
AWS Cloud Practitioner For Beginners
By Saurav Saini | 24 May 2022 | (0 Reviews)
Suggest Improvement on AWS Cloud Practitioner — Click here
🌩️ AWS Certified – Associate: Beginner’s Guid
1.1 Introduction – What is AWS?
AWS (Amazon Web Services) is Amazon’s powerful cloud computing platform that allows individuals and businesses to access IT resources — like servers, storage, databases, and software — over the internet instead of owning them physically.
Think of AWS as renting computers and tools from Amazon instead of buying them. You get exactly what you need, use it for as long as you want, and pay only for what you use — just like paying an electricity or mobile bill.
☁️ Physical Server vs Virtual Server
Before we go into the setup, here’s a comparison between AWS physical and virtual servers:
| Concept | Physical Server | Virtual Server |
|---|---|---|
| In AWS | You can’t directly “create” physical servers — AWS manages them in its data centers. But you can rent dedicated physical servers using Dedicated Hosts or Bare Metal Instances. | Virtual servers are standard AWS EC2 instances, created on top of AWS-managed physical hardware using virtualization. |
| Control Level | Full control over hardware (bare metal access). | Virtualized — limited to your instance’s resources. |
| Hardware Access | Direct access to CPU, RAM, Disk (no virtualization layer). | Indirect access — runs through AWS hypervisor (virtualization). |
| Use Case | Compliance, licensing, hardware-level apps (e.g., VMware, antivirus kernel modules). | General workloads, web apps, databases, testing, scaling. |
⚙️ Key Benefits of AWS
- 💰 Pay only for what you use (like utility billing)
- 📈 Automatically scale resources up or down
- 🛡️ High security and reliability
- 🌍 Global availability — access from anywhere
🚀 Why AWS is So Popular
- 💰 Pay-as-you-go: No upfront cost — only pay for what you use.
- ⚡ Scalable: Easily scale resources up or down based on demand.
- 🛡️ Secure: Backed by top-level encryption, compliance, and data protection.
- 🌍 Global Reach: AWS has data centers around the world — access services from anywhere.
🎓 Why Learn AWS Associate?
Becoming an AWS Certified Associate is a great step to start your cloud career. Here’s why:
- 📈 High Demand: Cloud professionals are in huge demand globally.
- 💼 Career Growth: Opens paths to roles like Cloud Architect, Cloud Engineer, and DevOps Specialist.
- 🎯 Strong Foundation: Builds the base for advanced AWS certifications like Professional or Security Specializations.
- 🧠 Hands-on Skills: Learn real AWS tools like EC2, S3, RDS, and Lambda.
- 💰 Cost Optimization (Reserved Instances): Understand how Reserved Instances help reduce AWS compute costs by up to 72% for long-term, predictable workloads.
Main Core Services in AWS (Quick Overview)
AWS has 4 core pillars — everything in AWS is built around these, plus additional categories for Security, Monitoring, and DevOps.
- 🧩 Compute (Power / Processing): Runs your applications, servers, and functions (EC2, Lambda).
- 🗄️ Storage (Memory / Disk Space): Stores data, files, and backups (S3, EBS, Glacier).
- 🌐 Networking & Content Delivery: Connects resources securely and delivers content globally (VPC, CloudFront, Route 53).
- 🧮 Database Services: Manages structured and unstructured data (RDS, DynamoDB, Aurora).
- 🔒 Security & Identity: Controls access and protects your environment (IAM, KMS, WAF, Shield).
- ⚙️ Management & Monitoring: Tracks, audits, and optimizes your AWS usage (CloudWatch, CloudTrail).
- 💻 Developer / DevOps Tools: Automates code building, testing, and deployment (CodePipeline, CodeDeploy).
1.2 What is Cloud Computing?
Cloud computing means using the internet to access IT resources — like servers, storage, databases, and software — without owning them physically.
You just rent what you need from a cloud provider (like AWS, Azure, or Google Cloud) and pay only for what you use.
OR
Cloud computing is the on-demand delivery of IT resources such as servers, storage, databases, networking, analytics, and applications over the internet (“the cloud”) with pay-as-you-go pricing.
Instead of buying, owning, and maintaining physical data centers and servers, you can access technology services like computing power, storage, or databases on-demand from a cloud provider (e.g., AWS, Azure, GCP).
👉 Characteristics of Cloud Computing (NIST 5 Principles – Exam Favorite):
- On-Demand Self Service – Provision resources instantly without requiring human intervention.
- Broad Network Access – Access resources from anywhere using laptops, smartphones, or APIs.
- Resource Pooling – Multiple customers share the same infrastructure securely and efficiently.
- Rapid Elasticity – Scale computing resources up or down automatically as needed.
- Measured Service – Pay only for what you use with metered billing and usage tracking.
Main Types of Cloud Service Models:
- IaaS (Infrastructure as a Service):
- AWS provides raw infrastructure like servers, storage, and networking.
- You manage the OS, apps, and data.
- Examples: EC2, EBS, VPC.
- Analogy: Renting an unfurnished house — you set it up as you like.
- PaaS (Platform as a Service):
- AWS provides infrastructure + platform (runtime, databases, OS).
- You focus on apps without worrying about servers.
- Examples: Elastic Beanstalk, RDS, AWS Fargate.
- Analogy: Renting a furnished apartment — you just move in.
- SaaS (Software as a Service):
- Ready-to-use software over the internet.
- You only use the app — no server or platform management.
- Examples: AWS Chime, AWS WorkMail, Google Workspace, Salesforce.
- Analogy: Staying in a hotel — everything is provided for you.
1.3 AWS Global Infrastructure (Regions, Availability Zones, and Edge Locations)
AWS has built a massive global network of data centers around the world so that cloud services are fast, reliable, and secure — no matter where users are. This global network is divided into three main components:
-
🗺️ 1. AWS Regions
🔹 Definition: A Region is a geographical area that contains multiple, isolated Availability Zones (AZs). Each Region operates independently for security and fault tolerance.
🔹 Key Points:
- Each Region is located in a distinct part of the world (e.g.,
us-east-1in Virginia,ap-south-1in Mumbai). - Regions are physically separated for disaster recovery and high security.
- Each Region consists of multiple data centers grouped into Availability Zones.
Region Name Code Location US East (N. Virginia) us-east-1USA Asia Pacific (Mumbai) ap-south-1India Europe (Frankfurt) eu-central-1Germany 🔹 Use Case: Choose a Region closest to your users to reduce latency and comply with local data residency laws (e.g., store Indian data in India).
- Each Region is located in a distinct part of the world (e.g.,
-
🏢 2. Availability Zones (AZs)
🔹 Definition: An Availability Zone is one or more data centers within a Region, each with its own power, cooling, and networking — built for high availability.
🔹 Key Points:
- Each Region typically has 2 to 6 AZs.
- AZs are connected through high-speed, low-latency fiber networks.
- Deploying apps across multiple AZs ensures fault tolerance and uptime.
🔹 Example (Mumbai Region -
ap-south-1):ap-south-1aap-south-1bap-south-1c
💡 If one AZ fails due to outage or disaster, your applications in other AZs keep running — ensuring high availability.
-
📡 3. Edge Locations
🔹 Definition: Edge Locations are global data centers that cache and deliver content closer to end users — part of AWS CloudFront, Route 53, and Global Accelerator.
🔹 Key Points:
- Used for Content Delivery Network (CDN) services to deliver data, videos, or APIs faster.
- Hundreds of Edge Locations exist across major global cities.
- Reduces latency by serving cached content from the nearest location to users.
🔹 Example: If your website is hosted in
us-east-1but accessed from Delhi, CloudFront delivers content via an Edge Location in Mumbai or Chennai for faster load times.⚡ Edge Locations = Global performance boosters for AWS customers.
1.4 Types of Cloud Deployment Models
- Public Cloud: Shared infrastructure (AWS, Azure, GCP).
- Private Cloud: Dedicated to one organization (on-premises or hosted).
- Hybrid Cloud: Combination of public and private (used by banks, governments).
- Multi-Cloud: Using multiple providers (AWS + Azure + GCP).
1.5 Types of Cloud Service Models (IaaS, PaaS, SaaS, FaaS, CaaS)
Cloud computing services are categorized based on the level of control and management provided to users.
-
A. Infrastructure as a Service (IaaS)
- Provides raw infrastructure: virtual servers, networking, storage, firewalls, and load balancers.
- User controls OS, applications, middleware, runtime, and data.
- Cloud provider manages physical hardware + virtualization layer.
👉 AWS Examples: EC2, EBS, VPC, Elastic Load Balancer.
✅ Advantages: Maximum control, flexibility, and pay-per-use.
⚠️ Disadvantages: Requires technical expertise, manual patching, and security setup.
🏠 Analogy: Renting an unfurnished house — you set it up as you like.
-
B. Platform as a Service (PaaS)
- Provides infrastructure + managed runtime environment.
- Developers focus only on building and running apps — no server or OS management.
- Cloud provider handles scaling, patching, and database management.
👉 AWS Examples: Elastic Beanstalk, RDS, Fargate.
✅ Advantages: Faster development, auto-scaling, automated backups.
⚠️ Disadvantages: Less control, limited customization, and vendor lock-in risk.
🏢 Analogy: Renting a furnished apartment — everything is set up for you.
-
C. Software as a Service (SaaS)
- Fully managed applications delivered over the internet.
- Users don’t manage infrastructure, OS, or platform — just use the app.
- Access via browser or mobile app from anywhere.
👉 AWS Examples: AWS Chime, AWS WorkMail, Amazon Connect, Salesforce.
✅ Advantages: No setup, no maintenance, easy access.
⚠️ Disadvantages: Least control, vendor lock-in, limited customization.
🏨 Analogy: Staying in a hotel — everything is included; you just use the service.
-
D. Function as a Service (FaaS)
- Serverless computing model — upload functions, and AWS runs them automatically when triggered.
- No server management or scaling concerns — runs on demand.
- Pay only when your code executes (cost-efficient).
👉 AWS Examples: AWS Lambda, Step Functions, EventBridge.
✅ Advantages: No servers to manage, automatic scaling, pay-per-execution.
⚠️ Disadvantages: Limited runtime, cold start delays, debugging complexity.
🍔 Analogy: Ordering food delivery — you don’t own a kitchen; you only pay when you order.
-
E. Container as a Service (CaaS)
- Provides a managed platform for running and orchestrating containers.
- Containers bundle apps with dependencies for consistent deployment.
- Cloud provider manages orchestration, scaling, and networking (Kubernetes or Docker).
👉 AWS Examples: Amazon ECS, Amazon EKS, AWS Fargate.
✅ Advantages: Consistent deployments, easier scaling, app isolation.
⚠️ Disadvantages: Requires container knowledge, complex networking, higher costs at scale.
🏙️ Analogy: Renting portable mini-apartments inside a building — isolated yet share base resources.
1.6 AWS Shared Responsibility Model
The AWS Shared Responsibility Model defines how security and compliance tasks are divided between AWS (the cloud provider) and you (the customer).
In simple terms — AWS secures the cloud, while you secure what’s inside the cloud.
⚙️ 1. AWS is Responsible for: “Security of the Cloud”
AWS manages and protects the infrastructure that runs all AWS services.
- 🏢 Physical Security: Protecting data centers, hardware, and facilities.
- 🌐 Network Infrastructure: Routers, switches, firewalls, and connectivity.
- 🧩 Virtualization Layer: Hypervisors and isolation of compute resources.
- 🖥️ Hardware Maintenance: Servers, storage, and networking devices.
- ☁️ Managed Services Security: Security of services like S3, RDS, DynamoDB, etc.
🧍♂️ 2. Customer is Responsible for: “Security in the Cloud”
You control how AWS services are used — so you must secure your data, configurations, and access.
- 🔐 Access Management: Set up IAM users, roles, policies, and MFA.
- 🧾 Data Protection: Encrypt data (in transit & at rest).
- 🛡️ Network Security: Configure firewalls, VPC security groups, and ACLs.
- ⚙️ Operating Systems: Patch, update, and secure EC2 instances.
- 💻 Application Security: Secure your app code, APIs, and configurations.
- 📜 Compliance Settings: Follow privacy regulations like GDPR or HIPAA.
⚖️ 3. Shared Responsibility by Service Type
| Service Type | AWS Responsibility | Customer Responsibility |
|---|---|---|
| IaaS (EC2, EBS, S3) | Physical + Virtual Infrastructure | OS patches, firewall, data encryption |
| PaaS (RDS, Elastic Beanstalk) | Platform + DB Engine Security | Application code, DB access management |
| SaaS (Amazon WorkMail, AWS Managed Services) | Full app + infrastructure | Data access, user permissions |
🧠 4. Real-World Example
Suppose you host a website using EC2 and S3:
- AWS ensures data center security, hardware reliability, and network stability.
- You must patch your OS, secure ports, and configure S3 buckets properly.
📊 5. Summary of Responsibilities
| Responsibility Area | AWS | Customer |
|---|---|---|
| Physical Hardware | ✅ | ❌ |
| Global Network | ✅ | ❌ |
| Virtualization Layer | ✅ | ❌ |
| Operating System | ❌ | ✅ |
| Applications | ❌ | ✅ |
| Identity & Access (IAM) | ❌ | ✅ |
| Data Encryption | ❌ | ✅ |
1.7 Benefits of AWS
AWS provides many benefits to users and businesses, but the three most important ones are:
- ✅ Scalability
- ✅ Cost Efficiency
- ✅ Reliability
⚙️ 1. Scalability
What It Means: Scalability means AWS can automatically increase or decrease computing resources based on your application's demand.
- AWS uses EC2 and Auto Scaling Groups (ASG) to manage sudden traffic changes.
- You can add more servers (scale out) or increase power of existing ones (scale up).
- Prevents downtime during high demand.
💰 2. Cost Efficiency (Pay-As-You-Go)
What It Means: AWS follows a pay-as-you-go model — you pay only for the resources you actually use, not for idle capacity.
- No upfront hardware investment required.
- Automatic scaling saves cost during low traffic.
- Reserved Instances or Savings Plans reduce long-term expenses.
- Free Tier available for testing and learning.
🔒 3. Reliability
What It Means: Reliability ensures your applications and data remain available and protected — even if something fails in the system.
- Data is stored across multiple Availability Zones (AZs) and Regions.
- Most AWS services offer 99.99% uptime.
- Load balancing, replication, and auto-recovery prevent single points of failure.
- Built-in disaster recovery tools protect data automatically.
🧱 Summary Table
| Benefit | Meaning | AWS Features That Support It | Real-World Example |
|---|---|---|---|
| Scalability | Adjusts resources automatically based on demand | Auto Scaling, Elastic Load Balancing | Website scales automatically during festival sales |
| Cost Efficiency | Pay only for what you use | Pay-as-you-go, Savings Plans, EC2 On-Demand | Lower costs during low-traffic periods |
| Reliability | System remains available and fault-tolerant | Multi-AZ Deployment, S3 Replication | App stays online even during outages |
⚙️ Scalable: Grows automatically with your needs.
💰 Cost-Effective: Pay only for what you use.
🔒 Reliable: Works even when parts fail. 📘 Learn more at the official AWS Website.
1.8 AWS Services You Will Learn as a Beginner
Think of AWS like a toolbox — each service is a tool.
- Compute: EC2, Lambda
- Storage: S3, EBS, EFS
- Databases: RDS, DynamoDB
- Networking: VPC, Route 53, CloudFront
- Security: IAM, KMS, Secrets Manager
1.9 Core Concepts of AWS Architecture
- Regions & Availability Zones: Global data centers for redundancy
- High Availability: Keep services running even during failure
- Scalability: Automatically adjust resources (Auto Scaling)
- Cost Optimization: Pay for what you use; use reserved instances
- Security: Use least privilege and encryption best practices
1.10 What is AWS Certification?
AWS Certification proves your knowledge and skills in using AWS. It shows you can design, deploy, and manage applications in the AWS cloud.
Certification Levels:
- Foundational – Beginner
- Associate – Intermediate (focus of this guide)
- Professional – Advanced
- Specialty – Expert in a specific domain
1.11 AWS Associate Exam Basics
- Format: Multiple-choice & multiple-answer
- Time: 130 minutes
- Domains:
- Design Resilient Architectures
- Design High-Performing Architectures
- Design Secure Applications
- Design Cost-Optimized Architectures
- Tip: Use AWS Free Tier for hands-on practice
1.12 How to Start Learning AWS as a Beginner
- Sign up for AWS Free Tier
- Learn core services: EC2, S3, RDS, VPC, Lambda
- Understand cloud fundamentals: Regions, AZs, IAM
- Follow tutorials and deploy small projects
- Practice with mock exams
1.13 Simple Analogy
Think of AWS as a digital Lego set — each service is a Lego block. You can combine EC2, S3, Lambda, and VPC blocks to build anything from websites to enterprise systems. The AWS Associate exam tests your ability to connect these blocks securely and efficiently.
Module 02 : Amazon EC2 – Instances (Easy & Detailed Notes)
Amazon EC2 (Elastic Compute Cloud) is the core compute service of AWS that lets you launch virtual servers on demand. This module explains EC2 concepts in a very simple and beginner-friendly way — including instance types, AMIs, security groups, EBS storage, key pairs, networking, load balancing, auto scaling, and pricing options. By the end of this module, you will understand how to deploy, secure, monitor, and scale EC2 instances effectively for real-world applications.
1. Amazon EC2 – Instances (Easy & Detailed Notes)
EC2 (Elastic Compute Cloud) is a virtual server in the AWS cloud. It lets you run applications, host websites, and store data — all on Amazon’s infrastructure. Let’s break down what each word in “Elastic Compute Cloud” means in a simple way 👇
⚙️ 1. Elastic
Meaning: “Elastic” means flexible — it can automatically scale up or down depending on your needs.
In EC2: You can increase resources (scale up) when your app or website has high traffic. You can reduce resources (scale down) when demand drops — helping you save money.
🧠 Think of it like a rubber band — it stretches when you need more power and contracts when you don’t.
📘 Example: If your website suddenly gets 10,000 visitors in one hour, AWS automatically launches more EC2 instances. When the traffic goes down, those extra instances are stopped or terminated to reduce costs.
🖥️ 2. Compute
Meaning: “Compute” refers to the processing power — like CPU, RAM, and GPU — that runs your applications.
In EC2: You decide how much computing power you need (number of CPUs, amount of RAM, or GPU for graphics tasks). AWS then provides you a virtual machine that performs those tasks.
📘 Example: Running a web server, hosting a game server, or executing a data analysis script — all need compute resources. EC2 gives you that virtual computing power instantly.
☁️ 3. Cloud
Meaning: “Cloud” means on-demand access to IT resources (like servers, storage, and databases) through the internet — without owning physical hardware.
In AWS Cloud: You don’t buy servers; you rent them from Amazon’s data centers. You can access your resources anytime, anywhere using the internet. AWS handles all the maintenance — power, cooling, and hardware — while you just focus on using it.
📘 Example: Instead of buying a physical server for your app, you simply launch an EC2 instance from your AWS account. Then, you connect to it via SSH or a browser-based console and start using it right away.
✅ In Simple Words:
- Elastic → It grows or shrinks automatically as per your need.
- Compute → It’s the brainpower (CPU/RAM) that runs your programs.
- Cloud → You rent servers online instead of buying them physically.
So, Amazon EC2 simply means — a flexible (elastic) virtual computer (compute) that runs in Amazon’s cloud. It’s the foundation for almost everything you do in AWS.
🔹 Why EC2 Instances Are Important
| Feature | Description |
|---|---|
| 💻 Computing Power | Run apps, websites, and databases easily. |
| ⚙️ Scalability | Increase or decrease instances as needed. |
| 💰 Pay as You Go | Only pay for the time your instance is running. |
| 🌍 Global Availability | Launch instances in multiple AWS regions worldwide. |
🔹 Basic Components of an Instance
| Component | Description |
|---|---|
| AMI (Amazon Machine Image) | OS template — contains software/config (e.g., Amazon Linux, Ubuntu, Windows). |
| Instance Type | Defines CPU, RAM, and storage (e.g., t2.micro, m5.large). |
| Key Pair | Used for secure SSH (Linux) or RDP (Windows) login. |
| Security Group | Virtual firewall controlling inbound/outbound traffic. |
| Elastic IP | Static public IP address assignable to an instance. |
| EBS Volume | Block storage drive attached to store files permanently. |
🔹 Types of Instance Families (Based on Use Case)
| Family | Example | Best For |
|---|---|---|
| 🧮 General Purpose | t3, m6i | Balanced compute, memory, networking. |
| ⚡ Compute Optimized | c5, c6g | High CPU tasks (gaming, analytics). |
| 💾 Memory Optimized | r5, x1e | Databases and in-memory caching. |
| 🎥 Storage Optimized | i3, d2 | Big data, backups, and heavy I/O. |
| 💻 Accelerated Computing | p3, g5 | Machine learning and GPU rendering. |
🔹 Instance Lifecycle
- 🚀 Launch – Create a new instance from an AMI.
- 🟢 Running – Instance is active and billed per second/hour.
- ⏸️ Stop – Turned off, data in EBS volume remains safe.
- ❌ Terminate – Instance deleted, data lost unless backed up.
                                 +----------+        +----------+        +------------+
                                 |  Launch  | ---->  |  Running | ---->  |  Stopped   |
                                 +----------+        +----------+        +------------+
                                        \                                   |
                                         \--------------------------------->|
                                                    Terminate
🔍 Verifying Your EC2 Instance Configuration
After connecting to your EC2 instance using SSH, run the following commands to verify system configuration, hardware details, and network settings.
1️⃣ Check Operating System
Command:
cat /etc/os-releaseExample Output:
NAME="Ubuntu"
VERSION="22.04.3 LTS (Jammy Jellyfish)"
ID=ubuntu
VERSION_ID="22.04"
2️⃣ Check Memory (RAM)
Command:
free -mExample Output:
              total    used    free
Mem:          1024     150      874
Swap:            0       0        0
3️⃣ Check CPU Information
Command:
lscpuExample Output:
Architecture:        x86_64
CPU(s):              1
Model name:          Intel(R) Xeon(R)
CPU MHz:             2300.000
4️⃣ Check Network Configuration
Command:
ip aExample Output:
eth0: inet 172.31.45.12/20
lo:   inet 127.0.0.1/8
🔧 Additional Verification Commands
5️⃣ Check Disk Usage
df -h
Filesystem      Size  Used Avail Use% Mounted on
/dev/root        8G   1.2G    7G   15% /
6️⃣ Check Hostname
hostname7️⃣ Check System Uptime
uptime -p8️⃣ Check Running Services
systemctl list-units --type=service --state=running9️⃣ Check Open Ports
ss -tulnp🔟 Check Firewall Status (Ubuntu)
sudo ufw status1️⃣1️⃣ Get EC2 Metadata (Instance Details)
curl http://169.254.169.254/latest/meta-data/1️⃣2️⃣ Verify Public IP
curl ifconfig.me🔹 Instance Pricing Models
| Model | Description |
|---|---|
| On-Demand | Pay only when the instance runs — flexible, no commitment. |
| Reserved | 1–3 year commitment; lower cost for long-term workloads. |
| Spot | Buy unused capacity at discount; can be interrupted anytime. |
| Dedicated Host | Physical server exclusively for your organization. |
🔹 Common Example – Hosting a Website
- Go to EC2 Dashboard → Launch Instance
- Choose AMI (e.g., Ubuntu)
- Select Instance Type (e.g.,
t2.micro– Free Tier) - Add Key Pair for SSH login
- Configure Security Group (allow
HTTP,HTTPS,SSH) - Launch instance → Connect using PuTTY or SSH
- Install Apache or Nginx → Website live 🌐
- Highly Scalable
- Flexible Configuration
- Secure (Key Pair + Security Group)
- Cost-Effective
- Easy to Automate (via AWS CLI or SDKs)
🧠 Simple Summary
| Term | Meaning |
|---|---|
| EC2 Instance | Virtual server in AWS |
| AMI | Pre-configured image to launch instance |
| Key Pair | For secure login |
| Security Group | Virtual firewall |
| Elastic IP | Permanent public IP address |
| EBS Volume | Attached storage |
1.2. How to Create an IAM User in AWS
IAM (Identity and Access Management) helps you securely manage access to AWS services.
🎯 Purpose
- ✅ Create users and groups
- ✅ Manage permissions to AWS resources
- ✅ Control who can access what
🪟 Step 1: Open the IAM Console
- Go to AWS Console → IAM.
- Click
Usersin the left menu → Create User.
🧍 Step 2: Add User Details
- User name: Example →
developer-shekhar - Access Type:
- ☁️ Programmatic Access: via CLI / API
- 🖥️ Console Access: via AWS web login
- Set password → choose “Require password reset on first login”
🔐 Step 3: Set Permissions
- Option 1: Attach existing policy (e.g.,
AdministratorAccess) - Option 2: Add user to group (recommended for multiple users)
- Option 3: Copy permissions from another user
- Option 4: Create custom policy (JSON)
🏷️ Step 4: Add Tags (Optional)
Tags help organize users — e.g., Project=Test, Department=IT.
🧾 Step 5: Review & Create
- Review details and click Create user.
- Save the Access Key ID and Secret Access Key (if programmatic access enabled).
🧪 Step 6: Test IAM User
- Log out of the root account.
- Sign in with IAM user credentials.
- Verify allowed services and permissions.
1.3. AWS EC2 Key Pair — Complete Explanation
A Key Pair in AWS is used for secure login to your EC2 instances — instead of passwords.
🔑 1. What is a Key Pair?
It’s a combination of:
- 🔓 Public Key → stored inside AWS
- 🔐 Private Key (.pem/.ppk) → downloaded and kept by you
📘 2. Why It’s Needed
- Used for SSH connection to Linux servers.
- Ensures secure, password-free login.
- Without the private key, you cannot access your instance.
⚠️ 3. Does Key Pair Depend on Availability Zone?
Many beginners think that a Key Pair is limited to an Availability Zone (AZ), but that is NOT correct.
🌍 Key Pair Scope → REGION Level
- A Key Pair belongs to one **AWS Region** (e.g., ap-south-1).
- It can be used in ALL Availability Zones inside that Region:
- • ap-south-1a
- • ap-south-1b
- • ap-south-1c
💚 So When Does a Key Pair “Not Work”?
Only in these cases:
- ❌ You selected a different Region (e.g., created key in ap-south-1 but instance in us-east-1)
- ❌ You lost or deleted the private key (.pem file)
- ❌ Wrong file permission on your PC (must be chmod 400)
- ❌ You entered the wrong username (e.g., ec2-user, ubuntu, centos)
🌍 4. Difference Between AWS Region & Availability Zone (Very Easy Explanation)
Before working with EC2, VPC, or Key Pairs, you must clearly understand the difference between an AWS Region and an Availability Zone (AZ). This confusion is common among beginners.
🟦 What is an AWS Region?
A Region is a geographical location like a country or large area. Example: Mumbai, Singapore, London, Virginia.
- 🌎 A region contains multiple Availability Zones.
- 🔐 Key Pairs, Snapshots, AMIs are created at the region level.
- 💡 Data never leaves a region unless you move it.
🟩 What is an Availability Zone (AZ)?
An Availability Zone is a separate datacenter inside a region. A region has 2 to 6 AZs.
- 🏢 AZs are physically separate datacenters.
- 🔌 Each AZ has its own power, network, cooling.
- 🛡️ Designed so if one AZ fails, others continue working.
• ap-south-1a
• ap-south-1b
• ap-south-1c
📊 Region vs Availability Zone (Quick Difference)
| Feature | AWS Region | Availability Zone (AZ) |
|---|---|---|
| Definition | Geographical area (country/continent) | Datacenter inside a region |
| Example | ap-south-1 (Mumbai) | ap-south-1a, ap-south-1b |
| Number | ~30+ regions | 2–6 AZs per region |
| Scope of Key Pair | Region-level | Not AZ-specific |
| Network Latency | High between different regions | Very low between AZs |
| Used For | Choosing where your data lives | High availability and failover |
🧠 Super Easy Analogy (School Example)
Think of an AWS Region as a school and Availability Zones as classrooms.
- 🏫 One school = Region
- 🏠 Multiple classrooms = AZs
- If one classroom has a problem, the school still works → high availability
🪟 5. Create a Key Pair (Console Method)
- Go to EC2 Dashboard → Key Pairs.
- Click Create Key Pair.
- Choose:
- Name: e.g., my-aws-key
- Type: RSA or ED25519
- Format: PEM (Linux/macOS) or PPK (Windows)
- Download the private key file — only once!
💻 6. Connect to EC2 Instance
- Find Public IP in EC2 dashboard.
- Use SSH command:
ssh -i "MyKeyPair.pem" ec2-user@ - For Ubuntu AMI:
ssh -i "MyKeyPair.pem" ubuntu@
🧠 7. Best Practices
- 🗝️ Keep it private — never share your
.pemfile. - 📂 Store backups safely (e.g., encrypted USB).
- 🔁 Use separate keys for Dev/Test/Prod.
- 🧼 Delete unused keys regularly.
📋 8. Common Commands (AWS CLI)
 aws ec2 describe-key-pairs
 aws ec2 delete-key-pair --key-name OldKey
 aws ec2 create-key-pair --key-name MyKeyPair --query 'KeyMaterial' --output text > MyKeyPair.pem
 chmod 400 MyKeyPair.pem
2.1a Amazon EBS – Elastic Block Store
Amazon EBS (Elastic Block Store) provides block-level storage for EC2 instances. Think of EBS as the hard disk of your virtual machine. It stores OS files, application data, logs, databases, and more.
🔹 Key Features of EBS
- 🔒 Durable – 99.999% availability
- ⚡ High Performance – suitable for databases & applications
- ♻ Scalable – increase storage anytime
- 📸 Supports Snapshots for backups
- 🔁 Attach/Detach volumes between instances
- 🚀 Integrated with Auto Scaling & EC2
🔹 EBS vs Instance Store
| Feature | EBS | Instance Store |
|---|---|---|
| Persistence | Persistent (survives stop/start) | Temporary (deleted on stop/terminate) |
| Use Case | OS, apps, DB | Cache, temporary data |
| Backup | Snapshots supported | No backup support |
2.1b How to Create an EBS Volume (Step-by-Step)
An EBS volume can be created from the AWS Management Console or using the AWS CLI. Follow the steps below to create and attach a new EBS volume to your EC2 instance.
🖥️ 1️⃣ Create an EBS Volume from AWS Console
- Go to AWS Console → EC2 Dashboard
- In the left menu, click Elastic Block Store → Volumes
- Click Create Volume
- Choose Volume Type:
- gp3 (General Purpose SSD) — Default
- io2 — High-performance databases
- st1 — Big data, streaming
- sc1 — Cold/infrequent access
- Enter Size (Example: 8 GiB)
- Select Availability Zone ⚠ Must match your EC2 instance AZ
- Choose Encryption (optional)
- Click Create Volume
📎 2️⃣ Attach the Volume to an EC2 Instance
- After creating the volume → Select it
- Click Actions → Attach Volume
- Select your EC2 instance
- Choose a device name (Example:
/dev/sdf) - Click Attach
💽 3️⃣ Format & Mount the Volume (Inside EC2)
SSH into your EC2 instance and run:
👉 Check if the new disk is detected:
lsblk👉 Format the disk:
sudo mkfs -t xfs /dev/sdf👉 Create a mount directory:
sudo mkdir /data👉 Mount the volume:
sudo mount /dev/sdf /data👉 Verify:
df -h/etc/fstab for persistence.
💻 4️⃣ Create an EBS Volume Using AWS CLI
aws ec2 create-volume \
--availability-zone ap-south-1a \
--size 10 \
--volume-type gp3
📎 Attach the Volume (CLI)
aws ec2 attach-volume \
--volume-id vol-1234567890 \
--instance-id i-0123456789 \
--device /dev/sdf
🪟 How to Create & Use an EBS Volume on Windows EC2
Windows EC2 instances handle new EBS volumes differently from Linux. Once the volume is created and attached, you must initialize the disk, create partitions, format it (NTFS/ReFS), and assign a drive letter using **Disk Management**, **DiskPart**, or **PowerShell**.
🖥️ 1️⃣ Create a New EBS Volume via AWS Console
This step is identical for Windows and Linux:
- Open AWS Console → EC2 Dashboard
- Go to Elastic Block Store → Volumes
- Click Create Volume
- Select Volume Type:
- gp3 — Best for general Windows workloads
- io2 — High IOPS for SQL Server / Exchange
- st1/sc1 — Not recommended for Windows OS drives
- Enter Size (Example: 20 GiB)
- Select the same Availability Zone as your instance
- Optional: Enable Encryption (KMS)
- Click Create Volume
📎 2️⃣ Attach the Volume to Your Windows EC2 Instance
- Select the newly created volume
- Click Actions → Attach Volume
- Select your Windows EC2 instance
- Device name usually appears as
/dev/sdf(AWS name) - Click Attach
💽 3️⃣ Initialize, Format & Assign Drive Letter (Windows OS)
Now log in to Windows EC2 using RDP, then follow the steps below.
🧭 Method 1: Using Disk Management (GUI)
- Press Windows + R, type:
diskmgmt.msc - Find the disk labeled Unknown / Not Initialized
- Right-click → Initialize Disk
- Select partition style:
- GPT — Recommended for modern Windows versions
- MBR — Only for legacy systems
- Right-click on Unallocated Space → New Simple Volume
- Choose a drive letter (Ex:
E:) - Select filesystem:
- NTFS — Best for general use
- ReFS — For Windows Server Storage Spaces
- Click Finish
💻 Method 2: Using DiskPart (Command Line)
Run the following commands in an elevated Command Prompt:
diskpart
list disk
select disk 1
attributes disk clear readonly
online disk
convert gpt
create partition primary
format fs=ntfs quick
assign letter=E
exit
list disk to verify.
⚡ Method 3: Using PowerShell (Recommended for automation)
Get-Disk | Where-Object PartitionStyle -Eq "RAW" | Initialize-Disk -PartitionStyle GPT
New-Partition -DiskNumber 1 -UseMaximumSize -AssignDriveLetter |
Format-Volume -FileSystem NTFS -NewFileSystemLabel "DataDisk"
🚀 5️⃣ EBS Best Practices for Windows
- Always enable CloudWatch Disk Metrics for monitoring
- Use gp3/io2 for Windows Server workloads
- Never use st1/sc1 for Windows boot volumes
- Enable Volume Shadow Copy (VSS) for backups
- Use Disk Defragmenter weekly for NTFS volumes
- Avoid ReFS unless required
- Always create AMI backups before resizing volumes
🛠️ 6️⃣ Troubleshooting (Windows)
- Disk not visible?
→ Run:
Get-Diskin PowerShell - Disk shows “Offline (Policy)”?
→ Run:
Set-Disk -Number 1 -IsOffline $false - GPT/MBR warning? → Use GPT for modern Windows Server
- Cannot assign drive letter? → Check if letter already in use
2.1c EBS Volume Types (Use Cases & Comparison)
AWS provides multiple EBS volume types optimized for performance, cost, and workload requirements.
🔹 SSD-Based Volumes (High Performance)
| Type | Description | Best For |
|---|---|---|
| gp3 (General Purpose SSD) | Offers balanced price/performance | Boot volumes, general workloads |
| io2 / io2 Block Express | Highest IOPS SSD volume | Databases, mission-critical apps |
🔹 HDD-Based Volumes (Cost-Optimized)
| Type | Description | Best For |
|---|---|---|
| st1 (Throughput Optimized HDD) | High throughput for large data reads/writes | Big data, analytics, log processing |
| sc1 (Cold HDD) | Lowest cost HDD volumes | Infrequently accessed data |
2.1d EBS Snapshots (Backup & Restore)
A Snapshot is a backup of your EBS volume stored in Amazon S3. Snapshots allow you to restore data, create new volumes, or copy backups across regions.
🔹 Snapshot Features
- 📦 Back up EBS volumes anytime
- 🚀 Restore a snapshot into an EBS volume
- 🌍 Copy snapshots across regions (DR setup)
- ⚡ Fast Snapshot Restore (FSR) for instant availability
- 🔁 Automate using Lifecycle Manager
🔹 Common Snapshot Commands
aws ec2 create-snapshot --volume-id vol-12345 --description "Backup-1"
aws ec2 describe-snapshots --owner self
aws ec2 delete-snapshot --snapshot-id snap-12345
2.1e EBS Lifecycle Manager (DLM) – Automated Backups
AWS Data Lifecycle Manager (DLM) automatically creates, retains, and deletes EBS snapshots based on policies you define.
🔹 What You Can Automate with DLM
- 📆 Daily / Weekly snapshot creation
- 🗂 Retention policy (keep for N days)
- 🔁 Deletion of old snapshots
- 🌍 Cross-Region copy
- 🚀 Automate FSR-enabled snapshots
🔹 Example Use Case
- Create snapshot every 24 hours
- Retain 7 snapshots
- Tag snapshots for tracking
🔹 CLI Example – Create DLM Policy
aws dlm create-lifecycle-policy \
--execution-role-arn arn:aws:iam::123456789012:role/service-role/AWSDataLifecycleManagerDefaultRole \
--description "Daily backups" \
--state ENABLED \
--policy-details file://policy.json
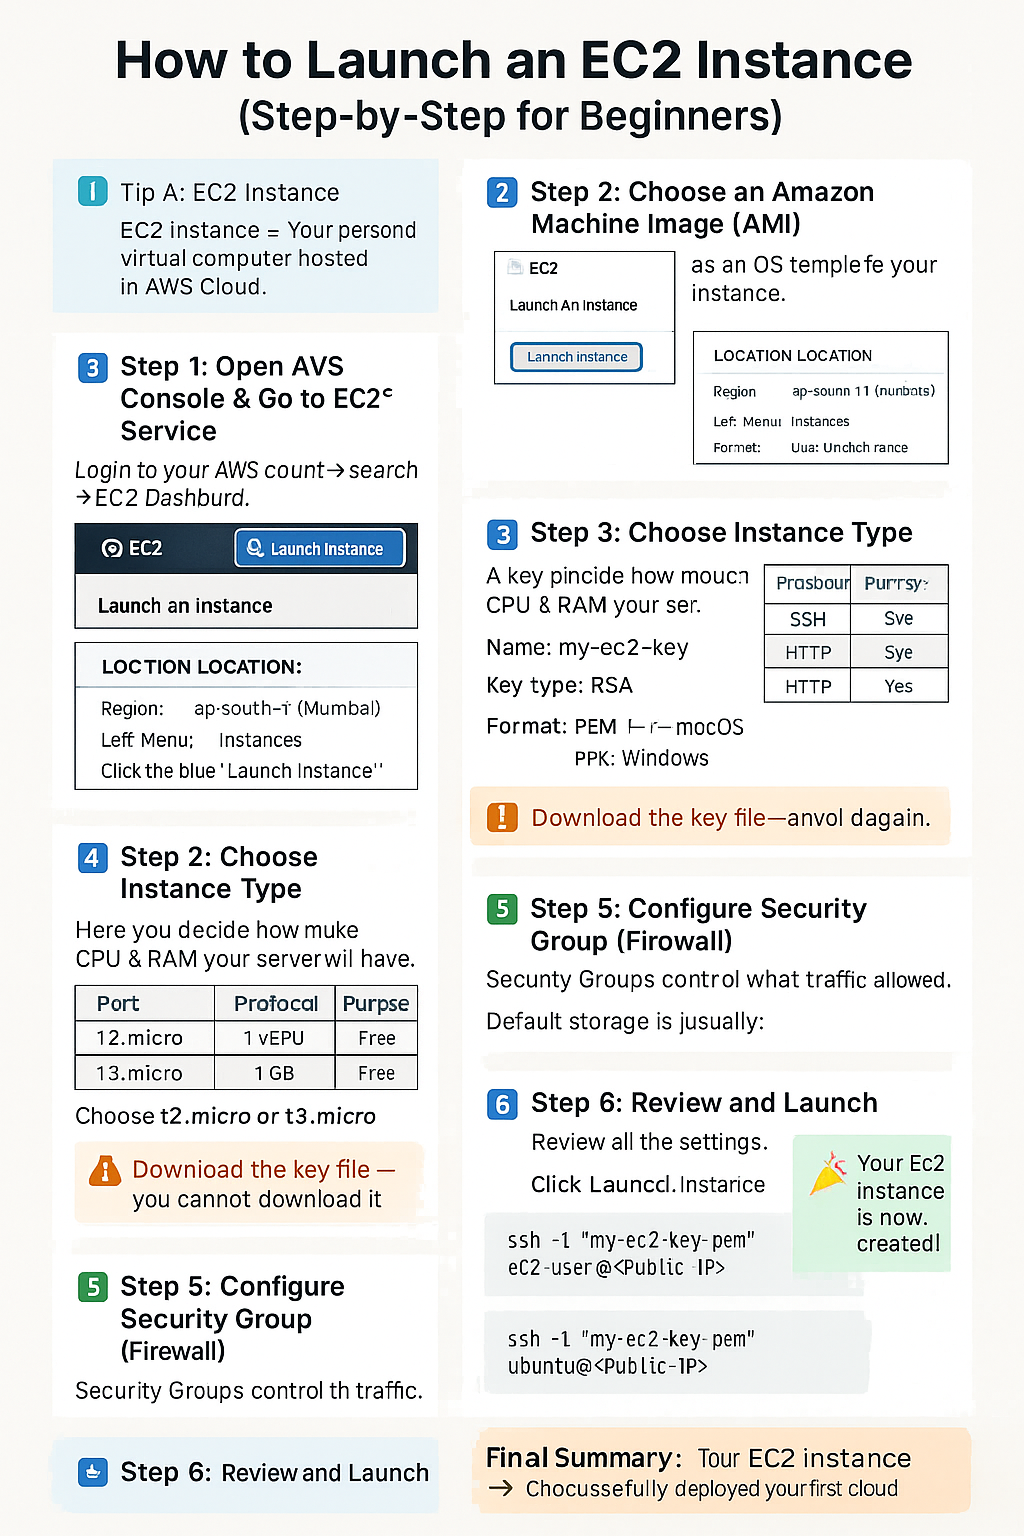
2.2 How to Launch an EC2 Instance (Step-by-Step for Beginners)
Let’s walk through how to actually launch and connect to an EC2 instance in AWS — from start to finish. This guide uses the AWS Management Console, perfect for beginners 🎓.
- An AWS Account
- A verified email and payment method
- IAM User with
EC2FullAccess permissions
🪟 Step 1: Open the EC2 Console
- Login to AWS Console.
- Search for EC2 in the search bar.
- Click EC2 → You’ll reach the EC2 Dashboard.
https://console.aws.amazon.com/ec2/
🖥️ Step 2: Click “Launch Instance”
This starts the setup wizard to create your virtual server.
⚙️ Step 3: Configure Instance Basics
- 🧩 Name: Enter something like
my-first-ec2 - 🪟 Application/OS Image (AMI): Choose
Amazon Linux 2023orUbuntu 22.04 - 💻 Instance Type: Select
t2.micro(Free Tier eligible) - 🔑 Key Pair: Create or select existing key (used for SSH login)
- 🔒 Network Settings: Allow:
- SSH (port 22) → for remote access
- HTTP (port 80) → for website
- HTTPS (port 443) → for secure site
- 💾 Storage: Default 8 GB is fine for practice
🚀 Step 4: Launch the Instance
- Review all configurations.
- Click Launch Instance.
- Wait a few seconds until the instance state = Running.
🌐 Step 5: Connect to Your Instance
- Select your instance → Click Connect.
- Choose “SSH client” tab.
- Follow the SSH command example shown.
💻 Example for Linux/Mac Terminal:
ssh -i "my-key.pem" ec2-user@
💻 Example for Windows (PuTTY):
- Convert
.pem→.ppkusing PuTTYgen. - Open PuTTY → Host Name:
ec2-user@ - Go to Connection → SSH → Auth → Browse and select your
.ppkfile. - Click “Open” → You’re connected!
📦 Step 6: Install a Web Server (Optional)
Once logged in, you can install Nginx or Apache to host a site.
# For Amazon Linux / RHEL
sudo yum update -y
sudo yum install httpd -y
sudo systemctl start httpd
sudo systemctl enable httpd
echo "Hello from EC2!" | sudo tee /var/www/html/index.html

# For Ubuntu
sudo apt update
sudo apt install apache2 -y
sudo systemctl start apache2
sudo systemctl enable apache2
🛑 Step 7: Stop or Terminate When Done
- Go to EC2 Dashboard → Instances
- Select the instance → Actions → Instance State
- Choose:
- Stop → Pauses instance (no billing for compute)
- Terminate → Deletes instance and data permanently
🧠 Step 8: Understand the Behind-the-Scenes
- 💽 AMI — base OS template.
- 🔢 Instance Type — defines hardware (CPU/RAM).
- 🔒 Security Group — defines network access.
- 🗝️ Key Pair — secure login credentials.
- 📊 Elastic IP — permanent IP (optional).
- 📁 EBS Volume — persistent storage.
✅ Quick Summary Table
| Step | Action | Purpose |
|---|---|---|
| 1 | Open EC2 Console | Access EC2 service |
| 2 | Launch Instance | Start instance creation wizard |
| 3 | Choose AMI & Type | Select OS & hardware |
| 4 | Set Key Pair & Security | Ensure secure access |
| 5 | Launch & Connect | Boot up and SSH in |
| 6 | Install Web Server | Host an app or website |
| 7 | Stop/Terminate | Manage billing & lifecycle |
2.3 EC2 User Data – Bootstrap Script (Amazon Linux & Ubuntu)
When launching an EC2 instance, you can use User Data to automatically configure the server during the first boot. This is perfect for installing software, enabling services, creating files, or deploying a basic website.
🟦 Amazon Linux 2 – Bootstrap Script
Paste this script into the EC2 "User Data" box when launching a new Amazon Linux instance.
#!/bin/bash
sudo su
yum install httpd -y
systemctl start httpd
systemctl enable httpd
cd /var/www/html
echo "This is my Bootstrapp Server" > index.html
- Installs Apache (httpd)
- Starts and enables the service
- Creates a simple homepage at
/var/www/html/index.html
🟩 Ubuntu Server – Bootstrap Script
Use this script when launching an Ubuntu EC2 instance.
#!/bin/bash
sudo su
apt update -y
apt install apache2 -y
systemctl start apache2
systemctl enable apache2
cd /var/www/html
echo "Welcome to Arena Bootstrap Server" > index.html
- Installs Apache2 (Ubuntu version)
- Starts and enables Apache service
- Adds a custom homepage
💡 Tips for Using User Data
- Use
#!/bin/bashalways at the top - Ensure the instance security group allows port 80
- For Amazon Linux 2023, use dnf install instead of yum
- User Data executes only on FIRST BOOT unless configured otherwise
2.4 What are EC2 Pricing Models?
When you use Amazon EC2 (Elastic Compute Cloud), you are basically renting virtual servers (instances) on AWS to run your applications, websites, or systems. But — you can choose how to pay for that computing power.
- ⏱️ How long you want to use the instance
- 📊 How predictable your workload is
- 💰 How much you want to save
There are mainly three traditional pricing models:
- 👉 On-Demand
- 👉 Reserved Instances
- 👉 Spot Instances
And one modern option called Savings Plan.
🟢 1. On-Demand Instances
🔧 Use Cases:
- Testing or learning projects
- Short-term applications
- Unpredictable workloads
- Development and staging environments
Suppose you start an EC2 instance for 5 hours → You’ll pay only for 5 hours of compute time.
Stop or terminate → billing stops.
It’s like using a taxi — you pay only for the ride.
✅ Advantages:
- No commitment or contract
- Start and stop anytime
- Very flexible and simple
- Great for beginners or testing
⚠️ Disadvantages:
- Highest hourly cost
- Not cost-effective for 24/7 usage
💰 When to Choose: For new users, experiments, or unpredictable workloads.
🟠 2. Reserved Instances (RI)
- All Upfront – Maximum discount
- Partial Upfront – Balanced cost
- No Upfront – Monthly payment, lowest discount
🔧 Use Cases:
- Long-running production servers
- Databases and backend systems
- Predictable workloads (websites, enterprise apps)
A company runs its website 24/7 → buys a 3-year RI → saves up to 70%.It’s like buying a car instead of renting daily.
✅ Advantages:
- Huge long-term savings
- Guaranteed capacity
- Flexible or Standard options
⚠️ Disadvantages:
- Lock-in for 1–3 years
- Limited flexibility in instance type or region
💰 When to Choose: For predictable workloads or long-term production apps.
🔵 3. Spot Instances
🔧 Use Cases:
- Batch or background processing
- Machine Learning training
- Data analytics
- Testing and development (non-critical)
Training an AI model using Spot Instances — 90% cheaper. If AWS reclaims capacity, the instance stops automatically.It’s like standby flight — cheap but uncertain.
✅ Advantages:
- Lowest cost (up to 90% savings)
- Ideal for flexible workloads
⚠️ Disadvantages:
- Can be interrupted anytime
- Not for production workloads
💰 When to Choose: For temporary or interruptible workloads needing cost efficiency.
⚙️ (Bonus) AWS Savings Plans
A modern, flexible pricing model offering RI-like discounts but with more freedom. You commit to a spend amount per hour ($/hr) for 1 or 3 years, and AWS applies discounts automatically across eligible services (EC2, Lambda, Fargate).
🧠 Summary Table
| Feature | On-Demand | Reserved Instance | Spot Instance |
|---|---|---|---|
| Payment Type | Pay per use | 1- or 3-year commitment | Bid-based (spare capacity) |
| Discount | None | Up to 75% | Up to 90% |
| Flexibility | Very High | Medium | Low |
| Reliability | 100% | 100% | May terminate anytime |
| Best For | Testing, short-term apps | Long-term stable apps | Cheap, flexible batch jobs |
| Billing Stops When Stopped? | ✅ Yes | ❌ No | ✅ Yes (but may stop anytime) |
🔍 Visual Diagram (Text-based)
                                 Cost Comparison ↓
                                 Spot (💸 Cheapest)
                                    ↓
                                 Reserved (💰 Affordable)
                                    ↓
                                 On-Demand (💵 Expensive)

                                 Commitment Level ↑
                                 On-Demand (None)
                                    ↑
                                 Spot (Flexible)
                                    ↑
                                 Reserved (Fixed)
| You Want... | Choose... |
|---|---|
| Full freedom and flexibility | 🟢 On-Demand |
| Long-term savings and stability | 🟠 Reserved Instance |
| Ultra-low cost for temporary use | 🔵 Spot Instance |
2.5 AWS Application Load Balancer (ALB)
An Application Load Balancer (ALB) is a Layer 7 (Application Layer) service that intelligently distributes HTTP and HTTPS traffic across multiple targets like EC2 instances, containers, IPs, or Lambda functions in multiple Availability Zones.
- ✅ Highly Available
- ⚙️ Scalable and Flexible
- 🔒 Secure (supports SSL/TLS and WAF)
- 🌐 Smart Routing (URL, Host, Header-based)
🔹 1. Types of AWS Load Balancers
| Type | Layer | Use Case |
|---|---|---|
| Application Load Balancer (ALB) | Layer 7 | HTTP/HTTPS routing (Web apps, APIs) |
| Network Load Balancer (NLB) | Layer 4 | TCP/UDP traffic (Gaming, Real-time apps) |
| Classic Load Balancer (CLB) | Layer 4 & 7 | Legacy workloads |
🏗️ 2. ALB Architecture Overview
                                               Internet
                                                    ↓
                                      ┌────────────┐
                                      │  ALB (DNS) │ ← Distributes requests
                                      └────────────┘
                                            ↓
                                  ┌──────────┴──────────┐
                                  │                      │
                                 EC2-1                EC2-2
                                 (Targets in Target Group)
Clients access via DNS (e.g. myapp-alb-123456.ap-south-1.elb.amazonaws.com).
ALB forwards traffic based on listener rules to the registered targets.
⚙️ 3. Key ALB Components
| Component | Description |
|---|---|
| Load Balancer | Entry point for all incoming traffic. |
| Listener | Protocol + Port (e.g., HTTP:80, HTTPS:443) listener. |
| Rules | Define how traffic is routed (Path, Host, Header). |
| Target Group | Group of registered targets receiving traffic. |
| Health Check | Regularly checks target status before routing traffic. |
🎯 4. Listener Rules (Routing Logic)
ALB inspects requests and routes traffic using listener rules:
| Rule Type | Example | Description |
|---|---|---|
| Host-based | api.example.com → API servers | Routes traffic by domain name |
| Path-based | /images/* → image servers | Routes by URL path |
| Header-based | User-Agent=Mobile | Routes by HTTP headers |
| Query-based | ?type=premium | Routes by query parameters |
🧩 5. Target Groups
Each Target Group defines target type, port, and health check configuration.
- Type: EC2, IP, Lambda, ECS Containers
- Port: Example → 80 or 8080
- Health Check Path: /health
- Healthy Threshold: 5
- Unhealthy Threshold: 2
🚀 6. Key ALB Features
- 🌐 Content-based Routing — by URL, host, or header.
- 🧭 Sticky Sessions — session affinity per target group.
- 🔐 SSL/TLS Termination — via AWS Certificate Manager (ACM).
- ⚡ HTTP/2 & WebSocket — modern and real-time support.
- 🧩 Integration with ECS, Lambda, WAF — for microservices and security.
- 📜 Access Logs — stored in S3 for auditing.
🪟 7. Steps to Create an Application Load Balancer
A. Using AWS Console
- Open EC2 Dashboard → “Load Balancers” → Create Load Balancer
- Select Application Load Balancer
- Set:
- Name:
my-alb-demo - Scheme: Internet-facing
- Listeners: HTTP (80) / HTTPS (443)
- AZs: At least 2
- Target Group: Type - Instances, Health Check - /
- Name:
- Review & Create
B. Using AWS CLI
aws elbv2 create-load-balancer \
--name my-alb-demo \
--subnets subnet-123456 subnet-789012 \
--security-groups sg-123456 \
--scheme internet-facing \
--type application \
--ip-address-type ipv4
🌍 8. Example: Path-Based Routing
| URL | Target Group | Backend Service |
|---|---|---|
| myapp.com/ | TG-Frontend | Web Frontend |
| myapp.com/api/* | TG-API | REST API |
| myapp.com/images/* | TG-Images | Image Service |
📊 9. Monitoring and Logging
| Feature | Purpose |
|---|---|
| CloudWatch Metrics | Monitor request count, latency, and target health |
| Access Logs (S3) | Store detailed request/response data |
| AWS X-Ray | Trace requests end-to-end |
| Health Checks | Identify and isolate failed instances |
🔒 10. Security and Compliance
- Use HTTPS listeners with SSL certificates (ACM)
- Integrate with AWS WAF to block attacks
- Restrict traffic via Security Groups / Network ACLs
- Enforce TLS 1.2 or higher
💼 11. Real-World Use Cases
| Use Case | Example |
|---|---|
| Web Applications | Distribute web server traffic |
| Microservices | Path-based routing to multiple backends |
| ECS Containers | Dynamic service discovery |
| API Gateway Alternative | Host REST APIs behind ALB |
| Hybrid Apps | Integrate EC2 + Lambda |
⚖️ 12. Advantages & Limitations
| Advantages | Limitations |
|---|---|
| Layer 7 intelligent routing | Higher cost than CLB |
| SSL offloading | No TCP/UDP direct support |
| Native container support | No static IP (use NLB for that) |
| Auto-scaling & fault tolerance | Complex for small apps |
🧠 13. ALB vs NLB vs CLB Comparison
| Feature | ALB | NLB | CLB |
|---|---|---|---|
| Layer | 7 | 4 | 4/7 |
| Protocol | HTTP/HTTPS | TCP/UDP | HTTP/HTTPS |
| SSL Termination | ✅ | ❌ | ✅ |
| Host/Path Routing | ✅ | ❌ | ❌ |
| WebSocket Support | ✅ | ✅ | ❌ |
| Health Checks | HTTP/HTTPS | TCP | HTTP/HTTPS |
| Use Case | Web apps, APIs | Low-latency apps | Legacy setups |
- ALB operates at Layer 7 (Application Layer).
- Supports path, host, and header-based routing.
- Integrates with ECS, Lambda, WAF, ACM.
- Offers SSL termination, auto-scaling, and health checks.
- Ideal for modern, microservice-based web applications.
3.2. What is a Network Load Balancer (NLB)?
A Network Load Balancer (NLB) operates at Layer 4 (Transport Layer) and efficiently distributes
incoming TCP, UDP, or TLS traffic across multiple targets (EC2, IPs, Containers, or On-prem servers).
It is built for high performance, ultra-low latency, and massive scalability — capable of handling
millions of requests per second.
🌩️ Why Use a Network Load Balancer?
- ⚡ High-performance – Handles sudden traffic spikes with ease.
- 🧩 Low-latency – Works at the connection (network) level.
- 🧱 Highly available – Spreads load across multiple Availability Zones.
- 🔐 Secure – Supports static IPs and TLS offloading.
- 🔁 Reliable – Automatically reroutes traffic to healthy targets.
✅ Best For: Real-time applications like gaming, IoT, VoIP, and financial trading systems.
🧱 Types of AWS Load Balancers
| Type | Layer | Protocol | Use Case |
|---|---|---|---|
| Application Load Balancer (ALB) | Layer 7 | HTTP/HTTPS | Web apps, APIs |
| Network Load Balancer (NLB) | Layer 4 | TCP/UDP/TLS | Real-time, low latency apps |
| Classic Load Balancer (CLB) | Layer 4 & 7 | HTTP/TCP | Legacy workloads |
🌐 NLB Architecture Overview
        Internet
            ↓
     ┌──────────────┐
     │ NLB (Static IP) │ ← Distributes TCP/UDP traffic
     └──────────────┘
            ↓
 ┌────────────┴────────────┐
 │                         │
EC2-1 (Target)       EC2-2 (Target)
- 1️⃣ Clients connect to NLB via DNS name or static IP.
- 2️⃣ NLB receives TCP/UDP/TLS traffic.
- 3️⃣ NLB forwards to healthy targets in target groups.
- 4️⃣ Targets respond directly back to clients.
🧩 Key Components of NLB
| Component | Description |
|---|---|
| Load Balancer | Main entry point for all incoming traffic. |
| Listener | Defines protocol & port (e.g., TCP:80, TLS:443, UDP:53). |
| Target Group | Collection of EC2s, IPs, or ECS containers. |
| Health Check | Monitors targets’ availability regularly. |
| Elastic IPs (EIPs) | Assigns static public IPs for consistent access. |
🎯 Listener and Target Groups
Listeners: Accept incoming traffic and forward to target groups.
Target Groups: Contain EC2 instances or IPs where traffic is sent.
| Listener | Target Group | Description |
|---|---|---|
| TCP:80 | TG-Web | Handles web traffic |
| UDP:53 | TG-DNS | DNS or gaming traffic |
| TLS:443 | TG-SecureApp | Encrypted HTTPS traffic |
❤️ Health Checks
NLB regularly checks target health before sending traffic.
Only healthy targets receive traffic.
🧠 NLB Features
- ⚙️ Layer 4 Load Balancing – routes traffic based on IP & port.
- 📡 Static IP Support – assign Elastic IPs per AZ.
- 🔐 TLS Termination – offloads encryption via ACM certificates.
- 🌍 Cross-Zone Balancing – evenly distributes across AZs.
- 👁️ Preserve Source IP – see real client IPs in logs.
- 🔗 Integrates with EC2, ECS, Global Accelerator, and CloudWatch.
- 🚀 Handles millions of requests per second.
🧰 Steps to Create an NLB (Console)
- Open EC2 Dashboard → Load Balancers → Create Load Balancer
- Select Network Load Balancer
- Set name, scheme (Internet-facing/Internal), and IP type (IPv4)
- Add listeners (TCP:80, TLS:443)
- Choose Availability Zones & assign Elastic IPs
- Create Target Group → Type: Instances/IP → Health check: TCP/HTTP
- Register targets (EC2s)
- Review & Create
💻 AWS CLI Example
aws elbv2 create-load-balancer \
--name my-nlb-demo \
--type network \
--subnets subnet-123456 subnet-789012 \
--scheme internet-facing \
--ip-address-type ipv4
📊 Real-World Use Cases
| Use Case | Protocol | Target | Description |
|---|---|---|---|
| Web Server Load Balancing | TCP:80 | EC2 | Distribute web requests |
| Database Cluster | TCP:3306 | RDS/MySQL | Balance DB replicas |
| Gaming/DNS Server | UDP:53 | EC2 | Handle real-time traffic |
| Secure App | TLS:443 | EC2 | Encrypted connections |
🔐 Security & Monitoring
- Use Security Groups for targets
- Enable TLS (port 443) for encryption
- Restrict inbound ports
- Integrate with CloudWatch, WAF, and IAM
⚖️ ALB vs NLB vs CLB
| Feature | ALB | NLB | CLB |
|---|---|---|---|
| Layer | 7 (Application) | 4 (Transport) | 4 & 7 |
| Protocol | HTTP/HTTPS | TCP/UDP/TLS | HTTP/HTTPS/TCP |
| Routing | URL/Host/Header | Port/IP-based | Basic |
| Performance | Moderate | Very High | Low |
| Static IP | ❌ | ✅ | ❌ |
| SSL Termination | ✅ | ✅ | ✅ |
| WebSocket Support | ✅ | ✅ | ❌ |
| Health Check | HTTP/HTTPS | TCP/HTTP | HTTP/HTTPS |
🧠 Summary
- NLB operates at Layer 4 for TCP, UDP, and TLS traffic.
- Supports static IPs and preserves source IPs.
- Provides ultra-high performance and low latency.
- Best suited for real-time, gaming, IoT, and financial systems.
2.6 AWS Auto Scaling Group (ASG)
1️⃣ What is an Auto Scaling Group (ASG)?
An Auto Scaling Group (ASG) is an AWS service that automatically manages the number of EC2 instances in your environment based on demand.
- Ensures the desired number of instances are always running.
- Automatically scales out when load increases and scales in when load decreases.
- Replaces unhealthy instances automatically.
💡 Think of ASG as your application’s self-healing and auto-growing system.
2️⃣ Why Use Auto Scaling Groups?
| Reason | Description |
|---|---|
| High Availability | Keeps your app running even if instances fail. |
| Scalability | Automatically adjusts capacity based on demand. |
| Fault Tolerance | Launches new instances in healthy AZs. |
| Cost Optimization | Removes unused instances when traffic is low. |
| Automation | No manual management required. |
3️⃣ Core Components of Auto Scaling
| Component | Description |
|---|---|
| Launch Template / Config | Defines instance settings (AMI, type, key, etc.). |
| Auto Scaling Group | Defines number and location of instances. |
| Scaling Policies | Decide when to scale in or out. |
| CloudWatch Alarms | Trigger scaling actions based on metrics. |
| Load Balancer | Distributes traffic across instances. |
4️⃣ How Auto Scaling Works (Overview)
+--------------------------------------+
| CloudWatch Alarm (Trigger)          |
+--------------------------------------+
                |
                v
+-----------------------------------+
| Scaling Policy (Condition)        |
+-----------------------------------+
                |
                v
+-----------------------------------+
| Auto Scaling Group (ASG)          |
| - Desired Capacity                |
| - Min / Max Size                  |
| - Launch Template                 |
+-----------------------------------+
                |
                v
+-----------------------------------+
| EC2 Instances (Running)           |
+-----------------------------------+
Example: If CPU > 80% for 5 minutes → ASG adds 2 EC2s.
If CPU < 20% for 10 minutes → ASG removes 1 instance.
5️⃣ Launch Template (Heart of ASG)
- AMI ID, Instance Type, Key Pair
- Security Groups, IAM Role, EBS Size, User Data
aws ec2 create-launch-template \
--launch-template-name my-launch-template \
--version-description "v1" \
--launch-template-data '{
 "ImageId":"ami-0abcdef1234567890",
 "InstanceType":"t2.micro",
 "KeyName":"my-key",
 "SecurityGroupIds":["sg-0abc1234"],
 "UserData":"IyEvYmluL2Jhc2gKc3VkbyB5dW0gaW5zdGFsbCBodHRwZCAteQ=="
 }'
6️⃣ Key Settings in ASG
| Setting | Description |
|---|---|
| Launch Template | Defines EC2 config. |
| VPC & Subnets | Specifies network placement. |
| Load Balancer | Optional, for traffic distribution. |
| Desired / Min / Max Size | Controls scaling limits. |
| Health Checks | EC2 or ELB-based instance health. |
7️⃣ Scaling Policies
| Type | Description | Example |
|---|---|---|
| Target Tracking | Keeps metric near target. | CPU 60% |
| Simple Scaling | Single threshold. | Add 1 if CPU > 80% |
| Step Scaling | Incremental scaling. | Add 1 if >70%, 2 if >90% |
| Scheduled | Time-based. | Add 3 at 9 AM daily |
8️⃣ CloudWatch Integration
- Metrics:
CPUUtilization,NetworkIn/Out,RequestCount - Triggers scaling actions via alarms
aws cloudwatch put-metric-alarm \
--alarm-name "HighCPU" \
--metric-name CPUUtilization \
--namespace AWS/EC2 \
--threshold 70 \
--comparison-operator GreaterThanThreshold \
--evaluation-periods 2
9️⃣ Instance Life Cycle
| State | Description |
|---|---|
| Pending | Launching |
| InService | Running |
| Terminating | Scaling in |
| Terminated | Removed |
| Standby | Paused but running |
🔟 Health Checks
- EC2 health – instance system checks
- ELB health – traffic response
- Custom health – user scripts/metrics
💡 Self-healing infrastructure: unhealthy instances auto-replaced.
💻 Step-by-Step: Creating ASG (Console)
- Create Launch Template (define AMI, type, SG, User Data)
- Create Auto Scaling Group (set min, max, desired, attach ALB)
- Test Scaling (stress test CPU to trigger scale out)
- Verify & Cleanup (delete ASG and template)
12️⃣ ASG + ALB Integration
Instances auto-register to Target Group and receive balanced traffic.
13️⃣ Monitoring & Logging
| Tool | Purpose |
|---|---|
| CloudWatch | Monitor instance and scaling metrics |
| Activity History | Records scaling events |
| CloudTrail | Tracks API calls |
| SNS | Send notifications |
14️⃣ Advanced Features
- Instance Refresh – auto-upgrade AMI
- Warm Pools – standby instances
- Lifecycle Hooks – custom actions during launch/terminate
- Mixed Instances Policy – combine Spot + On-Demand
- Predictive Scaling – uses ML for pre-scaling
15️⃣ Real-World Use Cases
| Use Case | Example |
|---|---|
| Web Servers | Scale websites with traffic |
| E-commerce | Handle sales surges |
| CI/CD Deployments | Replace old instances |
| Security Labs | Multiple load servers |
| Microservices | Scale each service independently |
16️⃣ Best Practices
- ✅ Use multiple AZs for fault tolerance
- ✅ Attach ALB for load balancing
- ✅ Use Target Tracking for simplicity
- ✅ Enable termination protection
- ✅ Prefer Launch Templates
- ✅ Define grace periods correctly
- ✅ Use least-privilege IAM roles
17️⃣ Common CLI Commands
# Create Launch Template
aws ec2 create-launch-template --launch-template-name my-template --version-description v1 --launch-template-data file://template.json

# Create ASG
aws autoscaling create-auto-scaling-group \
--auto-scaling-group-name my-asg \
--launch-template LaunchTemplateName=my-template,Version=1 \
--min-size 1 --max-size 4 --desired-capacity 2 \
--vpc-zone-identifier "subnet-abc,subnet-def"
18️⃣ Troubleshooting
| Issue | Cause | Fix |
|---|---|---|
| Instances not launching | Invalid AMI/key pair | Check template |
| No scaling | Policy not triggered | Review CloudWatch |
| Instances unhealthy | Wrong health check | Update path |
| Too frequent scaling | Short cooldown | Increase cooldown |
19️⃣ Summary
✅ ASG automates EC2 scaling and healing.
✅ Works with Launch Templates, CloudWatch, ALB.
✅ Ensures cost-optimized, resilient infrastructure.
✅ Core for production-grade AWS deployments.
2.7 Amazon VPC Concepts (Subnets, Route Tables, Gateways)
Amazon VPC (Virtual Private Cloud) is your own private network inside AWS. It allows you to control networking just like on-premises, but with cloud flexibility.
🟦 1. What is a VPC?
A VPC is an isolated virtual network you create inside AWS. You decide:
- How many subnets you want
- Which resources are public or private
- How traffic flows using route tables
- How to connect to the internet or on-premises
Your AWS Account
   └── VPC (Your Private Network)
         ├── Subnets
         ├── Route Tables
         ├── Gateways
         ├── Security Groups
         └── NACLs
🟩 2. Subnets – Dividing Your VPC into Small Areas
A subnet is a smaller section inside your VPC. You divide your VPC into multiple subnets to separate your resources.
🔹 Types of Subnets
- Public Subnet – Accessible from the internet (via Internet Gateway)
- Private Subnet – NOT accessible directly from the internet
🔹 What goes in a Public Subnet?
- Web servers (EC2)
- Load balancers
- Bastion hosts
🔹 What goes in a Private Subnet?
- Databases (RDS)
- Application servers
- Internal backend services
- Cache servers
🌍 Subnet Diagram
VPC (10.0.0.0/16)
  |
  ├── Public Subnet (10.0.1.0/24) → Internet Allowed
  └── Private Subnet (10.0.2.0/24) → No Direct Internet
🟥 3. Route Tables – Navigation Map for Your Subnets
A Route Table contains a set of rules that decide where network traffic goes.
🔹 Example Route Table (Public Subnet)
| Destination | Target |
|---|---|
| 10.0.0.0/16 | local |
| 0.0.0.0/0 | Internet Gateway (IGW) |
🔹 Example Route Table (Private Subnet)
| Destination | Target |
|---|---|
| 10.0.0.0/16 | local |
| 0.0.0.0/0 | NAT Gateway |
🗺️ Route Table Diagram
Public Subnet
   ↓
Internet Gateway → Internet

Private Subnet
   ↓
NAT Gateway → Internet (OUTBOUND ONLY)
🟨 4. Gateways – Entry & Exit Points
Gateways allow your VPC to communicate with the outside world or your on-prem network.
🟦 4.1 Internet Gateway (IGW)
Allows your VPC to connect to the internet. Required for:
- EC2 public IP access
- Hosting websites
- Inbound internet traffic
🟩 4.2 NAT Gateway
Allows instances in a **private subnet** to access the internet **only for outbound traffic** (e.g., downloading updates).
🟥 4.3 VPC Peering
Connects two VPCs so they can communicate
🟧 4.4 VPN Gateway / Direct Connect
Connects your AWS VPC to your On-Premises Data Center securely.
- VPN Gateway → Encrypted connection over the internet
- Direct Connect → Private dedicated high-speed connection
🌐 5. Full VPC Diagram (Very Easy)
                   +---------------------+
                   |        VPC          |
                   |    10.0.0.0/16      |
                   +---------------------+
                        /            \
                       /              \
     +------------------+         +------------------+
     | Public Subnet    |         | Private Subnet   |
     | 10.0.1.0/24      |         | 10.0.2.0/24      |
     +------------------+         +------------------+
           |                            |
           |                            |
  +-----------------+            +---------------------+
  |   EC2 Public    |            |   EC2 Private       |
  +-----------------+            +---------------------+
           |                            |
           |                      +---------------+
  +-----------------+             | NAT Gateway   |
  | Internet Gateway|             +---------------+
  +-----------------+                    |
           |                              |
        Internet                        Internet (Only Outbound)
- VPC = Your private network in AWS
- Subnets = Divide your network (public/private)
- Route Tables = Decide traffic direction
- IGW = Allows internet access for public subnets
- NAT Gateway = Allows private subnets to reach the internet (outbound only)
- VPN/DC = Connect AWS to on-premises
2.7a CIDR Blocks & IP Addressing (IPv4/IPv6)
CIDR (Classless Inter-Domain Routing) defines how many IP addresses you have inside your VPC or Subnets. Understanding CIDR is crucial for planning AWS networks effectively.
The “/16” defines how many total IPs you get.
🟦 1. Understanding IPv4 CIDR Notation
IPv4 addresses are 32-bit numbers written as four octets (x.x.x.x). The CIDR suffix (like /16 or /24) tells us how many bits are fixed for the network.
🔹 Common CIDR Blocks
| CIDR | Total IPs | Usable IPs | Usage |
|---|---|---|---|
| /16 | 65,536 | 65,534 | Entire VPC |
| /20 | 4,096 | 4,094 | Large Subnet |
| /24 | 256 | 254 | Most Common Subnet Size |
| /28 | 16 | 14 | Small Subnet |
• First IP → Network Address
• Second IP → AWS VPC Router
• Third IP → Reserved for future use
• Last two IPs → Broadcast & Reserved
✔ Usable IPs = Total IPs − 5
🟩 2. CIDR Example: 10.0.1.0/24
This CIDR block is commonly used for public subnets.
| Info | Value |
|---|---|
| Network Range | 10.0.1.0 – 10.0.1.255 |
| Total IPs | 256 |
| Usable IPs | 254 (AWS reserves 5) |
| Subnet Mask | 255.255.255.0 |
🔹 Visual Diagram
10.0.1.0/24  → 256 IPs

Reserved by AWS:
10.0.1.0   → Network
10.0.1.1   → VPC Router
10.0.1.2   → Reserved
10.0.1.255 → Broadcast

Usable range:
10.0.1.3 → 10.0.1.254
🟥 3. IPv6 Overview (Optional)
IPv6 is a 128-bit addressing format providing an extremely large number of IPs. AWS VPC IPv6 ranges look like:
Example IPv6 CIDR: 2600:1f18:abcd:1234::/56
🟨 4. How to Subnet a VPC
Example: VPC = 10.0.0.0/16 → We divide it into smaller subnets.
| Subnet Name | CIDR | IPs | Purpose |
|---|---|---|---|
| public-subnet | 10.0.1.0/24 | 254 | Internet-facing resources |
| private-subnet | 10.0.2.0/24 | 254 | DBs, App servers |
🔹 Subnetting Diagram
VPC: 10.0.0.0/16
    ├── 10.0.1.0/24 → Public Subnet
    ├── 10.0.2.0/24 → Private Subnet
    └── More subnets (10.0.X.0/24)
🧮 5. CIDR Calculator – Subnet Sizes & IP Count
This table helps you quickly understand how many IP addresses are available in each subnet size (CIDR prefix). Very useful for VPC and Subnet design.
| CIDR Prefix | Total IPs | Usable IPs (Total - 5) | Subnet Mask | Typical Usage |
|---|---|---|---|---|
| /16 | 65,536 | 65,531 | 255.255.0.0 | Entire VPC |
| /17 | 32,768 | 32,763 | 255.255.128.0 | Large Subnets |
| /18 | 16,384 | 16,379 | 255.255.192.0 | Large Private Subnets |
| /19 | 8,192 | 8,187 | 255.255.224.0 | Medium Subnets |
| /20 | 4,096 | 4,091 | 255.255.240.0 | App Subnets |
| /21 | 2,048 | 2,043 | 255.255.248.0 | DB Subnets |
| /22 | 1,024 | 1,019 | 255.255.252.0 | Batch Systems |
| /23 | 512 | 507 | 255.255.254.0 | Medium Networks |
| /24 | 256 | 251 | 255.255.255.0 | Most Common Subnet |
| /25 | 128 | 123 | 255.255.255.128 | Small Subnet |
| /26 | 64 | 59 | 255.255.255.192 | Testing / Lab |
| /27 | 32 | 27 | 255.255.255.224 | Containers, ENIs |
| /28 | 16 | 11 | 255.255.255.240 | Small Private Subnets |
| /29 | 8 | 3 | 255.255.255.248 | Point-to-Point Links |
| /30 | 4 | - | 255.255.255.252 | Routing Links |
- CIDR controls how many IPs are available in VPC/Subnets
- /16 = Big network, /24 = Common subnet
- AWS reserves 5 IPs in every subnet
- IPv4 is preferred for most VPC setups
- IPv6 is optional and not needed for beginners
2.7b Create VPC with EC2 (Full Step-by-Step Guide)
In this section, you will learn how to manually build an AWS VPC from scratch, configure subnets, route tables, and internet connectivity, and finally launch an EC2 instance inside the Public Subnet. This guide is 100% practical and beginner-friendly.
🟧 VPC Only – Creating a Custom VPC Manually
AWS provides two creation modes:
✔ VPC Only – Creates only the VPC (you configure all components manually)
✔ VPC and More – Automatically creates subnets, IGW, NAT, routes, etc.
Here we use VPC Only for full control and better understanding.
- Public & Private Subnets
- Internet Gateway (IGW)
- Route Tables
- NAT Gateway (Optional)
- Security Groups & NACLs
🔹 Step 1: Create VPC (VPC Only)
- Go to VPC Console → Click Create VPC
- Select → VPC Only
| Field | Value | Description |
|---|---|---|
| Name | project-vpc | Easy reference name |
| IPv4 CIDR block | 10.0.0.0/16 | Large block (65,536 IPs) |
| IPv6 | No IPv6 | Beginner friendly |
| Tenancy | Default | Free tier supported |
🟦 Step 2: Create Subnets (Public & Optional Private)
A VPC must have at least one subnet. We create one public and one optional private subnet.
🔹 Public Subnet
- Select VPC ID → project-vpc
- Name: public-subnet
- IPv4 CIDR: 10.0.1.0/24
- AZ: ap-south-1a
✔ You selected correct VPC → project-vpc
✔ You entered subnet CIDR → 10.0.1.0/24
✔ Availability Zone → ap-south-1a
✔ Name tag added correctly → public-subnet
Enable Auto-Assign Public IP:
- Select the subnet
- Click Edit Subnet Settings
- Enable → Auto-assign IPv4 public address
🔹 Private Subnet (optional)
- Name: private-subnet
- IPv4 CIDR: 10.0.2.0/24
🟥 Step 3: Create & Attach Internet Gateway (IGW)
- Go to Internet Gateways
- Click Create Internet Gateway
- Name → project-igw
- Click → Create Internet Gateways
- ✅ Internet Gateway created successfully!
- Select the Internet Gateway → project-igw
- Click Actions → Attach to VPC
- From dropdown → Select project-vpc
- Click → Attach Internet Gateway
🟨 Step 4: Create Public Route Table
🔹 Create Route Table
- Go to Route Tables in the VPC Dashboard
- Click Create Route Table
- Enter Name → public-rt
- Select VPC → project-vpc
- Click → Create route table
-
✅ Route table (public-rt) was created successfully!
(As shown in your screenshot)
🔹 Add Route to Internet (0.0.0.0/0)
- Select the route table → public-rt
- Click Edit routes
- You will see the default route:
10.0.0.0/16 → local (auto-created) - Click Add route
- Destination → 0.0.0.0/0
- Target → Internet Gateway
- Select your IGW → igw-01246013decfc63a2 (project-igw)
- Click Save changes
| Destination | Target |
|---|---|
| 10.0.0.0/16 | local |
| 0.0.0.0/0 | Internet Gateway (project-igw) |
✔ Route table public-rt was created successfully
✔ Default route exists: 10.0.0.0/16 → local (Active)
✔ You added: 0.0.0.0/0 → Internet Gateway (igw-01246013decfc63a2)
✔ Status shows Active
👍 Your public route table is properly configured!
🔹 Associate Public Subnet
- Select the route table → public-rt
- Open → Subnet Associations
- Click Edit
- Select your subnet → public-subnet
- Click Save associations
This means EC2 instances inside this subnet will get internet access (with public IP).
🟦 Step 5: Launch EC2 Instance in Public Subnet
- Open EC2 Console → Click Launch Instance
- Name → project-ec2-public
- Select AMI → Amazon Linux 2 / Ubuntu
- Instance Type → t2.micro
- Select/Create Key Pair
Network Settings
- VPC → project-vpc
- Subnet → public-subnet
- Auto-assign Public IP → Enabled
- Security Group:
- Allow SSH (22) from MY IP
- Allow HTTP (80)
✔ Test SSH Connection
ssh -i mykey.pem ec2-user@YOUR_PUBLIC_IP
🧠 Final Architecture Diagram
VPC (10.0.0.0/16)
     |
     ├── Public Subnet (10.0.1.0/24)
     │       ├── EC2 Instance (Public IP)
     │       └── Route → Internet Gateway
     |
     └── Private Subnet (10.0.2.0/24)
             └── Internal Backend / DB (Optional)
2.8 AWS Direct Connect & VPN (Easy & Detailed Explanation)
When companies move to AWS, they often need a secure and reliable way to connect their on-premises network (office/datacenter) to their AWS VPC (cloud network). AWS provides two main options: AWS VPN and AWS Direct Connect.
🟦 1. AWS Site-to-Site VPN
A Site-to-Site VPN creates an encrypted connection between your on-premises router and AWS VPC over the public internet.
🔹 How AWS VPN Works
- Your office router connects to AWS
- AWS provides a Virtual Private Gateway (VGW)
- Both sides create an IPSec encrypted tunnel
- Traffic flows securely between office and AWS
🔹 VPN Diagram (Simple)
Office Network (Router/Firewall)
            |
     Encrypted IPSec Tunnel
            |
    +------------------------+
    |  AWS Virtual Private   |
    |      Gateway (VGW)     |
    +------------------------+
            |
          VPC
🔹 VPN Advantages
- 🤑 Very low cost
- ⚡ Quick setup (10–15 minutes)
- 🔐 Full encryption
- 🔄 Supports redundancy (multiple tunnels)
🔹 VPN Limitations
- 🌐 Relies on public internet → not 100% stable
- 📉 Higher latency (compared to Direct Connect)
- 📡 Bandwidth limited (usually 1 Gbps max)
🔹 Best Use Cases for VPN
- Quick temporary connectivity
- Small to mid-sized companies
- Backup link for Direct Connect
- Remote offices connecting securely to AWS
🟩 2. AWS Direct Connect (DX)
AWS Direct Connect provides a dedicated, private, physical network connection from your data center to AWS — bypassing the public internet.
🔹 Direct Connect Diagram
Your Data Center
       |
Dedicated Fiber Line (1–100 Gbps)
       |
+----------------------+
| AWS Direct Connect   |
|      Location        |
+----------------------+
       |
      VPC
🔹 Direct Connect Benefits
- ⚡ Very low latency
- 🔒 Private network (not internet)
- 📡 High bandwidth: 1 Gbps, 10 Gbps, 100 Gbps
- 🌐 Stable connectivity
- 💼 Ideal for enterprise workloads
🔹 Direct Connect Limitations
- 💰 Expensive to setup
- ⏳ Takes weeks to months to provision
- 📍 Requires physical installation at DX locations
🔹 Best Use Cases
- Large enterprises
- Real-time financial trading
- Big data transfer workloads
- Hybrid architecture (datacenter + cloud)
- Massive storage backup to AWS
🟨 3. Direct Connect + VPN: Best of Both
Many companies use both services together. This model is called DX + VPN Redundancy.
                +------------+
                |  On-Prem   |
                +------------+
                     |
      +--------------+--------------+
      |                             |
   Direct Connect               VPN Tunnel
      |                             |
 +----------------------------------------+
 |               AWS VPC                 |
 +----------------------------------------+
✔ Best practice for enterprises
- DX = Primary, fast connection
- VPN = Backup (failover)
🧠 4. VPN vs Direct Connect – Quick Comparison
| Feature | AWS VPN | AWS Direct Connect |
|---|---|---|
| Connection Type | Internet-based | Private dedicated line |
| Security | Encrypted (IPSec) | Private but can add VPN |
| Latency | High/Variable | Low & Consistent |
| Speed | Up to 1 Gbps | 1–100 Gbps |
| Cost | Very Low | High (enterprise-level) |
| Setup Time | Minutes | Weeks |
| Best For | Small–Medium workloads | Large enterprises, heavy workloads |
- AWS VPN → Cheap, fast to setup, encrypted tunnel over the internet.
- AWS Direct Connect → Private, dedicated, high-speed, low-latency link.
- DX + VPN → Enterprise-grade hybrid connectivity with backup.
2.9 Elastic IPs, Security Groups & NACLs (Beginner-Friendly Explanation)
These three components are important for networking and security in AWS. You will use them whenever you launch EC2 instances. Let’s understand them in a very simple way.
🟦 1. Elastic IP (EIP) – A Permanent Public IP
By default, AWS gives your EC2 instance a public IP, but it changes when you stop/start the instance. If you want a fixed, permanent public IP for your website or server, you use an Elastic IP (EIP).
🔹 Why Do We Use Elastic IP?
- Your website or API needs a constant IP
- Your EC2 restarts—but you want same IP
- You want to easily switch IP to new server
- For hosting web servers, DNS mapping
🔹 How to Assign an Elastic IP?
- Go to EC2 Dashboard → Elastic IPs
- Click Allocate Elastic IP
- After allocation → Select the IP
- Click Associate with EC2 instance
⚠️ Important Billing Note
• You keep an Elastic IP **without attaching** it
• You use **more than one** EIP per instance
🌍 Diagram: Elastic IP
Internet
   │
Elastic IP (Permanent)
   │
EC2 Instance
🟥 2. Security Groups (SG) – Instance Level Firewall
A Security Group is a virtual firewall that protects your EC2 instance. It controls what traffic is allowed to enter or leave.
Only people (traffic) on the allowed list can enter.
🔹 Important Features of Security Groups
- Instance-level protection
- Stateful – Response traffic is automatically allowed
- Only Allow rules (no deny rules)
- Can attach multiple SGs to an EC2 instance
- Default SG blocks all inbound traffic
🔹 Common Security Group Rules
| Port | Purpose | Example |
|---|---|---|
| 22 | SSH Access (Linux) | Admin login |
| 3389 | RDP Access (Windows) | Remote desktop |
| 80 | HTTP | Website access |
| 443 | HTTPS | Secure website |
0.0.0.0/0
Always restrict it to your IP for security.
🌍 Diagram: Security Group
Internet
   ↓
Security Group (Allow Rules Only)
   ↓
EC2 Instance
🟨 3. NACL (Network ACL) – Subnet Level Firewall
A Network ACL protects your entire subnet (group of EC2 instances). It controls inbound and outbound traffic at the subnet boundary.
It protects every house (EC2 instance) inside the area (subnet).
🔹 Key Features of NACL
- Subnet-level protection
- Stateless – Return traffic must be explicitly allowed
- Supports Allow + Deny rules
- Rules are checked in order (Rule #100 → #110 → #120)
- One NACL can be used for multiple subnets
🔹 Example NACL Rules
| Rule No | Traffic | Action | Source |
|---|---|---|---|
| 100 | HTTP | Allow | 0.0.0.0/0 |
| 110 | SSH | Deny | 0.0.0.0/0 |
| 120 | Ephemeral Ports | Allow | 1024-65535 |
🌍 Diagram: NACL
Internet
   ↓
Network ACL (Allow / Deny)
   ↓
Subnet
   ↓
Security Group
   ↓
EC2
📘 4. Security Group vs NACL – Very Easy Comparison
| Feature | Security Group | NACL |
|---|---|---|
| Level | Instance-Level | Subnet-Level |
| State | Stateful | Stateless |
| Supports Deny? | No | Yes |
| Rules | Only Allow | Allow + Deny |
| Use Case | Protect individual EC2 | Protect entire subnet |
| Return Traffic | Auto allowed | Must allow manually |
- Elastic IP → Permanent public IP
- Security Group → Firewall for EC2
- NACL → Firewall for Subnet
Module 03 : AWS S3 (Simple Storage Service)
Amazon S3 is AWS’s highly scalable, durable, and secure object storage service used to store files, images, videos, backups, big data, logs, and static website content. This module explains S3 in a simple and practical way — from creating your first bucket, understanding storage classes, lifecycle rules, permissions, versioning, hosting static websites, to advanced security and cost optimization techniques.
☁️ AWS S3 – Creating an S3 Bucket
3.1 What is Amazon S3?
Amazon S3 (Simple Storage Service) is an object storage service that stores data in the form of objects within buckets. It provides scalability, data availability, security, and performance.
2. Creating an S3 Bucket (Step-by-Step)
- Login to your AWS Management Console.
- Navigate to Services → S3.
- Click on Create bucket.
- Enter a globally unique bucket name, e.g.,
my-first-s3-bucket. - Select a region (preferably near your users).
- Configure options like Versioning, Encryption, and Tags.
- Click Create bucket.
3. Versioning
Versioning allows you to preserve, retrieve, and restore every version of every object stored in your bucket.
aws s3api put-bucket-versioning --bucket my-first-s3-bucket --versioning-configuration Status=Enabled
4. Lifecycle Rules
Lifecycle policies help you automatically transition objects to cheaper storage or delete them after a set time.
Example: Move files older than 30 days to Glacier Deep Archive.
{
  "Rules": [
    {
      "ID": "MoveToGlacier",
      "Status": "Enabled",
      "Filter": {},
      "Transitions": [
        { "Days": 30, "StorageClass": "GLACIER" }
      ]
    }
  ]
}
3.2 AWS S3 – Storage Classes & Cost Optimization
S3 offers different storage classes optimized for various access patterns and cost requirements.
| Storage Class | Use Case | Durability | Availability | Cost |
|---|---|---|---|---|
| Standard | Frequently accessed data | 99.999999999% | 99.99% | High |
| Standard-IA | Infrequent access | 99.999999999% | 99.9% | Lower |
| One Zone-IA | Non-critical infrequent access | 99.999999999% | 99.5% | Low |
| Glacier | Archival (retrieval minutes-hours) | 99.999999999% | Varies | Very Low |
| Glacier Deep Archive | Long-term archival (hours retrieval) | 99.999999999% | Varies | Lowest |
💡 Cost Optimization Tips
- Use Lifecycle Policies to move old data to cheaper storage.
- Delete incomplete multipart uploads automatically.
- Use S3 Storage Lens to monitor usage and cost.
- Compress data before uploading.
3.3 AWS S3 – Creating a Bucket Using AWS CLI
1. What is AWS CLI?
The AWS Command Line Interface (CLI) is a unified tool to manage AWS services using commands from your terminal.
2. Configure AWS CLI
aws configure
Enter your Access Key ID, Secret Key, Region, and Output Format.
3. Create Bucket Command
aws s3api create-bucket --bucket my-cli-bucket --region ap-south-1 --create-bucket-configuration LocationConstraint=ap-south-1
4. Verify Bucket
aws s3 ls
5. Upload File
aws s3 cp myfile.txt s3://my-cli-bucket/
6. Delete Bucket
aws s3 rb s3://my-cli-bucket --force
3.4 AWS S3 – Static Website Hosting
1. What is Static Website Hosting?
AWS S3 can host static websites consisting of HTML, CSS, JS, and images without a web server.
2. Steps to Enable Hosting
- Create a new S3 bucket (e.g.,
notestime-website). - Uncheck “Block all public access”.
- Upload your website files (
index.html,error.html). - Go to Properties → Static website hosting → Enable.
- Set index.html and error.html.
- Copy and open the endpoint URL.
3. Example Website Policy
        {
          "Version": "2012-10-17",
          "Statement": [
            {
              "Sid": "PublicReadGetObject",
              "Effect": "Allow",
              "Principal": "*",
              "Action": "s3:GetObject",
              "Resource": "arn:aws:s3:::notestime-website/*"
            }
          ]
        }
Now your site is live at your S3 bucket endpoint URL.
3.5 AWS S3 – Bucket Policies & Access Control (IAM + ACL + Policy Examples)
1. What is Access Control in S3?
Access Control defines who can access your bucket or objects and what actions they can perform.
- IAM Policies: Grant access to AWS users and roles.
- Bucket Policies: Control access directly at the bucket level.
- ACLs: Object-level permissions (legacy).
2. Example IAM Policy (Read-Only)
        {
          "Version": "2012-10-17",
          "Statement": [{
            "Effect": "Allow",
            "Action": ["s3:ListBucket", "s3:GetObject"],
            "Resource": ["arn:aws:s3:::my-example-bucket", "arn:aws:s3:::my-example-bucket/*"]
          }]
        }
3. Example Bucket Policies
✅ Public Read Access
        {
          "Version": "2012-10-17",
          "Statement": [{
            "Effect": "Allow",
            "Principal": "*",
            "Action": "s3:GetObject",
            "Resource": "arn:aws:s3:::my-example-bucket/*"
          }]
        }
❌ Deny Delete Actions
        {
          "Version": "2012-10-17",
          "Statement": [{
            "Effect": "Deny",
            "Principal": "*",
            "Action": "s3:DeleteObject",
            "Resource": "arn:aws:s3:::my-example-bucket/*"
          }]
        }
🌐 Restrict by IP Address
        {
          "Version": "2012-10-17",
          "Statement": [{
            "Effect": "Deny",
            "Principal": "*",
            "Action": "s3:*",
            "Resource": ["arn:aws:s3:::my-example-bucket", "arn:aws:s3:::my-example-bucket/*"],
            "Condition": { "NotIpAddress": { "aws:SourceIp": "203.0.113.0/24" } }
          }]
        }
4. Access Control Lists (ACLs)
| Grantee | Permission |
|---|---|
| private | Owner full control |
| public-read | Everyone can read |
| public-read-write | Everyone can read/write |
| authenticated-read | Any AWS user can read |
5. CLI Commands
aws s3api put-bucket-policy --bucket my-example-bucket --policy file://bucket-policy.json
aws s3api get-bucket-policy --bucket my-example-bucket
6. Best Practices
- Keep buckets private by default.
- Use IAM roles instead of access keys.
- Audit bucket permissions regularly.
- Enable AWS Access Analyzer for risk checks.
3.6 Amazon EBS – Volume Types & Snapshots
1. What is Amazon EBS?
Amazon EBS (Elastic Block Store) provides persistent block storage for EC2 instances. Volumes behave like virtual hard disks that remain available even after instance termination.
2. EBS Volume Types
| Volume Type | Description | Use Case |
|---|---|---|
| gp3 (General Purpose SSD) | Balanced price-performance | Most workloads, boot volumes |
| io1/io2 (Provisioned IOPS) | High performance, low latency | Databases, mission-critical apps |
| st1 (HDD – Throughput Optimized) | Low-cost, high throughput | Big data, log processing |
| sc1 (Cold HDD) | Lowest cost storage | Rarely accessed data |
3. What are Snapshots?
Snapshots are point-in-time backups of EBS volumes, stored in S3.
- Incremental – only changed blocks are saved.
- You can restore new volumes using snapshots.
- Snapshots can be shared across accounts or regions.
4. CLI Commands
aws ec2 create-snapshot --volume-id vol-123456 --description "My backup"
aws ec2 create-volume --snapshot-id snap-123456 --availability-zone us-east-1a
5. Best Practices
- Use gp3 for most workloads.
- Schedule snapshots automatically using Lifecycle Manager.
- Encrypt EBS volumes with KMS for security.
3.7 AWS Glacier & Backup Solutions
1. What is Amazon Glacier?
Amazon S3 Glacier is a low-cost storage class designed for archival and long-term backups.
2. Glacier Storage Classes
- Glacier Instant Retrieval – Millisecond access, low-cost.
- Glacier Flexible Retrieval – Minutes to hours retrieval.
- Glacier Deep Archive – Lowest cost, 12–48 hours retrieval.
3. Backup Tools in AWS
- AWS Backup – Central backup for EBS, RDS, DynamoDB, EFS.
- Lifecyle Policies – Automatically move S3 objects to Glacier.
- Vaults – Secure Glacier containers with lock policies.
4. Example Lifecycle Rule
{
 "Rules": [{
   "ID": "MoveToGlacier",
   "Status": "Enabled",
   "Transitions": [{
     "Days": 30,
     "StorageClass": "GLACIER"
   }]
 }]}
5. Best Practices
- Use Deep Archive only for compliance or long-term storage.
- Encrypt backups using KMS.
- Enable Backup Vault Lock for tamper-proof backups.
3.8 Amazon RDS – Multi-AZ, Read Replicas & High Availability
1. What is Amazon RDS?
Amazon RDS (Relational Database Service) is a fully managed database service provided by AWS that makes it easy to set up, operate, and scale relational databases in the cloud. RDS automates time-consuming database administration tasks such as provisioning, patching, backups, recovery, monitoring, and scaling, allowing you to focus on application development instead of database management.
🚀 What is a “Relational Database Service”?
A relational database stores structured data in tables (rows & columns) and uses SQL (Structured Query Language) to query and manage the data. In a traditional setup, developers or DBAs must install, configure, secure, maintain, and optimize the database server manually.
Amazon RDS converts this into a managed service, meaning AWS takes care of all the heavy lifting:
- Provisioning database hardware & storage
- Installing and updating the database engine
- Automatic backups & point-in-time recovery
- Monitoring using CloudWatch metrics
- High availability with Multi-AZ deployments
- Failover handled automatically by AWS
📌 Supported Database Engines
- MySQL
- PostgreSQL
- MariaDB
- Oracle
- SQL Server
- Amazon Aurora (MySQL/PostgreSQL compatible)
✨ Key Benefits of Amazon RDS
- Fully managed — AWS handles maintenance, upgrades, and backups.
- Scalable — You can increase compute and storage without downtime.
- Secure — Encryption (KMS), network isolation (VPC), IAM integration.
- Highly available — Multi-AZ ensures automatic failover.
- Performance optimized — Read Replicas reduce load on primary DB.
2. Multi-AZ Deployment (High Availability)
Multi-AZ ensures disaster recovery and high availability by creating a synchronous standby replica in another Availability Zone.
- Synchronous replication – zero data loss
- Automatic failover to standby on:
- Primary failure
- AZ outage
- Network issues
- Manual reboot with failover
- Standby node cannot be used for reads
- Used mainly for production workloads
3. Read Replicas (Read Scaling)
Read Replicas improve read performance by creating one or more asynchronous copies.
- Asynchronous replication – may experience slight replication lag
- Used for:
- Analytics
- Reporting
- Read-heavy traffic
- Can be created within AZ, cross-AZ, or cross-region
- Can be promoted to standalone DB during migration
- Supports up to 5 replicas
4. Automated Backups & Snapshots
- Automated Backups
- Enabled by default
- Point-in-time recovery
- Retention 1–35 days
- Manual Snapshots
- Never deleted automatically
- Can be shared across AWS accounts
- Can be copied across regions
5. RDS Storage Types
| Storage Type | Description | Use Case |
|---|---|---|
| GP3 (General Purpose SSD) | Balanced price-performance | Most workloads |
| IO-Optimized | High IOPS & throughput | Large production databases |
| Magnetic (Deprecated) | Legacy slow HDD | Not recommended |
6. Monitoring & Performance Tools
- CloudWatch – CPU, storage, connections, latency
- Enhanced Monitoring – OS-level metrics (1-second granularity)
- Performance Insights – SQL query-level performance breakdown
- Event Subscriptions – email notifications for failover, upgrades
7. Security in RDS
- KMS Encryption – encrypts storage, logs, snapshots
- IAM Authentication – for MySQL & PostgreSQL
- VPC Security Groups – control DB access
- Automated Patching – maintenance window updates
8. CLI Commands
aws rds create-db-instance-read-replica --db-instance-identifier mydb-replica --source-db-instance-identifier mydbaws rds reboot-db-instance --db-instance-identifier mydb --force-failover9. How to Create an RDS Database (Step-by-Step GUI Guide)
Follow these simple steps to create an RDS instance using the AWS Management Console.
Step 1: Open RDS Console
- Login to AWS Console → Search → RDS
- Click Create Database
Step 2: Choose Database Creation Method
- Select Full configuration (recommended).
Step 3: Select Engine Type
- Choose your engine:
- MySQL
- PostgreSQL
- MariaDB
- Oracle
- SQL Server
- Aurora
Step 4: Choose Templates
- Select based on requirement:
- Free Tier – for learning/testing
- Dev/Test
- Production – enables Multi-AZ by default
Step 5: Configure DB Instance
- Enter DB instance identifier (example: mydb)
- Enter master username (example: admin)
- Set master password and confirm
Step 6: Choose DB Instance Size
- Select instance class:
- db.t3.micro → Free Tier
- db.m5.large → Production
- db.r6g → Memory optimized
Step 7: Storage Settings
- Choose storage type:
- GP3 (default)
- IO-Optimized
- Set allocated storage (e.g., 20 GB)
- Optionally enable Storage Autoscaling
Step 8: Configure Availability & Durability
- Select:
- Multi-AZ Deployment → For high availability
- Single-AZ → For low-cost dev environment
Step 9: Connectivity
- Choose your VPC
- Choose Subnets (usually auto)
- Select Public Access:
- No → High security (recommended)
- Yes → Only if connecting from outside VPC
- Select VPC Security Group
Step 10: Database Authentication
- Password Authentication (default)
- Or enable IAM Authentication (MySQL/PostgreSQL)
Step 11: Additional Settings
- Enter database name (optional)
- Set backup retention period (0–35 days)
- Enable:
- Performance Insights
- Enhanced Monitoring
- Enable Auto Minor Version Upgrade
Step 12: Create Database
- Review all settings
- Click Create Database
Step 13: Connect to the Database
- Go to RDS Console → Databases
- Select your DB → Copy the Endpoint
- Use MySQL Workbench, PgAdmin, or application code to connect
10. How to Create Database, Tables & Insert Data (SQL Guide)
Once your RDS instance is created and connected using Workbench / PgAdmin / CLI, follow these steps to create your first database and table.
✔ Install MySQL Client (Linux / Ubuntu / EC2)
If your system does not have a MySQL client installed, run:
sudo apt-get update
sudo apt-get install mysql-client -y
Now connect to RDS:
mysql -h <RDS-endpoint> -u admin -p
Step 1: Create a New Database
Create a new schema/database:
CREATE DATABASE notesdb;
👉 View All Databases
SHOW DATABASES;
- Refresh schemas in MySQL Workbench / PgAdmin
- Select the newly created database
Step 2: Use / Select the Database
USE notesdb;
Step 3: Create a Table
Create a students table:
CREATE TABLE students (
    id INT AUTO_INCREMENT PRIMARY KEY,
    name VARCHAR(100),
    email VARCHAR(150),
    course VARCHAR(100),
    created_at TIMESTAMP DEFAULT CURRENT_TIMESTAMP
);
👉 Show All Tables
SHOW TABLES;
- AUTO_INCREMENT → Auto-generated IDs
- VARCHAR → String type
- TIMESTAMP → Record creation time
Step 4: Insert Data Into the Table
Add sample records:
INSERT INTO students (name, email, course)
VALUES
('Rahul Sharma', 'rahul@example.com', 'AWS Cloud'),
('Priya Patel', 'priya@example.com', 'DevOps'),
('Ayesha Khan', 'ayesha@example.com', 'Python');
Step 5: View the Data
SELECT * FROM students;
Step 6: Update Existing Data
UPDATE students
SET course = 'AWS Solutions Architect'
WHERE id = 1;
Step 7: Delete a Record
DELETE FROM students
WHERE id = 3;
Step 8: Drop (Delete) a Table
DROP TABLE students;
Step 9: Drop (Delete) a Database
Permanently removes the full database:
DROP DATABASE notesdb;
11. Best Practices
- Always enable Multi-AZ for production.
- Use Read Replicas to scale out reads.
- Use Performance Insights for query analysis.
- Place RDS in private subnets for security.
- Regularly take manual snapshots before patching.
- Enable deletion protection to avoid accidental deletion.
3.9 Amazon DynamoDB – NoSQL Database
1. What is DynamoDB?
DynamoDB is a fully managed NoSQL database offering single-digit millisecond latency at any scale.
2. Core Concepts
- Tables – Container for items
- Items – Individual records (like rows)
- Attributes – Key-value pairs (like columns)
- Primary Key – Partition Key / Sort Key
3. Capacity Modes
- On-Demand – Automatically scales.
- Provisioned – Set Read/Write capacity manually.
4. Example IAM Policy
{
 "Version": "2012-10-17",
 "Statement": [{
   "Effect": "Allow",
   "Action": ["dynamodb:PutItem", "dynamodb:GetItem"],
   "Resource": "arn:aws:dynamodb:us-east-1:123456789012:table/MyTable"
 }]}
5. Best Practices
- Use Global Tables for multi-region HA.
- Use TTL to auto-delete old records.
- Enable DynamoDB Streams for event-driven apps.
3.10 AWS Database Migration Service (DMS)
1. What is AWS DMS?
AWS DMS helps you migrate databases securely and quickly with minimal downtime.
2. Migration Types
- Homogeneous – MySQL ➝ MySQL
- Heterogeneous – Oracle ➝ PostgreSQL
- Continuous Replication – Real-time sync
3. Key Components
- Source Endpoint – Existing database
- Target Endpoint – Destination DB
- Replication Instance – Engine that performs migration
4. CLI Command
aws dms create-replication-task --replication-task-identifier mytask --source-endpoint-arn arn:source --target-endpoint-arn arn:target --migration-type full-load
5. Best Practices
- Use SCT (Schema Conversion Tool) for heterogeneous migrations.
- Test migration with a pilot database.
- Enable CloudWatch for monitoring replication lag.
Module 04 : Amazon EFS – Elastic File System (Easy & Detailed Notes)
Amazon EFS (Elastic File System) is a fully managed, scalable, shared file storage service for Linux-based applications. This module provides a deep-dive explanation of EFS with simple diagrams, comparisons, step-by-step configuration, and real-world architecture examples.
4.1 What is Amazon EFS?
Amazon Elastic File System (EFS) is a scalable, serverless, fully managed NFS file system that can be accessed by multiple EC2 instances simultaneously.
EFS grows and shrinks automatically as you add/remove files — you don’t need to provision storage.
Key Features
- Fully managed elastic storage
- Linux-based NFSv4/v4.1 protocol
- Shared access from multiple EC2 instances
- Automatic scaling up to petabytes
- High availability across multiple AZs
- Pay-as-you-go pricing model
- Supports containers (ECS, EKS), Lambda, and on-premises access
                 +---------------------+
 EC2 Instance 1 →|                     |← EC2 Instance 2
                 |        EFS          |
 EC2 Instance 3 →| (Shared File System)|← EC2 Instance 4
                 +---------------------+
4.2 EFS Architecture (NFSv4, Mount Targets, Regional Scope)
EFS uses NFSv4 protocol and provides mount targets in each Availability Zone.
📌 Architecture Diagram
                AWS Region
        ┌─────────────────────────────┐
        │        EFS File System      │
        └─────────────────────────────┘
             /         |          \
            /          |           \
     Mount Target  Mount Target   Mount Target
       (AZ-a)         (AZ-b)        (AZ-c)
          |              |              |
      EC2 in a       EC2 in b       EC2 in c
Key Architecture Components
- NFSv4.1 Protocol – Used by EC2 to mount EFS
- Mount Targets – One per AZ, required for access
- Multi-AZ redundant storage
- Regional Service – Automatically spreads data across multiple AZs
4.3 EFS Storage Classes (Standard vs Infrequent Access)
EFS automatically stores files in two storage classes based on how often data is accessed.
| Storage Class | Description | Pricing |
|---|---|---|
| EFS Standard | For frequently accessed data | Higher cost |
| EFS Standard-IA | For infrequently accessed data | Lower cost |
4.4 EFS Performance Modes (General Purpose vs Max I/O)
EFS provides two performance modes based on application needs.
| Mode | Best For | Description |
|---|---|---|
| General Purpose | Web apps, CMS, dev environments | Low latency, best for everyday workloads |
| Max I/O | Big data, analytics, large-scale workloads | Higher latency but massive throughput |
4.5 Throughput Modes (Bursting, Provisioned, Elastic)
EFS supports flexible throughput modes to optimize performance.
- Bursting Throughput – Default, scales with file size
- Provisioned Throughput – Set throughput manually
- Elastic Throughput – Automatically adjusts to workload
4.6 EFS vs EBS vs S3 (When to Choose What?)
| Service | Type | Best Use Case |
|---|---|---|
| EFS | Shared file system (NFS) | Shared storage for EC2, containers |
| EBS | Block storage | Disk for a single EC2 instance |
| S3 | Object storage | Backups, media, big data, static websites |
4.7 Step-by-Step: Creating an EFS File System
- Open EFS Console
- Click Create File System
- Select VPC and enable mount targets
- Choose performance & lifecycle policies
- Enable encryption (recommended)
- Click Create
4.8 Step-by-Step: Mount EFS on EC2 (Amazon Linux, Ubuntu)
A. Amazon Linux
sudo yum install -y amazon-efs-utils
sudo mkdir /efs
sudo mount -t efs fs-12345678:/ /efs
B. Ubuntu
sudo apt install -y nfs-common
sudo mkdir /efs
sudo mount -t nfs4 -o nfsvers=4.1 fs-12345678.efs.region.amazonaws.com:/ /efs
4.9 EFS Access Points (Simplified Multi-User Access)
EFS Access Points provide application-specific entry points for different user groups.
- Define user UID/GID
- Define root directory
- Control permissions
4.10 EFS Backup, Replication & Lifecycle Management
- AWS Backup – Automated daily/weekly backups
- Lifecycle Management – Move files to IA after X days
- Regional Replication – Copy data to another region
4.11 EFS Security (IAM, KMS Encryption, SGs, NACLs)
EFS uses multiple security layers to protect data at rest and in transit.
🔐 1. Encryption
- At Rest – AES-256 using AWS KMS
- In Transit – TLS encryption using EFS mount helper
sudo mount -t efs -o tls fs-12345678:/ /efs
🛡 2. Security Groups
- Allow inbound NFS port 2049
- Restrict access to only required EC2/containers
🚧 3. NACL Rules
- Allow NFS (2049) inbound and outbound
- Block unused ports for subnet protection
👤 4. IAM Permissions
IAM controls who can create, delete, or modify EFS settings.
📁 5. EFS Access Points
Set per-user UID/GID + root directory permissions.
4.12 EFS Monitoring with CloudWatch
CloudWatch provides metrics to track performance, usage, and errors.
| Metric | Description |
|---|---|
| BurstCreditBalance | Tracks how much throughput credit is left |
| ClientConnections | Number of EC2 instances connected |
| DataReadIOBytes | Total bytes read |
| DataWriteIOBytes | Total bytes written |
| PercentIOLimit | Shows if filesystem is throttled |
4.13 EFS Use Cases (Web Apps, CMS, Containers, ML)
- Web Applications – Shared images, media, user uploads
- WordPress / Joomla CMS – Shared wp-content directory
- Microservices – Shared config files
- Machine Learning – Shared datasets across multiple compute nodes
- CI/CD Pipelines – Shared build artifacts
- Container Storage – EKS/ECS persistent storage
4.14 Real-World Architecture Scenarios
📘 Scenario 1: WordPress on EC2 + EFS
Load Balancer
      ↓
   EC2 x 2
      ↓
   Shared EFS
Ensures identical wp-content across all servers.
📘 Scenario 2: EKS Cluster Shared Storage
EKS Pods → EFS CSI Driver → EFS File System
Pods get persistent, shared storage.
📘 Scenario 3: Big Data Processing
Compute Nodes (EC2/EKS)
        ↓
Shared EFS Dataset
Multiple systems process the same dataset.
📘 Scenario 4: Hybrid Cloud Access
On-Prem Server
      ↓  VPN / Direct Connect
     EFS
On-prem servers access EFS using NFS protocol.
4.15 EFS Best Practices & Cost Optimization
💰 Cost Optimization
- Enable Lifecycle Policy → Move unused files to IA
- Use Elastic Throughput unless consistent workload
- Delete unused mount targets
- Use access points to restrict directories
⚡ Performance Best Practices
- Use General Purpose mode for low-latency workloads
- Use Max I/O for large-scale distributed systems
- Use mount option
tlsfor secure in-transit encryption - Spread EC2s across AZs for high availability
🛡 Security Best Practices
- Restrict NFS (2049) in security groups
- Encrypt at rest using KMS
- Use IAM + Access Points for multi-user setups
Module 05 : Security, Identity & Compliance
In this module, you will learn the core building blocks of AWS security: Identity & Access Management (IAM), Organizations, encryption using KMS, network protection tools like AWS WAF and Shield, along with global compliance programs. These topics form the backbone of cloud security and are essential for both administrators and security learners.
IAM = Who can access?
Policies = What can they do?
Organizations = Manage multiple AWS accounts
KMS = Encrypt data
WAF/Shield = Protect apps from attacks
Compliance = Meet international laws & rules
5.1 AWS Identity & Access Management (IAM)
🔐 What is IAM?
IAM is AWS’s security system for controlling access to AWS services. It decides:
- ✔ Who can log in?
- ✔ What are they allowed to do?
- ✔ Which AWS services can they use?
👤 IAM Components Explained Simply
- Users – One person = one user
- Groups – A collection of users (e.g., Admins, Developers)
- Roles – Access given to AWS services (not people)
- Policies – Permission documents written in JSON
📌 How Authentication Works
- Username + password
- MFA (extra layer of security)
- Access keys (programmatic access)
🔒 IAM Best Practices (Expanded)
- Enable MFA for all users
- Never use the root account for daily tasks
- Use IAM roles for EC2, Lambda, EKS etc.
- Apply least privilege (give only needed permissions)
- Use strong password policies
- Rotate access keys every 90 days
- Use IAM Access Analyzer to detect risky permissions
🔍 IAM Console Overview (Easy Visual Guide)
+------------------------------+
| IAM Dashboard                |
+------------------------------+
| Users                        |
| Groups                       |
| Roles                        |
| Policies                     |
| Identity Providers           |
| Access Analyzer              |
+------------------------------+
🧑💻 How to Create an IAM User (Step-by-Step Guide)
Follow these simple steps to create an IAM user in AWS with proper permissions.
-
Login to AWS Console
Open https://aws.amazon.com/console and sign in using your root or admin account. -
Open the IAM Service
Search for IAM in the console search bar and click on it. -
Go to “Users”
On the left sidebar → click Users → then click the blue Add users button. -
Enter Username
Example:developer-01,admin-user -
Select AWS Access Type
- Password → If the user logs in to AWS console
- Access Key → If access is needed for CLI or code
-
Assign User to a Group
Best practice: Put users in groups instead of giving permissions directly.
Example groups:- AdminGroup
- DeveloperGroup
- ReadOnlyGroup
-
Attach Permissions
You may select from AWS managed policies such as:AdministratorAccessAmazonS3FullAccessReadOnlyAccess
-
Review and Create User
Verify details → Click Create User. -
Download Credentials
AWS shows:- Password (for console login)
- Access Key + Secret Key (for CLI/programmatic access)
⚠ Important: Download the credentials CSV file. AWS will NOT show the secret key again. -
Enable MFA (Highly Recommended)
Go to user → Security Credentials → Assign MFA.
Options:- Authy
- Google Authenticator
- AWS Virtual MFA App
IAM User Creation Summary:
--------------------------
1. Login to AWS Console
2. Open IAM → Users → Add User
3. Provide username
4. Select access type (Console / Programmatic)
5. Add user to a group
6. Attach permissions
7. Create user
8. Download credentials
9. Enable MFA (best practice)
🔒 Enabling MFA (Multi-Factor Authentication)
MFA (Multi-Factor Authentication) adds an extra layer of security by requiring something you know (password) + something you have (phone or hardware token). Even if someone steals your password, they cannot log in without your MFA device.
✔ Root Account (highest priority)
✔ Admin-level IAM Users
✔ Any user managing production or sensitive data
🧠 Why MFA Is IMPORTANT?
- ✔ Prevents unauthorized access
- ✔ Protects your AWS billing & sensitive resources
- ✔ Blocks attackers even if passwords are leaked
- ✔ Required for AWS best practices & certifications
- ✔ Helps pass security audits
MFA can stop almost all of them.
📌 Types of MFA in AWS (Easy Explanation)
| MFA Type | Description | Best For |
|---|---|---|
| 🟢 Virtual MFA (Mobile App) | Use apps like Google Authenticator, Authy, Microsoft Authenticator | Most users (free + easy) |
| 🔵 Hardware Security Key | Physical device like YubiKey | Admins, high-security environments |
| 🟠 Hardware TOTP Token | Pocket device generating codes | Organizations needing offline devices |
📌 Steps to Enable MFA (Very Easy Guide)
- Go to the IAM Console
Search for IAM in AWS search bar. - Open “Users”
Choose the user who needs MFA. - Go to "Security Credentials"
Scroll until you see Multi-Factor Authentication (MFA). - Click “Assign MFA Device”
- Select MFA Type
- 🟢 Virtual MFA → easiest (mobile app)
- 🔵 Security Key → USB/NFC key
- 🟠 Hardware Token
- For Virtual MFA
Steps:- Install Google Authenticator / Authy
- Click "Show QR Code" in AWS
- Open app → Scan the QR code
- Enter the two MFA codes
Your app shows a 6-digit code that changes every 30 seconds.
AWS will ask for:- 🔢 Code 1
- 🔢 Code 2 (after it refreshes)
- Click “Assign” to save the MFA setup.
- Test your MFA
Logout and try logging in again → you should be prompted for an MFA code.
🔐 Bonus: Enable MFA for Root Account (Highly Recommended)
The root account has FULL access. If it is compromised, your entire AWS account is at risk.
Steps to enable root MFA:
- Login as Root
- Go to My Security Credentials
- Find MFA
- Click Activate MFA
- Select Virtual MFA
- Scan QR code and enter two codes
🛡 Additional Best Practices for MFA
- ✔ Use Authy instead of Google Authenticator (supports cloud backup)
- ✔ Store recovery codes safely
- ✔ Use MFA for AWS CLI (use AWS MFA token-based STS credentials)
- ✔ Never share MFA device with anyone
- ✔ For companies: enforce MFA with IAM policies & SSO
4.2 Roles, Groups & Policy Structure
👥 IAM Users vs Groups (Expanded)
| Users | Groups |
|---|---|
| Individual accounts | Collection of users |
| Permissions apply to one user | Permissions apply automatically to members |
| Examples: Dev1, Admin1 | Examples: Dev-Team, Admin-Group |
🎭 IAM Roles Explained Simply
Roles are used when an AWS service needs permissions.
📄 Example JSON Policy Breakdown
"Effect": "Allow"    -> permission given
"Action": "s3:*"     -> what actions allowed
"Resource": "*"      -> on which resource
🧠 Inline vs Managed Policies (Expanded)
- Inline Policy – Attached to a single user/role. Not reusable.
- AWS Managed Policy – Predefined by AWS.
- Customer Managed Policy – Best option for custom needs.
5.3 AWS Organizations & Service Control Policies (SCPs)
🏢 Why Organizations Are Needed?
- Manage multiple AWS accounts
- Apply central security rules
- Enable consolidated billing
- Isolate workloads (prod vs dev)
📌 Example Structure
Root Account
 ├── OU: Production
 │    ├── Prod-App
 │    └── Prod-Database
 ├── OU: Development
 │    ├── Dev-App
 │    └── Dev-Testing
 └── OU: Security
      └── Logging Account
🧩 What Are SCPs? (Simple)
SCPs set the "maximum boundary" of permissions for accounts:
- If SCP denies → IAM cannot allow
- If SCP allows → IAM decides
📌 Real Example Use
- Deny creation of expensive EC2 instance types
- Block regions (e.g., deny all except Asia regions)
- Force encryption of resources
5.4 AWS KMS – Key Management Service
🔑 Why Encryption Matters?
Encryption protects data even if storage is leaked.
🧠 Types of Encryption Keys
| Type | Description |
|---|---|
| AWS Managed Key | Automatically created by AWS |
| Customer Managed Key | User controls rotation, usage, access |
| CloudHSM Key | Hardware-level keys |
📦 KMS Integrated Services
- S3 Server-side encryption
- EBS volume encryption
- RDS encryption
- Lambda environment encryption
- Secrets Manager
5.5 AWS Shield, WAF & DDoS Protection
🛡 Shield Standard vs Shield Advanced
| Shield Standard | Shield Advanced |
|---|---|
| Free | Paid |
| Basic DDoS protection | 24/7 response team |
| Automatic | Detailed attack visibility |
🌐 AWS WAF Features (Expanded)
- IP blocking/allowing
- Geo-restriction
- Rate limiting (slow down attackers)
- Bot Control
- OWASP protection rules
5.6 Compliance Programs (SOC, ISO, GDPR)
📜 Why Compliance Exists
Governments and companies require cloud services to follow strict security rules.
📌 Major Certifications (Expanded)
- SOC 1: Financial reporting controls
- SOC 2: Security, privacy, availability controls
- SOC 3: Public report for compliance
- ISO 27001: Global security standard
- GDPR: EU data protection law
- HIPAA: Healthcare data compliance (US)
- PCI-DSS: Payment card data protection
🛡 Shared Responsibility Model (Expanded)
| AWS Responsibility | Customer Responsibility |
|---|---|
| Data center security | User access controls |
| Hardware & networking | Encrypting data |
| Virtualization layer | OS patching & updates |
| Global infrastructure | Secure app development |
Module 06 : Application Deployment & Automation
This module covers AWS services used for automating deployments, managing application stacks, serverless functions, CI/CD pipelines, and infrastructure automation. Each topic is simplified with diagrams, workflows, and real-world use cases.
6.1 AWS Elastic Beanstalk
🌱 What is Elastic Beanstalk?
AWS Elastic Beanstalk is a fully managed service that handles deployment, scaling, load balancing, monitoring of applications for you.
🎯 Key Features
- Supports Java, Python, Node.js, Go, PHP, Ruby, .NET
- Auto creates EC2, ASG, ALB, Security Groups
- Built-in monitoring via CloudWatch
- Zero-downtime deployments
- Fully managed scaling
📦 Elastic Beanstalk Architecture
You Upload Your Code
        ↓
Elastic Beanstalk Environment
        ↓
EC2 Instances + Auto Scaling + Load Balancer
        ↓
Application Runs Smoothly
🚀 Deploying an App (Console)
- Go to Elastic Beanstalk
- Create Application → Choose Platform
- Upload ZIP file
- Beanstalk creates environment automatically
6.2 AWS CloudFormation (Infrastructure as Code)
🏗️ What is CloudFormation?
AWS CloudFormation lets you define AWS resources as code using YAML or JSON templates.
🎯 Why Use It?
- Automated provisioning
- Repeatable infrastructure
- Rollback support
- Version-controlled infra
- No manual mistakes
📄 Sample CloudFormation Template
Resources:
  MyInstance:
    Type: AWS::EC2::Instance
    Properties:
      InstanceType: t2.micro
      ImageId: ami-0abcdef123456789
6.3 AWS Lambda – Serverless Computing
⚡ What is AWS Lambda?
AWS Lambda runs your code without servers. You pay only for execution time.
🎯 Lambda Features
- Runs code on demand
- Scales automatically
- Integrates with 200+ AWS services
- Supports Python, Node.js, Java, Go, .NET
🧪 Example Lambda Function
exports.handler = async (event) => {
  return "Hello from Lambda!";
};
6.3a Lambda Architecture & Event Model
⚙️ Lambda Workflow
Event Trigger (S3 / API / Cron)
        ↓
Lambda Function
        ↓
Sends output (DB, S3, API)
🔹 Invocation Types
- Synchronous – user waits for response
- Asynchronous – queued & executed later
- Event Source Mapping – SQS, Kinesis, DynamoDB streams
6.3b Lambda Triggers & Integrations
- S3 Upload Events
- API Gateway (REST / HTTP APIs)
- SQS messages
- CloudWatch Events
- DynamoDB Streams
- Cognito Triggers
6.3c Lambda Execution Role (IAM)
Lambda needs permissions to access other AWS services.
{
 "Effect": "Allow",
 "Action": "s3:*",
 "Resource": "*"
}
6.3d Lambda Pricing, Concurrency & Scaling
- Pay per millisecond
- FREE 1M requests per month
- Automatic scaling up to thousands of invocations
- Reserved Concurrency prevents overload
6.3e Monitoring Lambda with CloudWatch
- Execution time
- Memory usage
- Errors / Timeouts
- Cold starts
6.3f Deploying Lambda (ZIP, Containers, CI/CD)
- Upload ZIP file
- Use container images
- Deploy via CodePipeline
- Integrate with SAM or Serverless Framework
6.3g Lambda Best Practices & Real-World Use Cases
Best Practices
- Keep functions lightweight
- Use environment variables
- Enable CloudWatch logging
- Use VPC carefully (may slow cold starts)
Use Cases
- S3 file processing
- Real-time API backend
- Chatbot automation
- Scheduled tasks
- Image resizing
6.4 API Gateway & Integration
🌐 What is API Gateway?
API Gateway manages APIs at scale — authentication, rate limiting, caching, logging.
🎯 Features
- Creates REST & HTTP APIs
- Integrates with Lambda
- Request validation
- Custom domain support
📦 Use Cases
- Serverless APIs
- Mobile backend
- Microservices routing
6.5 CI/CD with AWS CodePipeline
🔄 What is CodePipeline?
CodePipeline automates code build → test → deploy steps.
🧱 CI/CD Pipeline Flow
Code Commit → Build (CodeBuild) → Test → Deploy (Beanstalk / Lambda / ECS)
🎯 Benefits
- Automated deployments
- Integrates with GitHub
- Zero-downtime releases
Module 07 : Monitoring, Logging & Troubleshooting
This module teaches you how AWS helps monitor applications, audit activity, track configuration changes, and fix common operational issues. Monitoring is critical for performance, cost control, compliance, and security.
CloudWatch = Performance monitoring (CPU, RAM, logs, alarms)
CloudTrail = User activity logs (Who did what?)
Trusted Advisor = Recommendations (cost, security, performance)
AWS Config = Tracks resource changes over time
Troubleshooting = Fixing common AWS issues
7.1 AWS CloudWatch (Metrics, Alarms, Dashboards)
📊 What is CloudWatch?
Amazon CloudWatch is a monitoring and observability service that helps you track performance, detect issues, and automate actions for AWS resources and applications.
- 📈 Metrics – CPU, Memory, Network, Disk, Lambda duration, RDS CPU, etc.
- 📜 Logs – Application logs, system logs, VPC flow logs, Lambda logs.
- 🔔 Alarms – Trigger notifications/actions when metrics cross thresholds.
- 📊 Dashboards – Visual graph panels to monitor apps & infrastructure.
📈 CloudWatch Metrics
Metrics are numeric measurements reported by AWS services or custom applications. AWS services send metrics every 1 minute or 5 minutes.
| Service | Common Metrics |
|---|---|
| EC2 | CPUUtilization, NetworkIn/Out, DiskReadOps, StatusCheckFailed |
| Lambda | Invocations, Errors, Duration, Throttles |
| S3 | BucketSizeBytes, NumberOfObjects, AllRequests |
| RDS | CPUUtilization, FreeStorageSpace, DatabaseConnections, ReadIOPS |
| API Gateway | Latency, 4XX Errors, 5XX Errors |
| DynamoDB | ConsumedReadCapacityUnits, ThrottledRequests |
📌 How to View CloudWatch Metrics
- Open AWS Console → CloudWatch
- Click Metrics from the left menu
- Select the service (EC2, Lambda, RDS, S3, etc.)
- Choose the metric namespace (e.g., AWS/EC2)
- Click on any metric to view graph
🔔 CloudWatch Alarms
CloudWatch Alarms monitor metrics and perform actions when thresholds are crossed.
- Send SNS Emails/SMS Notifications
- Trigger Auto Scaling actions
- Stop / Reboot / Terminate EC2 instances
- Trigger Lambda Functions for automation
🛠 How to Create a CloudWatch Alarm (Step-by-Step)
- Go to CloudWatch → Alarms
- Click Create Alarm
- Select a Metric (Example: EC2 → CPUUtilization)
- Click Select Metric
- Set a Threshold
Example → Trigger alarm if: CPUUtilization ≥ 80% for 5 minutes. - Choose Alarm State:
- ALARM – threshold breached
- OK – metric back to normal
- INSUFFICIENT_DATA – no data available
- Select SNS Notification (email/SMS)
- Review and click Create Alarm
📊 CloudWatch Dashboards
CloudWatch Dashboards help you visualize metrics across AWS services in a single panel. You can add:
- Line charts
- Number widgets
- Metrics from multiple AWS regions
- Logs widgets
🛠 How to Create a CloudWatch Dashboard
- Go to CloudWatch → Dashboards
- Click Create Dashboard
- Enter Dashboard Name
- Select Widget Type:
- Line
- Stacked Area
- Number
- Bar
- Text
- Select Metrics → (Example: EC2 → CPUUtilization)
- Customize Time Range (5m, 1h, 24h, 7d)
- Save Dashboard
🖥 CloudWatch Agent (Collect Custom Metrics)
To collect EC2 Memory & Disk metrics, install CloudWatch agent.
📌 Install Agent on EC2 (Linux)
sudo yum install amazon-cloudwatch-agent -y
sudo /opt/aws/amazon-cloudwatch-agent/bin/amazon-cloudwatch-agent-config-wizard
sudo systemctl start amazon-cloudwatch-agent
💰 CloudWatch Pricing (Important)
- Basic Metrics – Free (5-min intervals)
- Detailed EC2 Metrics (1-min) – Paid
- Logs – Charged per GB ingested & stored
- Dashboards – ~$3 per month per dashboard
- Alarms – ~$0.10 per month per alarm
🏆 Best Practices
- Enable Alarms for CPU, Memory, Network & Status Checks
- Monitor Billing using CloudWatch Billing Alarm
- Send logs to CloudWatch Logs from EC2, Lambda, ECS
- Use Log Insights to query application logs
- Create a centralized dashboard for production systems
7.2 AWS CloudTrail – Auditing & Logs
🛡 What is CloudTrail?
AWS CloudTrail is a security, governance, and auditing service that records all API-level activities performed in your AWS account. It provides complete visibility into actions taken by users, roles, services, and automated processes.
CloudTrail clearly answers the following critical security questions:
- 👤 Who performed the action (IAM user, role, root, or service)?
- ⏰ When was the action performed?
- 🛠 What AWS API action was executed?
- 🚀 From where (IP address, region, service)?
- ⚙ How (Console, CLI, SDK, automation)?
📋 CloudTrail Logs Example
Below is a simplified example of a CloudTrail log entry that records an EC2 action:
{
  "eventTime": "2026-01-10T08:32:41Z",
  "eventName": "StartInstances",
  "eventSource": "ec2.amazonaws.com",
  "userIdentity": {
      "type": "IAMUser",
      "userName": "Admin"
  },
  "sourceIPAddress": "192.168.0.10",
  "awsRegion": "us-east-1",
  "userAgent": "aws-cli/2.15.0"
}
🌟 Why CloudTrail is Important?
- 🔐 Detect unauthorized or suspicious access
- 🕵️ Perform incident investigation & forensics
- 📜 Maintain compliance (ISO, SOC, PCI-DSS)
- 🔁 Track configuration changes over time
- 🛠 Troubleshoot unexpected AWS behavior
📝 CloudTrail Event Types
CloudTrail records different types of events depending on what kind of activity you want to monitor.
-
Management Events
Control-plane operations such as:- EC2 start / stop / terminate
- IAM user, role, and policy changes
- VPC, security group, and route table updates
-
Data Events
Data-plane operations such as:- S3 object upload, download, delete
- Lambda function invocations
- DynamoDB item-level access
-
CloudTrail Insights Events
Automatically detect unusual or abnormal behavior, such as:- Sudden spikes in API calls
- Unexpected IAM activity
- Anomalous resource provisioning
🗂 Where CloudTrail Logs Are Stored
- 📦 Amazon S3 – Long-term storage & compliance
- 📊 CloudWatch Logs – Real-time monitoring & alerts
- 🔎 Athena – Query and analyze logs using SQL
7.2.1 How to Create AWS CloudTrail (Step-by-Step Guide)
✅ Prerequisites
- ✔ Active AWS Account
- ✔ IAM permissions: CloudTrail, S3, CloudWatch
- ✔ Access to AWS Management Console
🔐 Step 1: Open CloudTrail Console
- Login to AWS Management Console
- Search for CloudTrail
- Click Create trail
📝 Step 2: Configure Trail Settings
- Trail Name: organization-security-trail
- Apply to all regions: ✅ Yes
📦 Step 3: Configure Log Storage (S3)
- Create a new S3 bucket (recommended)
- Enable Log File Validation
- Enable Encryption (SSE-KMS)
🗝 Step 4: Configure KMS Encryption
- Select Customer Managed KMS Key
- Create or choose existing key
- Allow CloudTrail to use the key
📋 Step 5: Select Event Types
-
Management Events
- IAM changes
- EC2 start / stop
- VPC configuration updates
-
Data Events (Optional)
- S3 object access
- Lambda invocations
- DynamoDB item-level actions
-
CloudTrail Insights
- API call anomalies
- Suspicious IAM behavior
📡 Step 6: Enable CloudWatch Integration
- Enable CloudWatch Logs
- Create Log Group
- Allow IAM role creation
🚨 Step 7: Create Security Alerts
- Root account login detection
- IAM policy changes
- Security group open to 0.0.0.0/0
- EC2 launch outside business hours
🔍 Step 8: Verify CloudTrail Logs
- Go to Event History
- Perform any AWS action
- Confirm event appears in logs
AWSLogs/
 └── ACCOUNT-ID/
     └── CloudTrail/
         └── us-east-1/
🔎 Step 9: Log Analysis Using Athena
SELECT eventName,
       userIdentity.userName,
       sourceIPAddress
FROM cloudtrail_logs
WHERE eventName = 'ConsoleLogin';
⚠ Common Mistakes
- ❌ CloudTrail enabled in only one region
- ❌ No encryption
- ❌ No CloudWatch alerts
- ❌ Public S3 bucket
CloudTrail is the backbone of AWS security auditing.
Proper configuration = Full visibility.
🔔 Real-Time Monitoring & Alerts
CloudTrail becomes extremely powerful when integrated with CloudWatch:
- 🚨 Root account login detection
- 🚨 IAM policy or role changes
- 🚨 Security group opened to public (0.0.0.0/0)
- 🚨 EC2 instances launched outside business hours
⚠ Security & Best Practices
- ✔ Enable CloudTrail in all regions
- ✔ Enable log file validation
- ✔ Encrypt logs using KMS
- ✔ Restrict S3 access with IAM policies
- ✔ Monitor root account activity continuously
If CloudTrail is enabled, you can see everything.
If CloudTrail is disabled, you are operating blind.
7.3 AWS Trusted Advisor
🤝 What is Trusted Advisor?
Trusted Advisor gives recommendations for improving:
- 💰 Cost Optimization
- 🛡 Security
- ⚡ Performance
- 🔁 Fault Tolerance
- 🚀 Service Limits
📌 Example Recommendations
- Delete idle EC2 instances
- Enable MFA on root account
- Reduce under-utilized RDS instances
- Fix open security groups
🔐 Trusted Advisor Access Levels
| AWS Support Plan | Access Level |
|---|---|
| Basic / Developer | Limited Checks |
| Business / Enterprise | Full Checks |
7.4 AWS Config – Resource Tracking
🧭 What is AWS Config?
AWS Config tracks every configuration change in your AWS resources.
🔍 What Config Can Do?
- Track changes over time
- Show resource relationships
- Check compliance (e.g., S3 encryption ON?)
- Automate remediation
🧩 Example Configuration Timeline
EC2 Instance:
 - Jan 10 → Security Group changed
 - Jan 12 → IAM Role updated
 - Jan 20 → Volume attached
⚙ How Compliance Rules Work
- All S3 buckets must be encrypted
- No public security groups allowed
- EC2 instances must use approved AMIs
7.5 Troubleshooting Common AWS Errors
🐞 Common AWS Issues & Fixes
| Error | Cause | Fix |
|---|---|---|
| EC2 not reachable | Security group / NACL issue | Allow inbound ports (SSH/HTTP) |
| AccessDenied | IAM policy missing | Attach or update IAM inline/policy |
| Instance limit exceeded | AWS quota reached | Request limit increase |
| S3 Access Denied | Bucket policy mismatch | Update bucket policy or IAM role |
| RDS Connection Error | DB not public / SG misconfigured | Update SG, ensure port open |
🧠 Troubleshooting Tools
- VPC Flow Logs → Network traffic
- CloudWatch Logs → Application issues
- AWS Config → Misconfiguration
- CloudTrail → Unauthorized access
- IAM Access Analyzer → Risky permissions
Module 08 : Designing for High Availability & Cost Optimization
This module teaches you how to design highly available, fault-tolerant, scalable, and cost-efficient architectures on AWS. You will understand multi-AZ setups, multi-region design, caching, load balancing, and pricing models – all explained in a simple and practical way.
• High Availability = Your app stays online even during failures.
• Fault Tolerance = System continues working even if components fail.
• Cost Optimization = Reduce costs without affecting performance.
• Multi-AZ = Protection within a region.
• Multi-Region = Protection across continents.
8.1 Fault-Tolerant Architectures
🧱 What is Fault Tolerance?
Fault-tolerant design ensures your application continues to run even if certain components fail. AWS provides multiple services and design principles to achieve this.
🔧 Key AWS Fault Tolerance Tools
- Auto Scaling Groups (ASG) – automatically replaces failed instances
- Elastic Load Balancing (ELB) – distributes traffic across healthy targets
- Multi-AZ Deployment – duplicate resources across Availability Zones
- RDS Multi-AZ Failover – standby database takes over automatically
- S3 Cross-Region Replication – data replicated to multiple regions
🏗 High Availability Architecture Diagram
Users
   │
   ▼
Load Balancer
   │
   ├── EC2 Instance (AZ-1)
   └── EC2 Instance (AZ-2)
Both behind ASG (Self-healing)
✔ Best Practices
- Spread workloads across multiple AZs
- Use auto healing (ASG + CloudWatch alarms)
- Use managed services like RDS, EKS, Elastic Beanstalk
- Enable S3 versioning & replication for critical files
8.2 Multi-AZ vs Multi-Region Design
🌐 What is Multi-AZ?
Multi-AZ means deploying resources across multiple availability zones within the same region.
🌍 What is Multi-Region?
Multi-region means deploying applications in different AWS regions (e.g., Mumbai + Singapore + USA).
📌 Multi-AZ vs Multi-Region (Easy Comparison)
| Feature | Multi-AZ | Multi-Region |
|---|---|---|
| Distance | Few kms | Thousands of kms |
| Latency | Low | High |
| Cost | Medium | High |
| Use Case | High availability | Disaster recovery |
| Database Failover | Automatic | Manual/Automated (custom) |
🧠 When to use Multi-Region?
- Global applications (Netflix, Facebook)
- Disaster recovery (RTO < 1 hour)
- Country-specific compliance laws
8.3 Load Balancing Strategies
⚖ What is Load Balancing?
Load balancing distributes incoming traffic across multiple servers to ensure no single server becomes overloaded.
🧩 AWS Load Balancer Types
- Application Load Balancer (ALB) – HTTP/HTTPS, routing by URL
- Network Load Balancer (NLB) – TCP/UDP, high-performance
- Gateway Load Balancer (GWLB) – For virtual appliances
🔍 ALB Use Cases
- Microservices
- Path-based routing
- Host-based routing
- WebSocket applications
⚡ NLB Use Cases
- VoIP, gaming traffic
- Millions of requests per second
- Low latency apps
📡 Global Load Balancing with Route 53
Route 53 provides traffic routing across regions.
- Latency-based routing
- Geolocation routing
- Weighted routing
- Failover routing
8.4 Caching (CloudFront, ElastiCache)
⚡ What is Caching?
Caching stores frequently accessed data closer to users for fast performance.
🌎 CloudFront (CDN)
CloudFront caches content at more than 500+ edge locations worldwide.
- Faster website delivery
- Protection using AWS Shield
- Supports video streaming
- Reduces load on origin servers
🧠 ElastiCache
- Redis – in-memory database & caching engine
- Memcached – simple in-memory cache
📌 Use Cases
- Session management
- Leaderboard gaming apps
- Caching frequent DB queries
- Real-time analytics
8.5 AWS Pricing Models & Cost Explorer
💰 AWS Pricing Models
There are four major pricing models in AWS:
- On-Demand – Pay per hour/second
- Reserved Instances – 1-year/3-year commitment (up to 72% cheaper)
- Spot Instances – Up to 90% discount (can be interrupted)
- Savings Plans – Flexible discount for EC2, Lambda, Fargate
📊 AWS Cost Explorer
Cost Explorer helps you analyze spending patterns and identify cost-saving opportunities.
- Visualize bills
- Detect cost spikes
- Create budgets & alerts
- Identify unused resources
🧠 Cost Optimization Tips
- Stop unused EC2 instances
- Use S3 lifecycle rules
- Use Spot instances for testing
- Use auto scaling to match demand
- Enable Trusted Advisor cost checks
Module 09 : Exam Preparation & Real-World Scenarios
This module prepares you for AWS exam success and real-world architecture challenges. You will learn the AWS Well-Architected Framework, solve real-world scenarios, analyze common exam questions, prepare using tips, and explore recommended labs to strengthen hands-on understanding.
• AWS exams test concepts + real-world decision-making.
• You don’t memorize — you understand architecture patterns.
• The Well-Architected Framework is the backbone of exam thinking.
9.1 AWS Well-Architected Framework
📘 What is the AWS Well-Architected Framework?
The AWS Well-Architected Framework provides a set of best practices to design, build, and maintain secure, high-performing, resilient, and efficient cloud applications.
🏛 The Six Pillars
- 1. Operational Excellence – Monitoring, observability, automation
- 2. Security – IAM, KMS, WAF, least privilege, encryption
- 3. Reliability – Multi-AZ, failure recovery, auto scaling
- 4. Performance Efficiency – right resource selection, scaling
- 5. Cost Optimization – pricing models, tagging, budgets
- 6. Sustainability – energy usage, efficient architectures
📌 Why This Matters for the Exam?
- Used to answer architecture questions
- Helps identify best & wrong solutions
- Guides exam mindset: scalable, secure, cost-effective
📊 Quick Example
| Pillar | Example Exam Logic |
|---|---|
| Reliability | Choose Multi-AZ over single AZ |
| Security | Enable encryption + IAM least privilege |
| Cost Optimization | Spot or Savings Plans instead of On-Demand |
9.2 Real-World Case Studies
🌍 Why Case Studies Matter?
Real-world use cases help you understand how AWS services work together. These scenarios appear in AWS exam questions and job interviews.
📌 Case Study 1: E-Commerce Website
- Frontend: CloudFront + S3
- Application: EC2 or ECS + ALB
- Database: RDS Multi-AZ
- Session Cache: ElastiCache Redis
- Scaling: Auto Scaling Groups
- Security: WAF + Shield
📌 Case Study 2: Data Analytics Company
- S3 data lake
- Athena for queries
- Glue for ETL
- Redshift for analytics
- Kinesis for real-time data
📌 Case Study 3: Mobile App Backend
- AWS Lambda + API Gateway
- DynamoDB for low-latency storage
- SNS/SQS for messaging
- Cognito for user authentication
9.3 Common Architecture Questions
📝 Common Question Patterns
Expect questions like:
- “Which AWS service should you use?”
- “Which architecture improves reliability?”
- “Which solution reduces cost?”
- “What service scales automatically?”
📌 Typical Exam Question Formats
- Best architecture choice (AWS recommended)
- Cost optimization (Spot Instances, S3 classes)
- High availability (Multi-AZ, ALB, ASG)
- Migration (Database migration, DMS, Snowball)
- Security (IAM roles, encryption)
📘 Example Question + Explanation
A company wants a highly available database with automatic failover.
Best Answer:
Use Amazon RDS Multi-AZ deployment.Why? – automatic failover
– synchronous replication
– no manual intervention
📘 Another Example
How to reduce EC2 cost for workloads running 24/7?
Best Answer:
Use EC2 Reserved Instances or Savings Plans.Why? – Up to 72% cheaper – Ideal for predictable workloads
9.4 Practice Exam Tips
📚 Exam Strategy
- Understand the question keywords: “high availability”, “cost”, “scalable”
- Eliminate obviously wrong answers first
- Focus on managed services: RDS, DynamoDB, Lambda
- AWS always prefers serverless when possible
🧠 Keyword Cheat Sheet
| Keyword | Best AWS Service |
|---|---|
| Event-driven | Lambda |
| Low latency global | CloudFront |
| Decouple systems | SQS/SNS |
| Real-time data | Kinesis |
| Managed DB | RDS/DynamoDB |
| Massive storage | S3 |
⏱ Time Management Tips
- Don’t spend more than 1 minute per question
- Flag difficult questions and return later
- Trust your first instinct — it's usually correct
9.5 Study Resources & Labs
🧪 Hands-On Labs (Essential)
- Launch an EC2 + ALB + Auto Scaling setup
- Create an S3 bucket with versioning & lifecycle rules
- Create a Lambda function with API Gateway
- Build a DynamoDB table + CRUD operations
- Monitor with CloudWatch Metrics, Logs, Alarms
- Create a VPC with public/private subnets
📚 Recommended Study Resources
- AWS Official Exam Guide
- AWS Skill Builder Courses
- ACloudGuru / Udemy Certification Courses
- WhizLabs or TutorialDojo Practice Exams
- AWS Documentation & Whitepapers
🎯 Final Advice
- Master core services (EC2, S3, RDS, Lambda, CloudFront)
- Understand multi-AZ, scaling & security concepts
- Practice scenario-based questions daily
Module 10 : Migration, Backup & Disaster Recovery
This module explains how organizations move their applications/data to AWS, how backups work, and how to design disaster recovery (DR) plans. You will learn AWS migration tools, backup services, and real-world DR architectures.
10.1 AWS Migration Strategies (6 Rs Model)
🚚 What is Migration?
Migration means moving your applications, databases, or entire data centers to AWS.
🧩 The 6 Rs Migration Model
- Rehost (Lift & Shift) – Move as-is to AWS (fastest)
- Replatform (Lift & Tweak) – Small improvements while migrating
- Refactor (Re-architect) – Rewrite application for cloud-native
- Repurchase – Move to SaaS (e.g., Salesforce)
- Retire – Remove unused resources
- Retain – Keep some apps on-prem temporarily
10.2 AWS Database Migration Service (DMS)
🗄️ What is AWS DMS?
DMS helps migrate databases to AWS with near-zero downtime.
📌 Supports
- Homogeneous (MySQL → MySQL)
- Heterogeneous (Oracle → PostgreSQL)
⚙ How DMS Works?
- Source database → DMS replication instance → Target database
- Continues syncing until cutover
10.3 AWS Server Migration Service (SMS)
🖥️ What is SMS?
AWS Server Migration Service migrates on-premises virtual machines (VMware, Hyper-V, Azure VMs) to AWS.
📌 Key Benefits
- Automated replication
- Incremental backups
- Test migrations easily
10.4 AWS DataSync & Transfer Family (SFTP, Snowball, Snowcone)
⚡ AWS DataSync
DataSync transfers large amounts of data between on-prem and AWS.
- 10× faster than traditional tools
- Automatic verification
- Supports S3, EFS, FSx
📁 AWS Transfer Family
- SFTP (Secure File Transfer)
- FTPS
- FTP (in controlled environments)
📦 AWS Snow Family
- Snowcone – Smallest device (8 TB)
- Snowball Edge – 80 TB+ storage
- Snowmobile – Exabyte-scale truck for huge migrations
10.5 Backup Strategies (Snapshots, Cross-Region Replication)
🧰 Types of Backups
- EBS Snapshots – Block-level backup
- RDS Snapshots – Database backups
- S3 Versioning – Stores old versions
- DynamoDB PITR – Point-in-time recovery
🌍 Cross-Region Backups
Used for disaster recovery and compliance.
- Copy EBS snapshots
- S3 Cross-Region Replication (CRR)
- RDS Cross-Region Read Replicas
10.6 AWS Backup – Centralized Backup Management
📦 What is AWS Backup?
AWS Backup is a centralized service to automate backups across AWS services.
📌 What Can AWS Backup Manage?
- EBS volumes
- RDS databases
- DynamoDB tables
- FSx file systems
- EFS
🔧 Backup Plans
Define:
- Backup frequency
- Retention period
- Lifecycle rules
10.7 Disaster Recovery Models (Pilot Light, Warm Standby, Multi-Site)
🔥 Why Disaster Recovery?
DR ensures business continuity when a region goes down due to natural disasters or failures.
🌐 DR Models (Ordered by Cost & Speed)
- Backup & Restore – Cheapest, slowest recovery
- Pilot Light – Minimal services running in DR region
- Warm Standby – Partial active setup in DR region
- Multi-Site (Active/Active) – Both regions fully active
10.8 Testing & Validating Recovery Plans
🧪 Why Test DR Plans?
A backup is only useful if you can restore it successfully.
📌 DR Testing Checklist
- Test failover to DR region
- Verify data integrity
- Ensure application performance
- Test restoring from snapshots
- Simulate region failures
📊 RTO & RPO
- RTO – Recovery Time Objective (How long to recover?)
- RPO – Recovery Point Objective (How much data loss accepted?)
Module 11 : Advanced Architecting & Best Practices
This module teaches professional AWS architecture patterns used in real-world systems. You will learn multi-tier designs, event-driven patterns, microservices, caching, automation, security, and cost optimization. Each section includes simple explanations + industry-level knowledge.
11.1 Designing Multi-Tier Architectures
🏗️ What Is a Multi-Tier Architecture?
A multi-tier (3-tier) architecture separates an application into:
- Presentation Layer — UI (e.g., React, HTML)
- Application Layer — Backend/API (Node, Python, Java)
- Database Layer — RDS, DynamoDB, Aurora
🧩 AWS Multi-Tier Example
- CloudFront + S3 for Static Frontend
- Application Load Balancer → EC2 / ECS
- RDS Multi-AZ as Database
- ElasticCache for performance
🧱 Best Practices
- Put backend servers in private subnets
- Use ALB to route traffic between layers
- Enable Multi-AZ for DB high availability
- Use Auto Scaling for the app layer
11.2 Event-Driven Architecture (SQS, SNS, EventBridge)
⚡ What Is Event-Driven Architecture?
In this architecture, components communicate by sending/receiving events instead of calling each other directly. This creates loose coupling, better scalability & reliability.
📬 Key AWS Services
- SNS – Pub/Sub messaging (fan-out notifications)
- SQS – Queue for background processing
- EventBridge – Event bus for automation & microservices
🌟 Real Example: Order Processing
- Order placed → Event sent to EventBridge
- Payment Service → via Lambda
- Inventory Update → via SQS queue
- Email Notification → via SNS
11.3 Microservices with ECS, EKS & Fargate
🧩 What Are Microservices?
Microservices break an application into small, independent components. Each service can scale, deploy & update separately.
🚢 AWS Container Services
- ECS – Container management service (simple)
- EKS – Managed Kubernetes (enterprise-scale)
- Fargate – Serverless containers (no servers to manage)
🧱 Architecture Example
- API Gateway → Microservice 1 (ECS)
- Microservice 2 (Lambda)
- Microservice 3 (EKS)
- DynamoDB / RDS as DB layer
11.4 Caching Layers (ElastiCache, CloudFront)
⚡ Why Caching?
Caching reduces server load, speeds up response time & improves user experience.
🔹 Types of Caching
- CloudFront – Global edge caching for websites/APIs
- ElastiCache (Redis / Memcached) – In-memory cache for DB queries
🐇 Common Use Cases
- Cache HTML, CSS, JS on CloudFront
- Cache DB results (Redis)
- Rate limiting using Redis
- Session management using Redis
11.5 Monitoring, Logging & Security Automation
📊 Monitoring Tools
- CloudWatch – Metrics, alarms, dashboards
- CloudTrail – API activity logs
- X-Ray – Application tracing
🛡️ Security Automation
- AWS Config → Auto-remediate misconfigurations
- GuardDuty → Threat detection
- Security Hub → Centralized security overview
11.6 Cost Optimization Using AWS Budgets & Cost Explorer
💰 Tools to Manage Cost
- Cost Explorer – Analyze usage & find cost spikes
- AWS Budgets – Alerts based on billing targets
- Compute Optimizer – Right-size EC2/RDS
📉 Cost Saving Best Practices
- Use Auto Scaling instead of fixed servers
- Use Reserved Instances for steady workloads
- Choose S3 Storage Classes wisely
- Stop unused EC2, RDS, and EBS volumes
11.7 AWS Architecture Design Best Practices
🏛️ AWS Well-Architected Pillars
- Operational Excellence
- Security
- Reliability
- Performance Efficiency
- Cost Optimization
- Sustainability
💡 Core Architecture Principles
- Design for failure (assume everything can break)
- Implement Auto Scaling everywhere
- Use managed services (RDS, ECS, SQS)
- Enable Multi-AZ for critical systems
- Use CDNs & caching
11.8 Real-World Architecture Scenarios & Reviews
🌍 Scenario 1: E-Commerce Website
- CloudFront + S3 → Static Website
- ALB → EC2 Auto Scaling
- RDS MySQL Multi-AZ
- ElastiCache (Redis) for sessions
- CloudWatch + GuardDuty
📱 Scenario 2: Mobile App Backend
- API Gateway
- AWS Lambda (serverless)
- DynamoDB (low latency)
- Cognito for authentication
📹 Scenario 3: Video Streaming Platform
- S3 for storage
- CloudFront for streaming
- Elastic Transcoder or MediaConvert
