Windows Tips For Normal Users
By Saurav Saini | 07 Aug 2022 | (0 Reviews)
Suggest Improvement on Windows Tips & Tricks for Normal Users — Click here
Windows Basics & Daily Usage – Beginner Friendly Guide
This module builds a strong foundation for normal Windows users. You will understand how Windows works, how to use it efficiently every day, and how to avoid common beginner mistakes.
1.1 Understanding Windows Versions (Windows 10 vs Windows 11)
Microsoft Windows is an operating system that allows users to interact with computer hardware, run applications, manage files, and access the internet.
Currently, most users use Windows 10 or Windows 11. Both are reliable, but Windows 11 introduces a modern design and newer features.
🆚 Windows 10 vs Windows 11
| Feature | Windows 10 | Windows 11 |
|---|---|---|
| Start Menu | Left-aligned, classic style | Center-aligned, modern UI |
| Performance | Stable and mature | Optimized for newer hardware |
| Hardware Requirement | Runs on older PCs | Requires TPM 2.0 & newer CPU |
| Support | Supported until Oct 2025 | Long-term future support |
1.2 Essential Windows Settings Every User Should Know
Windows Settings control how your system behaves. Knowing the basics helps improve performance, privacy, and usability.
⚙️ Must-Know Settings
- 🖥️ Display: Screen resolution, scaling, night light
- 🔊 Sound: Output device, microphone, volume
- 🔔 Notifications: Control app alerts
- 🔒 Privacy: Location, camera, microphone access
- ⚡ Power & Battery: Battery saver, sleep timing
1.3 Start Menu, Taskbar & System Tray Explained
These are the three most-used parts of Windows UI.
- Start Menu: Launch apps, search files, access settings
- Taskbar: Switch between running apps quickly
- System Tray: Wi-Fi, sound, battery, background apps
1.4 File Explorer Basics (Folders, Search, Views)
File Explorer helps you manage files and folders on your computer.
📁 Key Areas
- This PC: Shows drives and storage
- Documents / Downloads: User files
- Search Bar: Quickly find files
1.5 Keyboard Shortcuts That Save Hours
| Shortcut | Action |
|---|---|
| Win + E | Open File Explorer |
| Alt + Tab | Switch apps |
| Win + L | Lock computer |
| Ctrl + Shift + Esc | Open Task Manager |
| Win + Shift + S | Screenshot tool |
1.6 Managing Startup Apps for Faster Boot
Too many startup apps slow down Windows boot time.
⚡ How to Manage Startup Apps
- Press Ctrl + Shift + Esc
- Go to Startup tab
- Disable apps you don’t need at startup
Laptop Buying Guide – Beginner to Smart Buyer
Buying a laptop is a big investment. This module helps you choose the right laptop, avoid scams, understand specs in simple language, and make a future-proof decision.
2.1 New vs Second-Hand Laptop – Which Is Better?
Many users are confused whether to buy a brand-new laptop or a second-hand / refurbished laptop. The answer depends on your budget, usage, and risk tolerance.
| Factor | New Laptop | Second-Hand Laptop |
|---|---|---|
| Price | Higher | 30–60% cheaper |
| Warranty | 1 year (or more) | Limited or none |
| Risk | Very low | Medium to high |
| Battery Health | 100% new | Usually degraded |
| Best For | Students, professionals | Tight budget users |
2.2 Complete Guide: How to Check Laptop Health Before Buying (Second-Hand) – 50+ Inspection Points
📋 Before You Meet: Preparation Checklist
Tools to Bring:
- 💻 USB flash drive with diagnostic tools (see below)
- 🔋 Power bank (to test charging via USB-C if applicable)
- 🎧 Headphones (test audio jack)
- 📱 Phone with camera (document any issues)
- 📝 Notepad to record specs and findings
Download These Tools to USB:
- CrystalDiskInfo – Check SSD/HDD health
- CPU-Z – Verify processor and RAM
- HWMonitor – Check temperatures
- BatteryInfoView – Battery cycle count
- MemTest86 – RAM testing (optional)
🔍 Part 1: Physical Inspection – What Your Eyes Can Tell You
A. Exterior Condition
| What to Check | Good Sign | Red Flag |
|---|---|---|
| Overall casing | No cracks, all seams aligned | Cracks, warping, misaligned panels |
| Hinges | Open/close smoothly, no wobble | Loose, stiff, or making cracking sounds |
| Screws | All present, no tamper marks | Missing screws, stripped heads |
| Rubber feet | All present, not worn | Missing or loose feet |
| Ports | Clean, no visible damage | Bent pins, loose connections |
B. Screen and Display
- Dead pixels test: Display solid colors (white, black, red, green, blue) and check for stuck/dead pixels
- Backlight bleeding: In dark room, display black screen – check edges for uneven lighting
- Viewing angles: Tilt screen to ensure colors don't invert or wash out excessively
- Touchscreen (if applicable): Test responsiveness on all areas
- Bezel condition: Check for cracks around screen edges
- Hinge wobble: Screen should stay firmly at any angle
C. Keyboard and Touchpad
- Every key test: Press each key and verify response (use Notepad)
- Backlight: Test all brightness levels if applicable
- Keycap condition: Check for worn letters (common on heavily used laptops)
- Touchpad clicks: Test left/right clicks and tap-to-click
- Palm rejection: Rest palm while typing – cursor shouldn't jump
- Gesture support: Test 2-finger scroll, pinch zoom if supported
🔋 Part 2: Battery Health – Complete Analysis
Quick Visual Check:
- Swollen battery: Look for bulging trackpad, raised keyboard, or uneven bottom panel – ❌ Reject immediately if swollen (fire hazard!)
- Battery seating: If removable, check contacts for corrosion
Windows Battery Report (Most Accurate):
# Open Command Prompt as Administratorpowercfg /batteryreport# Report saved to C:\Users\YourName\battery-report.html
Open the HTML file and check these key values:
| Metric | Good | Acceptable | Poor |
|---|---|---|---|
| Design Capacity | Original capacity when new | ||
| Full Charge Capacity | >90% of design | 70-90% | <70% (replace soon) |
| Cycle Count | <150 | 150-300 | >300 (lithium batteries last 300-500 cycles) |
Real-World Battery Test:
- Charge to 100% and unplug
- Set screen brightness to 50%
- Play a YouTube video continuously
- Note how long until battery dies:
- ✅ 4+ hours – Excellent
- ✅ 2-4 hours – Acceptable for older laptop
- ⚠️ 1-2 hours – Battery needs replacement
- ❌ Under 1 hour – Battery failing
Battery Replacement Considerations:
- Check if battery is user-replaceable or built-in
- Search online for replacement cost (typically $30-80)
- Factor replacement cost into your offer price
- Original OEM batteries are better than third-party
💾 Part 3: Storage Drive – Health and Performance
Drive Type Matters:
| Type | Speed | Reliability | Recommendation |
|---|---|---|---|
| NVMe SSD | ⭐⭐⭐⭐⭐ Very Fast | ⭐⭐⭐⭐ High | ✅ Best choice |
| SATA SSD | ⭐⭐⭐⭐ Fast | ⭐⭐⭐⭐ High | ✅ Good |
| SSHD (Hybrid) | ⭐⭐⭐ Moderate | ⭐⭐⭐ Moderate | ⚠️ Acceptable |
| HDD (Mechanical) | ⭐⭐ Slow | ⭐⭐ Risk of failure | ❌ Avoid for main drive |
Using CrystalDiskInfo (Portable Version):
- Run CrystalDiskInfo from your USB
- Check Health Status – should say "Good" (not "Caution" or "Bad")
- Review these SMART attributes:
| SMART Attribute | What It Means | Warning Sign |
|---|---|---|
| Reallocated Sectors | Bad sectors remapped to spare area | Any non-zero value (drive failing) |
| Power-On Hours | Total time drive has been running | >20,000 hours for HDD, >40,000 for SSD |
| Power-On Count | How many times laptop turned on | Extremely high count may indicate server use |
| Temperature | Drive operating temperature | Consistently >50°C |
| SSD Life Left | Estimated remaining life (SSD only) | <70% life remaining |
Physical Drive Test:
- Listen carefully: Put ear near laptop during file copy
- Clicking/grinding sounds = ❌ HDD failing
- Silent operation = ✅ Good (especially for SSD)
- Vibration test: Place hand on laptop during operation – excessive vibration indicates bearing issues
Performance Test:
- Copy a large file (1GB+) from USB to laptop
- Note transfer speed:
- NVMe SSD: 1000-3500 MB/s
- SATA SSD: 300-500 MB/s
- HDD: 80-160 MB/s
🧠 Part 4: RAM – Capacity and Functionality
Verify Installed RAM:
# Open Task Manager → Performance → Memory# OR use Command Prompt:wmic memorychip get capacity, speed, devicelocator
RAM Recommendations by Use Case:
| Usage | Minimum | Recommended | Notes |
|---|---|---|---|
| Web browsing, email, Office | 4 GB | 8 GB | 4 GB may struggle with multiple tabs |
| Programming, light photo editing | 8 GB | 16 GB | Virtual machines need more |
| Video editing, gaming, VMs | 16 GB | 32 GB | Check if upgradeable |
| Professional workstation | 32 GB | 64 GB+ | Ensure motherboard supports |
RAM Configuration Check:
- Single vs Dual Channel: Dual channel gives ~15% performance boost
- 8 GB single stick = slower
- 2×4 GB = faster dual channel
- Upgradeability:
- Look up laptop model specs online
- Check if RAM is soldered (non-upgradeable) or has SODIMM slots
- Maximum supported capacity
RAM Test (MemTest86):
- Boot from MemTest86 USB (create beforehand)
- Let it run at least one full pass (10-30 minutes)
- Any errors = ❌ Bad RAM module – reject or replace
⚡ Part 5: CPU and Overall Performance
CPU Information:
# View CPU detailswmic cpu get name, maxclockspeed, numberofcores# Or use CPU-Z from USB
CPU Generation Guide:
| Intel Generation | Release Year | Performance Rating |
|---|---|---|
| 13th Gen (Raptor Lake) | 2022-2023 | ⭐⭐⭐⭐⭐ Excellent |
| 12th Gen (Alder Lake) | 2021-2022 | ⭐⭐⭐⭐⭐ Excellent |
| 11th Gen (Tiger Lake) | 2020-2021 | ⭐⭐⭐⭐ Very Good |
| 10th Gen (Comet Lake) | 2019-2020 | ⭐⭐⭐⭐ Good |
| 9th Gen (Coffee Lake) | 2018-2019 | ⭐⭐⭐ Acceptable |
| 8th Gen (Kaby Lake R) | 2017-2018 | ⭐⭐⭐ Acceptable |
| 7th Gen and older | Before 2017 | ⚠️ Outdated, slow |
AMD Ryzen Guide:
| Ryzen 7000 Series | 2022+ | ⭐⭐⭐⭐⭐ Excellent |
| Ryzen 6000 Series | 2022 | ⭐⭐⭐⭐⭐ Excellent |
| Ryzen 5000 Series | 2021 | ⭐⭐⭐⭐ Very Good |
| Ryzen 4000 Series | 2020 | ⭐⭐⭐⭐ Good |
| Ryzen 3000 Series | 2019 | ⭐⭐⭐ Acceptable |
Real-World Performance Tests:
- Boot time: Cold boot to desktop – should be <30 seconds with SSD
- Multitasking test: Open 10+ browser tabs, YouTube video, and Word – any lag?
- 4K video playback: YouTube 4K should play smoothly without stuttering
- Fan noise: Under light load – fans should be quiet or off
- Temperature check (HWMonitor):
- Idle: 30-45°C
- Light use: 45-60°C
- Under load: 70-90°C (throttling starts at 95-100°C)
🔌 Part 6: Ports, Wi-Fi, Bluetooth – Everything That Connects
Port Testing Checklist:
| Port Type | Test Method |
|---|---|
| USB ports (all) | Plug in USB drive – should detect immediately |
| USB-C / Thunderbolt | Test charging, data transfer, video out if possible |
| HDMI / DisplayPort | Connect external monitor – check for signal |
| Headphone jack | Plug headphones – test both channels, no static |
| Ethernet | Connect cable – should get network |
| SD card reader | Insert SD card – should appear in File Explorer |
| Kensington lock slot | Physical check only |
Wireless Testing:
- Wi-Fi: Connect to network, check signal strength, browse internet
- Bluetooth: Pair with phone or Bluetooth speaker, test audio
Audio Test:
- Play audio through speakers – check both channels, distortion
- Test microphone – record voice, playback for clarity
📷 Part 7: Camera, Fingerprint, Facial Recognition
- Webcam: Open Camera app – check image quality, focus
- Fingerprint reader: Set up in Windows Hello – test multiple fingers
- IR camera (Windows Hello): Test facial recognition in different lighting
🔑 Part 8: Windows License and Bloatware
Check Windows Activation:
Settings → System → About → Windows specifications# OR Command Prompt:slmgr /dli
Should say "Windows is activated" – not "Evaluation copy"
BIOS/UEFI Password:
- Restart laptop and try to enter BIOS (F2, F10, Del)
- If BIOS password is set, ❌ walk away (laptop may be stolen)
Bloatware Check:
- Open Control Panel → Programs and Features
- Look for suspicious software (remote access tools, tracking software)
- Factory reset is recommended after purchase
💰 Part 9: Price Negotiation – What Each Issue Is Worth
| Issue Found | Negotiation Discount |
|---|---|
| Battery at 70-80% health | Request $30-50 off (replacement cost) |
| Battery below 70% | Request $50-80 off |
| Missing charger | $30-50 off |
| Small cosmetic scratches | $10-20 off |
| Cracked screen | Reject or $100+ off (repair expensive) |
| Dead pixel(s) | $20-50 off depending on location |
| Worn keyboard keys | $20-30 off |
| No original box/accessories | $10-20 off |
| HDD instead of SSD | $50 off (SSD upgrade cost) |
📋 Quick Reference: 20-Point Inspection Checklist
Exterior (7 checks):
- ☐ No cracks or damage
- ☐ Hinges smooth and firm
- ☐ All screws present
- ☐ Rubber feet intact
- ☐ Screen no dead pixels
- ☐ Keyboard all keys work
- ☐ Touchpad responsive
Hardware (7 checks):
- ☐ Battery health >80%
- ☐ SSD/HDD health "Good"
- ☐ RAM size 8GB+
- ☐ CPU not overheating
- ☐ All ports functional
- ☐ Wi-Fi connects
- ☐ Webcam works
Performance (3 checks):
- ☐ Boot time <30 seconds
- ☐ No unusual fan noise
- ☐ Multitasking smooth
Software (3 checks):
- ☐ Windows activated
- ☐ No BIOS password
- ☐ No suspicious software
- Swollen battery (fire risk)
- BIOS password set and seller doesn't know it
- Cracked screen (expensive to fix)
- Liquid damage signs (corrosion, sticky keys)
- SMART errors on drive (drive failing)
- Seller refuses to let you test thoroughly
2.3 CPU Explained (Intel vs AMD – Simple Language)
The CPU (processor) is the brain of the laptop. Better CPU = smoother performance.
| User Type | Intel | AMD |
|---|---|---|
| Basic Use | i3 (10th gen+) | Ryzen 3 |
| Office / Students | i5 | Ryzen 5 |
| Heavy / Gaming | i7 / i9 | Ryzen 7 / 9 |
2.4 Minimum Laptop Specs by Usage
| Usage | CPU | RAM | Storage |
|---|---|---|---|
| Students / Online Classes | i3 / Ryzen 3 | 8 GB | 256 GB SSD |
| Office Work | i5 / Ryzen 5 | 8–16 GB | 512 GB SSD |
| Gaming / Editing | i7 / Ryzen 7 | 16 GB+ | 1 TB SSD |
2.5 Common Second-Hand Laptop Scams & How to Avoid Them – Complete Protection Guide
🚫 SCAM TYPE 1: Fake or Inflated Specifications
How It Works:
Scammers list laptops with upgraded specs that aren't actually present – claiming 16GB RAM when it's 4GB, or an i7 when it's actually an i3. They hope you won't verify before buying.
Real-World Examples:
- Ad claims "Intel Core i7" but shows older 1st-gen i7 (slower than modern i3)
- "16GB RAM" – actually 8GB + 8GB virtual memory (fake)
- "1TB Storage" – 128GB SSD + fake USB drive disguised as internal
- "Gaming Laptop" – actually has integrated graphics, no dedicated GPU
- "4K Display" – stretched 1080p panel with wrong resolution
🛡️ Protection Strategies:
- ✅ Verify with CPU-Z – Run from USB
- ✅ Check Task Manager – Real-time specs
- ✅ Look up model number – Original specs online
- ✅ Check BIOS – Shows true hardware
- ✅ Physical inspection – RAM access panel
Specific Countermeasures:
| Claimed Spec | Verification Method | What to Look For |
|---|---|---|
| CPU (i7/i9) | CPU-Z or Task Manager | Check generation number – i7-4700 (2013) is much slower than i5-12500 (2022) |
| RAM | Task Manager → Performance → Memory | Verify total matches claimed. Check if it's actually usable (not hardware reserved) |
| Storage | Disk Management (diskmgmt.msc) | Look for fake partitions – scammers sometimes create virtual drives |
| Graphics | Device Manager → Display Adapters | Verify dedicated GPU appears. Run GPU-Z to confirm |
| Screen Resolution | Display Settings → Advanced display | Check native resolution – 1920x1080 is true 1080p, 1366x768 is low-end |
🔧 SCAM TYPE 2: Hidden Damage or Replaced Components
Common Component Swaps:
| Original Part | Replaced With | How to Detect |
|---|---|---|
| Original OEM battery | Cheap third-party battery | Check battery report – third-party batteries often show generic manufacturer |
| NVMe SSD | SATA SSD or fake drive | CrystalDiskInfo – shows model number; Google it to verify specs |
| Original charger | Cheap generic charger | Check branding, weight, and safety certifications |
| Original screen | Replacement (lower quality) | Check viewing angles, color accuracy, backlight bleed |
| Original keyboard | Replacement with different layout | Check key feel, backlight consistency, language layout |
Hidden Damage Scams:
- Liquid damage cleaned up: Looks fine initially but will fail within weeks
- Dropped laptop: Internal cracks in motherboard, intermittent failures
- Overheated components: CPU/GPU damaged from poor cooling
- Repaired motherboard: Janky soldering, may fail anytime
- Password-locked BIOS: Reset but with hidden backdoors
Detection Methods:
🔍 Physical Inspection:
- Check screw heads for tamper marks (stripped paint)
- Look for water damage indicators (white dots turning pink/red)
- Check USB ports for corrosion (liquid damage sign)
- Sniff for unusual smells (burnt electronics, mold)
- Flex chassis – should be rigid, not creaky
📊 Software Checks:
- Run HWMonitor – check if temperatures spike abnormally
- Check event viewer for hardware errors
- Run Prime95 (stress test) – if it crashes, cooling issues
- Check BIOS for unusual settings or passwords
🚨 SCAM TYPE 3: Stolen, Company-Locked, or iCloud-Locked Devices
Types of Locked Laptops:
| Type | Signs | Can It Be Fixed? |
|---|---|---|
| BIOS Password Locked | Can't enter BIOS or boot from USB | ❌ Usually impossible without motherboard replacement |
| Company MDM Lock | Shows "This device is managed by..." | ❌ Only company IT can remove |
| Microsoft Account Lock | Asks for previous owner's email | ⚠️ Only if seller provides account |
| iCloud Lock (Mac) | Activation Lock screen | ❌ Useless without original owner |
| Asset Tag Stickers | Property of [Company Name] stickers | ⚠️ Likely stolen from company |
How Scammers Sell Locked Laptops:
- Claim they forgot password and "just need to reset it"
- Sell as "parts only" but at working price
- Say it's from a "bankrupt company" but no documentation
- Remove asset tags but leave residue
- Claim it's "unlocked" but you discover lock after purchase
Red Flags:
- ❌ Seller can't demonstrate laptop booting to Windows desktop
- ❌ Seller refuses to let you connect to Wi-Fi
- ❌ BIOS has password (seller claims "it's always been that way")
- ❌ Multiple identical laptops for sale (bulk stolen goods)
- ❌ No charger included (common with stolen laptops)
💿 SCAM TYPE 4: Cracked, Pirated, or Non-Transferable Windows Licenses
Common License Scams:
- Volume License: From companies – not legally transferable
- DreamSpark/Educational: Only for students, expires when seller graduates
- Cracked Windows: Activated with hack tools, will deactivate after update
- OEM License bound to dead motherboard: Won't activate on replacement
- 30-day trial: Seller forgets to mention it's not activated
How to Verify Windows License:
# Check activation statusslmgr /dli# Shows license type and status# Check if it's genuine OEMwmic path softwarelicensingservice get OA3xOriginalProductKey
| License Type | Status Display | Transferable? |
|---|---|---|
| Retail License | "Windows is activated" + Retail channel | ✅ Yes, can transfer |
| OEM License (built-in) | "Windows is activated" + OEM channel | ⚠️ Stays with device |
| Volume License | Shows organization name | ❌ Not transferable |
| Cracked/Pirated | Shows as activated but slmgr shows error | ❌ Will fail updates |
💰 SCAM TYPE 5: Marketplace, Payment & Fake Listing Scams
Online Scams:
- Deposit scam: Ask for deposit to "hold" laptop, then disappear
- Fake payment confirmation: Send fake PayPal email
- Shipping scam: Ship empty box or brick
- Wrong item: Send different laptop than advertised
- Account takeover: Hacked seller account, you pay to scammer
In-Person Scams:
- Bait and switch: Show good laptop, hand over different one
- Distraction theft: One person distracts, other steals your cash
- Fake meetup: Dangerous location, robbery risk
- Cash flip: Claim you gave fake money, demand refund
Safe Buying Practices:
| Do This ✅ | Avoid This ❌ |
|---|---|
| Meet in public, well-lit locations (police station lobbies are best) | Meeting at seller's home or isolated area |
| Pay in cash after inspection (bring exact amount) | Paying deposit before seeing laptop |
| Bring a friend for safety and second opinion | Going alone to unknown locations |
| Test everything before paying (30+ minutes) | Rushing transaction |
| Get receipt with seller's name and contact | Anonymous sellers with no history |
🔄 SCAM TYPE 6: Fake "Refurbished" & "Grade A" Claims
What "Refurbished" Actually Means:
- Genuine refurbished: Tested, repaired with OEM parts, reset, repackaged
- Fake refurbished: Just wiped with a cloth, called "refurbished" to charge more
Grading System Scams:
| Grade Claimed | What It Should Mean | What Scammers Do |
|---|---|---|
| Grade A (Like New) | No scratches, perfect condition | Sell with minor scratches, call it "Grade A" |
| Grade B (Good) | Light wear, fully functional | Sell with dead pixels, call it "Grade B acceptable" |
| Grade C (Fair) | Visible wear, may have issues | Sell broken laptops as "Grade C – needs love" |
How to Verify Refurbished Claims:
- Check BIOS for previous company asset tags
- Look for third-party replacement parts (battery, charger, screen)
- Check if warranty is offered (real refurbishers offer warranty)
- Search online for seller reviews and complaints
📝 SCAM TYPE 7: Fake Warranties & "No Returns" Traps
Common Warranty Tricks:
- "30-day warranty" – but seller disappears after sale
- "Manufacturer warranty" – but it's expired or non-transferable
- "Return within 7 days" – but with 20% restocking fee
- "Warranty void if opened" – prevents you from checking internals
- Fake warranty cards with non-existent companies
How to Verify Warranty:
# Check Dell warrantyhttps://www.dell.com/support/warranty# Check HP warrantyhttps://support.hp.com/us-en/checkwarranty# Check Lenovo warrantyhttps://pcsupport.lenovo.com/us/en/warrantylookup
🛡️ Complete Scam Prevention Checklist – 25+ Protection Points
Before Meeting:
- ☐ Research seller history/reviews
- ☐ Reverse image search photos
- ☐ Check if price is realistic
- ☐ Ask for detailed photos (sticker closeups)
- ☐ Verify model number specs online
During Inspection:
- ☐ Check BIOS for passwords
- ☐ Run CPU-Z/GPU-Z/CrystalDiskInfo
- ☐ Verify Windows activation
- ☐ Check all ports work
- ☐ Test battery with powercfg report
At Payment:
- ☐ Meet in safe public place
- ☐ Bring friend for safety
- ☐ Pay only after full inspection
- ☐ Get written receipt
- ☐ Take photo of seller (with permission)
🚩 Red Flag Phrases – What Scammers Say
- "I forgot the password, but it's an easy fix"
- "No time to test, someone else is coming" (pressure tactic)
- "It's from my company, they gave it to me"
- "I don't have the charger, but you can buy one cheap"
- "The specs are in the photo, just look" (refuses to send more)
- "My nephew used it for gaming" (when it's clearly office laptop)
- "It was working yesterday, not sure what happened"
- "I need deposit to hold it for you"
- "PayPal is having issues, can you do friends & family?"
- "I'm selling for my friend/relative" (can't answer questions)
⚠️ The 10 Absolute Deal-Breakers
- ❌ BIOS password protected
- ❌ Company asset tags present
- ❌ Refuses to let you test before paying
- ❌ Won't meet in public place
- ❌ Price is 50% below market value
- ❌ No charger included
- ❌ Swollen battery (visible bulge)
- ❌ Water damage indicators tripped
- ❌ Can't show Windows desktop
- ❌ Asks for deposit before meeting
2.6 Checking Windows License (Genuine or Cracked)
Using a genuine Windows license is important for security, system updates, and long-term stability. Many second-hand laptops or newly assembled PCs may contain cracked or unofficial activations that stop working later.
✔ Method 1: Check from Windows Settings
- Open Settings
- Go to System → Activation
- Status should show "Windows is activated"
- You may also see "Activated with a digital license"
✔ Method 2: Check Using Command Prompt
This method reveals the activation type.
- Open Command Prompt (Admin)
- Run the command:
slmgr /dliA small window will appear showing license information such as:
- License status
- Product key channel
- Activation type
✔ Method 3: Check Detailed License Information
For deeper information, run the following command:
slmgr /dlvThis displays extended activation details including:
- Activation ID
- Installation ID
- License channel
- Activation expiration
⚠️ Warning Signs of Cracked Windows
- Windows activation message keeps returning
- Updates are blocked or fail frequently
- Unknown activation tools installed
- Windows shows activation expiration dates
- Strange services running in background
✔ Common Genuine License Types
| License Type | Description | Common In |
|---|---|---|
| OEM License | Pre-installed by manufacturer | Laptops from Dell, HP, Lenovo |
| Retail License | Purchased separately | Custom-built PCs |
| Digital License | Linked to Microsoft account | Modern Windows installations |
💡 Tip When Buying a Used Laptop
- Check Activation status
- Check Windows edition (Home / Pro)
- Make sure Windows Update works
- Verify there are no activation warnings
Complete Step-by-Step: Buying a Second-Hand Laptop
📋 PHASE 1: Preparation (Before Meeting)
✅ Step 1: Set Budget & Requirements
- Budget: Decide maximum amount
- Purpose: Student/Office/Gaming
- Must-have: Minimum specs needed
- Brand preference: Dell, HP, Lenovo, etc.
🔍 Step 2: Research Market Prices
- Check OLX, Facebook Marketplace
- Compare similar models & prices
- Note average selling price
- Identify suspiciously low prices
👁️ PHASE 2: Physical & Visual Inspection (5-10 minutes)
| Check Point | What to Look For | Tools Needed |
|---|---|---|
| Body & Chassis | Dents, cracks, loose hinges | Eyes, fingers |
| Screen Condition | Scratches, dead pixels, backlight bleed | Browser |
| Ports & Buttons | All ports working, power button | USB drive, charger |
| Keyboard | All keys working, backlight | Online tester |
| Trackpad | Smooth movement, gestures | Touchpad gestures |
📸 Screen Test Method (Dead Pixels & Backlight)
- Open: lcdtech.info dead pixel test
- Full-screen solid colors: black, white, red, green, blue
- Look for stuck/dead pixels (colored dots)
- Check backlight bleed on black screen
⌨️ Keyboard, Trackpad & Audio Detailed Tests (5-10 minutes)
Keyboard Professional Test
- Open keyboardtester.com
- Press every key, including:
- Function keys (F1–F12)
- Arrow keys
- Numpad (if available)
- Media control keys
- Test keyboard backlight at all brightness levels
- Check for sticky or non-responsive keys
Trackpad Professional Test
- Test gestures:
- Two-finger scroll
- Three-finger swipe
- Pinch-to-zoom
- Right-click zone
- Check palm rejection while typing
- Test cursor accuracy and smoothness
📷 Webcam & 🎤 Microphone Test
- Open Camera app and record a 30-second video with speech
- Use online mic test: mictests.com or onlinemictest.com
-
Speak normally and loudly, then check:
- Clear voice pickup
- No delay, echo, or distortion
- Consistent volume level
- For webcam quality, use: webcamtests.com
🔊 Speaker & Audio Test
- Play YouTube test audio:
-
Increase volume from low → high and listen for:
- Crackling or rattling sounds
- Distortion at high volume
- One speaker louder than the other
- Test headphone jack using wired earphones
📅 PHASE 2.2: How to Check Laptop Age & Manufacturing Date
🔢 Method 1: Serial Number Check (MOST ACCURATE)
- Get serial number:
- Open PowerShell
- Run:
Get-CimInstance Win32_BIOS | Select SerialNumber - Or check sticker under laptop
- Visit official support page:
- HP – support.hp.com
- Dell – dell.com/support
- Lenovo – pcsupport.lenovo.com
- Enter serial number
- Check:
- Manufacturing date
- Warranty history
⚙️ Method 2: BIOS Information (Quick)
- Open PowerShell
- Run:
Get-CimInstance Win32_BIOS - Look for:
- SMBIOSBIOSVersion
- Manufacturer
- Version
- BIOS year usually ≈ laptop age
💻 Method 3: Windows Install Date (Rough Estimate)
systeminfo | findstr /B /C:"Original Install Date"⚠️ This shows Windows install date, not manufacturing date. Useful only to detect reinstalled systems.
📊 Laptop Age Evaluation
- 0–3 years: ✅ Excellent (recommended)
- 4–6 years: ⚠️ Acceptable with discount
- 7+ years: ❌ Avoid
- Seller hides serial number
- Age older than claimed
- Specs don’t match model
💻 PHASE 3: Hardware & Performance Testing (10-15 minutes)
🔋 Battery Health Test
Command: powercfg /batteryreport
- Open Command Prompt as Admin
- Type command and press Enter
- Open generated HTML file
- Check "DESIGN CAPACITY" vs "FULL CHARGE CAPACITY"
💾 Storage Health Check
Tools: CrystalDiskInfo (free)
- Download CrystalDiskInfo portable
- Run without installation
- Check "Health Status"
- Look for "Good" status
- Check "Power On Hours"
🧠 RAM & CPU Check
Tools: Task Manager + CPU-Z
- Press Ctrl+Shift+Esc
- Go to Performance tab
- Verify RAM size & speed
- Download CPU-Z for details
🧩 How to Check RAM Slot Availability & Install CPU-Z (Without Opening Laptop)
This section helps you check whether a RAM slot is free and shows how to install CPU-Z step-by-step in the easiest way.
🔍 Part 1: Check If a RAM Slot Is Available
✔ Method 1: Task Manager (Quickest)
- Press Ctrl + Shift + Esc
- Go to Performance → Memory
- Look for "Slots used"
- 1 of 2 slots used → ✅ One RAM slot free
- 2 of 2 slots used → ❌ No free slot
✔ Method 2: CPU-Z (Most Accurate)
- Open CPU-Z
- Go to SPD tab
- Select Slot #1 / Slot #2
- Check which slots show RAM info
- RAM details shown → Slot occupied
- Empty / blank → Slot available
✔ Method 3: Command Prompt (Advanced)
wmic MEMORYCHIP get BankLabel, CapacityEach line represents one installed RAM stick.
- 1 line → One RAM slot used
- 2 lines → Both slots used
- Many thin laptops have 1 soldered RAM + 1 slot
- Some ultrabooks have no upgradeable RAM
- Always search: "Laptop Model + RAM upgrade"
⬇️ Part 2: How to Download & Install CPU-Z (Easy Step-by-Step)
CPU-Z is a safe and trusted free tool used to check RAM slots, RAM type, speed, and motherboard details.
🟢 Step 1: Download CPU-Z (Official)
🔗 Download CPU-Z (Official Website)🟢 Step 2: Choose Correct Version
- ZIP (Portable) → No installation, best for second-hand laptop checking
- SETUP → Normal installation like other software
🟢 Step 3: Run CPU-Z
- If ZIP version:
- Right-click ZIP → Extract
- Open folder → Double-click cpuz.exe
- If SETUP version:
- Double-click setup file
- Click Next → Install → Finish
- Open CPU-Z from Desktop
📊 Understanding RAM Slot Configurations
| Configuration | What It Means | Upgrade Possibility | Performance Impact |
|---|---|---|---|
| 4GB + Empty Slot | Single channel, 1 stick installed | ⭐⭐⭐⭐⭐ (Add another stick) | Up to 30% slower than dual channel |
| 4GB + 4GB | Dual channel, both slots used | ⭐⭐ (Need to replace sticks) | Optimal performance |
| 8GB + Empty Slot | Single channel, room for more | ⭐⭐⭐⭐ (Add matching 8GB) | Good, can improve with dual |
| All slots filled | No room for upgrade | ⭐ (Replace existing sticks) | Depends on configuration |
🛠️ Physical Indicators (Without Opening)
- Check bottom panel: Look for RAM access door (small separate panel)
- Search online: "[Your Laptop Model] RAM upgrade" on YouTube
- Manufacturer specs: Check official website for max RAM support
- Search: "Does [Laptop Model] have extra RAM slot?"
- Check: "Maximum RAM supported" for your model
- Look for: Teardown videos showing internal slots
🔥 ADVANCED: CPU, GPU & Thermal Stress Tests (Optional)
- You are buying a gaming or high-performance laptop
- The laptop feels hot or noisy during normal use
- You want to avoid overheating problems later
⬇️ How to Download & Run Cinebench R23 (Beginner Friendly)
Cinebench R23 is a free and safe CPU testing tool. Running it for a short time will NOT damage the laptop.
🟢 Step 1: Download Cinebench R23
- Open browser and visit: maxon.net (Official Cinebench Page)
- Scroll to Cinebench R23
- Click Download
- Login using Google or Email (free)
🟢 Step 2: Install / Open Cinebench
- Open the downloaded file
- If ZIP:
- Right-click → Extract
- Open folder → Double-click Cinebench.exe
- If installer:
- Double-click setup
- Next → Install → Finish
🔥 CPU Stress Test (Easy Method – 10 Minutes)
Tools: Cinebench R23 + HWMonitor
- Press Win + R → type
taskmgr→ Enter - Go to Performance → CPU (keep open)
- Open Cinebench R23
- Click CPU (Multi Core) → Start
- Let test run for 10 minutes
- Open HWMonitor and watch CPU temperature
CPU Temperature Guide:
- 40–50°C: Normal (idle)
- 70–85°C: OK under load
- 90–95°C: Warning zone
- >95°C: ❌ Reject laptop
⚡ Quick CMD Stress Test (No Installation Needed)
Alternative method using built-in Windows CMD & PowerShell
🟢 Method 1: Basic CPU Stress Test (5-10 minutes)
- Open Command Prompt as Administrator:
- Press Win + X → Select "Windows Terminal (Admin)" or "Command Prompt (Admin)"
- OR Search "cmd" → Right-click → "Run as administrator"
- Copy and paste this command:
for /L %x in (1,1,1000000) do echo %x- Press Enter to start
- Let it run for 5-10 minutes
- Open Task Manager (Ctrl+Shift+Esc)
- Go to Performance → CPU tab
- Monitor:
- CPU usage should stay at 90-100%
- Watch temperature rise
- Listen to fan noise
- To stop: Press Ctrl + C in Command Prompt
🔥 Method 2: Multi-Core Stress Test (All CPU Cores - Advanced)
For maximum CPU load across all cores:
- Open Notepad and copy this code:
@echo off
echo Starting multi-core CPU stress test...
echo This will use ALL CPU cores. Press Ctrl+C to stop.

for /L %%i in (1,1,8) do (
    start /high cmd /c "for /L %%j in (1,1,10000000) do echo %%j > nul"
)

echo Stress test running. Check Task Manager for CPU usage.
echo Press any key to stop all tests...
pause > nul

taskkill /F /IM cmd.exe
echo All stress tests stopped.
- Save as
stress_test.bat - Right-click → "Run as administrator"
- Test will automatically start 8 parallel processes
- To stop: Press any key OR close Command Prompt windows
💪 Method 3: PowerShell Stress Test (Most Powerful)
For modern Windows 10/11 with PowerShell:
- Open PowerShell as Administrator:
- Press Win + X → Select "Windows PowerShell (Admin)"
- OR Search "PowerShell" → Right-click → "Run as administrator"
- Copy and paste this command:
1..10 | % { Start-Job { while($true) { 1..1000000 | % { $_ * $_ } } } }- Press Enter to start 10 parallel CPU-intensive jobs
- Monitor in Task Manager
- To stop: Run this command in PowerShell:
Get-Job | Stop-Job; Get-Job | Remove-Job
📈 Expected Results & What to Watch For
✅ Good Signs
- CPU temp stabilizes at 80-85°C
- Fans spin up but not extremely loud
- No performance drops (throttling)
- System remains stable
❌ Bad Signs (Reject Laptop)
- CPU exceeds 95°C
- Loud grinding/clicking fan noise
- System crashes or blue screens
- Performance suddenly drops (throttling)
- Laptop becomes too hot to touch
- Do NOT run for more than 10-15 minutes on used laptops
- Stop immediately if temperature exceeds 95°C
- Always run on hard, flat surface (not on fabric/bed)
- Monitor temperatures with Task Manager or HWMonitor
- If laptop automatically shuts down → REJECT THE LAPTOP
- These tests are for DIAGNOSTICS only, not for daily use
🎮 GPU Stress Test (Gaming / Graphics Laptops Only)
Skip if: Laptop has no dedicated GPU
- Press Win + X → Open Device Manager
- Expand Display adapters
- Run Unigine Heaven or 3DMark (Free)
- Let it run for 5–10 minutes
- Watch GPU temperature in HWMonitor
GPU Temperature Guide:
- Integrated GPU: 60–75°C
- Dedicated GPU: 70–85°C
- >90°C: ❌ Dangerous
🌡️ Fan Noise & Heat Behavior (Very Important)
Listen for Fan Problems
- Grinding or rattling sounds
- High-pitched whining
- Fan stopping & restarting
- Loud fan even at idle
Temperature Behavior
- Temperature rises slowly
- Stabilizes under load
- Drops quickly after stopping test
- Thermal throttling occurs
- Laptop becomes too hot to touch
- System shuts down automatically
- Fan noise is extreme and constant
📡 PHASE 4: Connectivity & Features Test (5 minutes)
🌐 Wi-Fi & Bluetooth
- Connect to available Wi-Fi
- Test speed (fast.com)
- Pair Bluetooth device
- Check signal strength
🎤 Webcam & Audio
- Open Camera app
- Test video recording
- Play YouTube audio
- Test headphone jack
🔥 Temperature Test
- Download HWMonitor
- Run for 10 minutes
- Check CPU/GPU temps
- Listen to fan noise
⚠️ PHASE 5: Check for Hidden Issues
🔍 Water Damage Indicators
- Check under keyboard (sticky keys)
- Look at USB ports (discoloration)
- Check battery compartment (white/pink spots)
- Smell for musty odor
🔩 Previous Repair Signs
- Check screw heads (scratches)
- Look for mismatched screws
- Check gaps in body panels
- Verify serial numbers match
🤝 PHASE 6: Negotiation & Final Steps
| Issue Found | Negotiation Points | Expected Discount |
|---|---|---|
| Battery below 70% | "Need battery replacement soon" | ₹2,000-₹4,000 |
| Scratches on body | "Cosmetic damage affects resale" | ₹1,000-₹2,000 |
| No original charger | "Third-party charger risky" | ₹500-₹1,000 |
| Missing accessories | "Need to buy separately" | ₹500-₹2,000 |
📄 Final Checklist Before Payment:
✅ AFTER PURCHASE: First 24 Hours
🔄 Clean Windows Install
- Create Windows bootable USB
- Backup drivers using DriverStore Explorer
- Perform fresh Windows install
- Install necessary drivers
🛡️ Security Setup
- Enable Windows Security
- Set up BitLocker encryption
- Create system restore point
- Install essential software
⏱️ 20-Minute Quick Test Checklist
| Time | Test | Tools | Pass/Fail |
|---|---|---|---|
| 2 min | Visual inspection | Eyes | ✅ |
| 3 min | Screen test (dead pixels) | Browser | ✅ |
| 2 min | Keyboard & trackpad | Notepad | ✅ |
| 3 min | Battery health | Command Prompt | ✅ |
| 5 min | Storage health | CrystalDiskInfo | ✅ |
| 5 min | Wi-Fi, sound, webcam | Browser, Camera | ✅ |
🧰 Essential Testing Tools (Download Before Meeting)
Storage health check
Hardware information
Temperature monitoring
RAM testing (USB boot)
Internet, Browsers & YouTube Tips – Smart & Safe Usage
This module helps normal users browse the internet safely, reduce ads and distractions, understand browser tools, and deal with popups, YouTube ads, and fake websites responsibly.
3.1 Google Chrome vs Microsoft Edge – Which Is Better?
Browsers are your gateway to the internet. The two most popular browsers on Windows are Google Chrome and Microsoft Edge.
| Feature | Google Chrome | Microsoft Edge |
|---|---|---|
| Speed | Fast | Very fast on Windows |
| RAM Usage | High | Lower than Chrome |
| Battery Life | Average | Better on laptops |
| Extensions | Huge library | Supports Chrome extensions |
3.2 How to Remove / Block Ads on Browsers – Safe & Effective Methods
✅ Best Ad Blocker Extensions
⚙️ Built-in Browser Features
Microsoft Edge
- Click ⋯ → Settings
- Privacy, search, and services
- Turn on "Use ad blocker"
Brave Browser
Built-in ad blocking by default – no extension needed.
Chrome
No built-in ad blocker – use extensions above.
🚫 What to Avoid
- Never install "ad blocker" software from random websites – only use official browser stores
- Avoid "cracked" or "premium" ad blockers – they often contain malware
- Don't install multiple ad blockers – slows down browser, causes conflicts
3.3 YouTube Ads – Legal, Practical Options & Limits
✅ Legal & Approved Methods
🔹 YouTube Premium ($13.99/month)
- ✅ No ads on all videos
- ✅ Background play (audio only)
- ✅ Offline downloads
- ✅ YouTube Music included
- ✅ Creators still get paid
Family plan: $22.99/month (up to 5 members)
Student plan: $7.49/month (verified students)
🔹 Skip button (5 seconds)
Most ads have "Skip Ad" after 5 seconds – completely legitimate.
📺 Platform Differences
| Platform | Ad Experience |
|---|---|
| Smart TVs | Fewer, longer ads (often unskippable) |
| Mobile app | Standard ads, can't skip sometimes |
| Desktop + ad blocker | Gray area – works but against terms |
⚠️ Limits & Reality
- Ad blockers work but YouTube may detect them
- No legal way to remove all ads without Premium
- Support creators you love – whitelist them
3.4 YouTube Dash Trick (yout-ube.com) – Complete Guide: How It Works, Risks & Why You Should Avoid It
🔹 What Is the YouTube Dash Trick?
You may see comments, TikTok videos, or shady websites claiming that changing youtube.com to yout-ube.com (or similar variations) will:
- ❌ Remove all YouTube ads
- ❌ Allow background video playback
- ❌ Download videos directly
- ❌ Unlock "premium" features for free
None of these claims are true.
🔹 How Scammers Trick You
Step-by-Step Scam Process:
- You change the URL from youtube.com to youtu-ube.com
- You're redirected to a completely different third-party website
- Fake video player loads – looks like YouTube but isn't
- Multiple popups appear:
- "Your video is ready for download"
- "Install video player to continue"
- "Your PC is infected! Click to clean"
- "You won a prize! Claim now"
- If you click: You download malware, ransomware, or adware
🚫 What Actually Happens
- ❌ No ads removed – actually MORE popup ads
- ❌ Video download popups – lead to malware
- ❌ Fake "video player" required – actually ransomware
- ❌ Browser notifications hijacked – endless spam
- ❌ Personal info stolen if you "sign in"
- ❌ Cryptominers installed – PC becomes slow
✅ Safe Alternatives
- 🛡️ uBlock Origin – Blocks ads safely (see 3.2)
- 💰 YouTube Premium – Official ad-free experience
- 📱 Brave Browser – Built-in ad blocking
- ⏭️ Skip after 5 seconds – Legitimate option
🪤 The "Download Video" Trap – Detailed Warning
When you visit youtu-ube.com or similar fake sites, you'll typically see:
📥
Big Download Button
"Click here to download video"
DANGER🎬
"Update Video Player"
"Your player is outdated"
MALWARE⚠️
Virus Alert Popup
"Your PC is infected!"
SCAMWhat clicking these does:
- Downloads a .exe file – pretending to be video but actually malware
- Installs browser hijackers – changes your homepage, shows endless ads
- Ransomware – encrypts your files and demands payment
- Steals saved passwords – from your browser
- Cryptominer – uses your PC to mine cryptocurrency (slow, hot, high electricity)
🔍 Real URL vs Fake URL – Learn the Difference
| Safe URLs (Real YouTube) | Dangerous URLs (Scams) |
|---|---|
https://www.youtube.com |
https://www.yout-ube.com |
https://youtu.be/VIDEO_ID |
https://youtube-free.com |
https://m.youtube.com |
https://youtube-download.com |
| Padlock icon present | May show "Not Secure" warning |
📋 What To Do If You Already Visited a Fake Site
- Close the tab immediately – press Ctrl+W
- If you downloaded anything: Delete the file immediately. Do NOT run it.
- Run a malware scan: Use Windows Defender full scan
- Check browser extensions: Remove any unfamiliar extensions
- Change important passwords: If you signed in anywhere
- Clear browser cache and cookies: Settings → Privacy → Clear data
- YouTube Premium – Official downloads in app
- 4K Video Downloader (desktop software – from official site only)
- youtube-dl (command line – advanced users)
- Online converters with caution – use only trusted, well-known sites
3.5 Best Browser Extensions for Normal Users
🛡️ Security & Privacy
🔹 uBlock Origin (Ad Blocker)
What it does: Blocks ads, trackers, and malicious popups. Lightweight and open-source.
🔹 Bitwarden (Password Manager)
What it does: Generates and stores strong passwords securely. Free version works great.
🔹 HTTPS Everywhere
What it does: Forces encrypted connections on websites that support it.
📝 Productivity
🔹 Dark Reader (Dark Mode)
What it does: Adds dark mode to every website, reducing eye strain at night.
🔹 Grammarly
What it does: Checks spelling and grammar as you type on any website.
🔹 OneTab
What it does: Converts all open tabs into a list, saving up to 95% memory.
📄 Reading & PDF
- ✅ Only install from official stores – links provided above are safe
- ✅ Check number of users and reviews – millions of downloads = trusted
- ✅ Review permissions – a calculator doesn't need access to all your data
- ✅ Remove unused extensions – each one can slow down your browser
3.6 Protecting Yourself from Fake Websites & Popups
🔍 URL Inspection Checklist
- ✅ Check spelling carefully: Faceboook.com (extra 'o') is fake, amazonn.com (double 'n') is fake
- ✅ Look for HTTPS and padlock: Click the lock icon to verify certificate is valid
- ✅ Watch for unusual domains: .com is normal, .xyz .top .club are often suspicious
- ✅ Check for typos in address bar: Legit companies don't misspell their own name
🪤 Popup Red Flags
- ❌ "Your PC is infected!" – Microsoft/Apple never show virus alerts in browsers
- ❌ "You won an iPhone!" – You didn't enter any contest
- ❌ "Click to claim prize" – Always a scam to steal info
- ❌ "Update Flash Player/Java" – Flash is dead since 2020
🛡️ Safe Response Guide
- Fake download buttons: Look for the real download link (usually small text, not big colorful buttons)
- Popups won't close: Press Ctrl+W to close tab, never click "Cancel" or "X" on the popup itself
- Tech support calls: Hang up immediately – Microsoft won't call about computer problems
- Urgent warnings: Scammers create urgency to make you panic. Take a breath, think before clicking
3.7 Remove Popup Using Inspect Element (Temporary Trick)
Sometimes login or signup popups block content.
🛠️ Steps
- Right-click popup → Inspect
- Popup HTML highlights
- Add
display: none;in Styles
3.8 Remove Blur Effect from Background (Inspect Element)
Popups often blur the background content.
🧩 Steps
- Press Ctrl + F in Inspect
- Search for
blur - Change
blur(3px)toblur(0px)
3.9 Browser Developer Tools – Beginner Overview
Developer Tools are built into browsers and help inspect web pages.
- Elements: HTML structure
- Styles: CSS rules
- Console: Errors & logs
- Network: Loaded files
3.10 Full-Page Screenshot Using Browser (Hidden Feature)
📸 Complete Steps
- Press Ctrl + Shift + I (or F12) to open Developer Tools
- Press Ctrl + Shift + P to open command menu
- Type
screenshotin the search box - Select "Capture full size screenshot" from the dropdown
Other Options:
- Capture area screenshot: Select and drag
- Capture node screenshot: Single element only
Save Location:
File automatically saves to your Downloads folder as filename.png with timestamp.
3.11 Safe Browsing Habits for Everyday Users – 15 Essential Practices
🛡️ Essential Security Habits
- ✅ Keep browser updated: Enable automatic updates. Outdated browsers have known security flaws that hackers exploit. Chrome/Edge update silently in background – just restart occasionally.
- ✅ Use strong, unique passwords: Never reuse passwords across sites. Use a password manager (Bitwarden, LastPass) to generate and store 16-character random passwords. Change banking passwords every 6 months.
- ✅ Log out on shared PCs: At libraries, schools, or work, always sign out completely – not just close the tab. Use private/incognito mode on shared computers as extra precaution.
- ✅ Check for HTTPS: Look for padlock icon before entering any password or payment info. Never enter sensitive data on HTTP sites (no padlock).
- ✅ Enable two-factor authentication (2FA): On email, banking, social media. Use authenticator app (Google Authenticator, Microsoft Authenticator) rather than SMS when possible.
⚠️ Habits to Avoid
- ❌ Avoid pirated websites: Pirated software, movie streaming sites, and crack websites are #1 source of malware. One download can install ransomware that encrypts all your files.
- ❌ Don't click "You won!" popups: You didn't win an iPhone, lottery, or gift card. These are phishing attempts to steal your information.
- ❌ Never install "video players" from streaming sites: Legitimate sites don't ask you to install software to watch videos. These are always malware.
- ❌ Don't save passwords in browser on shared computers: Browser-stored passwords are easily viewable in settings by anyone with access.
🔍 Smart Browsing Practices
- ✅ Verify URLs before clicking: Hover over links to see real destination. Fake sites use misspellings (faceb00k.com, amazonn.com).
- ✅ Use ad blocker: uBlock Origin blocks malicious ads that can infect your PC even without clicking (drive-by downloads).
- ✅ Clear browsing data monthly: Cookies and cache can be used to track you. Settings → Privacy → Clear browsing data.
- ✅ Be cautious with extensions: Only install from official stores, check reviews, and limit permissions. Remove unused extensions.
📱 Mobile Browsing Safety
- ✅ Download apps only from official stores: Play Store or App Store. Sideloading apps from websites is risky.
- ✅ Check app permissions: A flashlight app doesn't need access to your contacts or location.
- ✅ Use VPN on public Wi-Fi: Coffee shop Wi-Fi is insecure – anyone can intercept your data. Use a trusted VPN service.
📋 Daily Safety Checklist
Screenshots, Screen Recording & Media – Complete Windows Guide
Screenshots and screen recordings are essential for students, office workers, creators, and support tasks. This module covers every practical method available on Windows — from basic shortcuts to hidden browser tools.
4.1 Taking Screenshots Using Keyboard Shortcuts
Windows provides multiple built-in keyboard shortcuts to capture screenshots without installing any software.
| Shortcut | What It Captures | Where It Is Saved |
|---|---|---|
| PrtSc | Entire screen | Clipboard |
| Alt + PrtSc | Active window only | Clipboard |
| Win + PrtSc | Entire screen | Pictures → Screenshots |
| Win + Shift + S | Selected area/window | Clipboard |
4.2 Full-Page Screenshot in Chrome & Edge (Hidden Feature)
Normal screenshots cannot capture long web pages. Browsers provide a hidden tool to capture entire web pages.
📌 Step-by-Step (Chrome / Edge)
- Open the web page
- Press Ctrl + Shift + I (Developer Tools)
- Press Ctrl + Shift + P
- Type
screenshot - Select Capture full size screenshot
4.3 Using Snipping Tool Like a Pro
The Snipping Tool is Windows’ built-in screenshot and annotation app.
🧰 Snipping Modes
- Rectangular Snip
- Freeform Snip
- Window Snip
- Full-Screen Snip
✏️ Built-in Editing
- Draw & highlight
- Add text
- Crop image
- Save or copy instantly
4.4 Screen Recording Without Any Software
Windows includes a built-in screen recorder using Xbox Game Bar.
🎥 How to Record Screen
- Press Win + G
- Click Record (●)
- Press Win + Alt + R to stop
📁 Saved Location
Videos are saved in: Videos → Captures
4.5 Compressing Images & Videos Without Quality Loss
Large media files consume storage and are hard to share.
🖼️ Image Compression
- Resize image dimensions
- Use JPG instead of PNG when possible
- Lower quality slightly (90–85%)
🎬 Video Compression
- Lower resolution (1080p → 720p)
- Reduce frame rate
- Use MP4 (H.264)
4.6 Screenshot & Recording for Students & Office Work
- Capture online class notes
- Record presentations
- Share error screenshots with IT support
- Save receipts and forms
4.7 Common Screenshot & Recording Problems (Fixes)
- ❌ Screenshot not saving → Check Pictures folder
- ❌ Win + G not working → Enable Xbox Game Bar
- ❌ Black screen → Disable hardware acceleration
- ❌ No sound → Check microphone permissions
4.8 Best Practices & Safety Tips
- 🔐 Avoid capturing sensitive data
- 📁 Organize screenshots in folders
- 🧹 Delete unnecessary media regularly
- 📤 Compress before sharing online
Windows Performance & Speed Boost – Complete Optimization Guide
A slow Windows PC is frustrating. This module teaches safe, practical, and beginner-friendly methods to speed up Windows without breaking your system.
5.1 Why Windows Becomes Slow Over Time
Windows doesn’t become slow overnight. Performance drops gradually due to everyday usage habits.
- 📦 Too many startup apps
- 🗂️ Low disk space
- 🔄 Background apps running constantly
- 🧹 Junk & temporary files
- 🦠 Malware or unwanted software
5.2 Managing Startup Apps for Faster Boot
Startup apps launch automatically when Windows starts. Too many startup apps = slow boot time.
⚙️ Steps
- Press Ctrl + Shift + Esc
- Open Startup tab
- Disable apps you don’t need at startup
5.3 Cleaning Junk Files (Without Breaking Windows)
Junk files waste disk space and slow down your PC.
🧹 Safe Cleaning Methods
- Use built-in Disk Cleanup
- Enable Storage Sense
- Delete temporary files only
🗑️ Disk Cleanup Steps
- Search Disk Cleanup
- Select system drive (C:)
- Check Temporary Files
- Click OK
5.4 Storage Sense – Automatic Cleanup
Storage Sense automatically removes unnecessary files.
⚙️ Enable Storage Sense
- Open Settings
- Go to System → Storage
- Turn ON Storage Sense
5.5 RAM vs SSD – What Upgrade Improves Speed Most?
| Upgrade | Speed Impact | Recommendation |
|---|---|---|
| RAM Upgrade | Medium | Useful if RAM < 8 GB |
| SSD Upgrade | Very High | Best speed improvement |
5.6 Visual Effects – Make Windows Faster
Fancy animations consume system resources.
⚙️ Steps
- Search Performance
- Select Adjust appearance & performance
- Choose Adjust for best performance
5.7 Background Apps & Services Control
- Disable unnecessary background apps
- Limit apps running in system tray
- Close unused browser tabs
5.8 Power Mode & Performance Settings
Windows power mode affects speed and battery.
- Best Performance: Faster but less battery
- Balanced: Best for daily use
- Battery Saver: Slower but longer battery
5.9 Overheating, Fan Noise & Throttling
- Dust buildup reduces performance
- Overheating causes CPU throttling
- Loud fan = system under stress
5.10 Malware & Unwanted Software Check
Malware can silently slow down your PC.
- Use Windows Security regularly
- Remove suspicious apps
- Avoid cracked software
5.11 When to Reset or Reinstall Windows
Sometimes optimization is not enough.
- PC extremely slow even after cleanup
- Frequent crashes or errors
- System files corrupted
5.12 Final Speed Optimization Checklist
- ✅ SSD installed
- ✅ Startup apps reduced
- ✅ Storage space free (20%+)
- ✅ No malware
- ✅ Windows updated
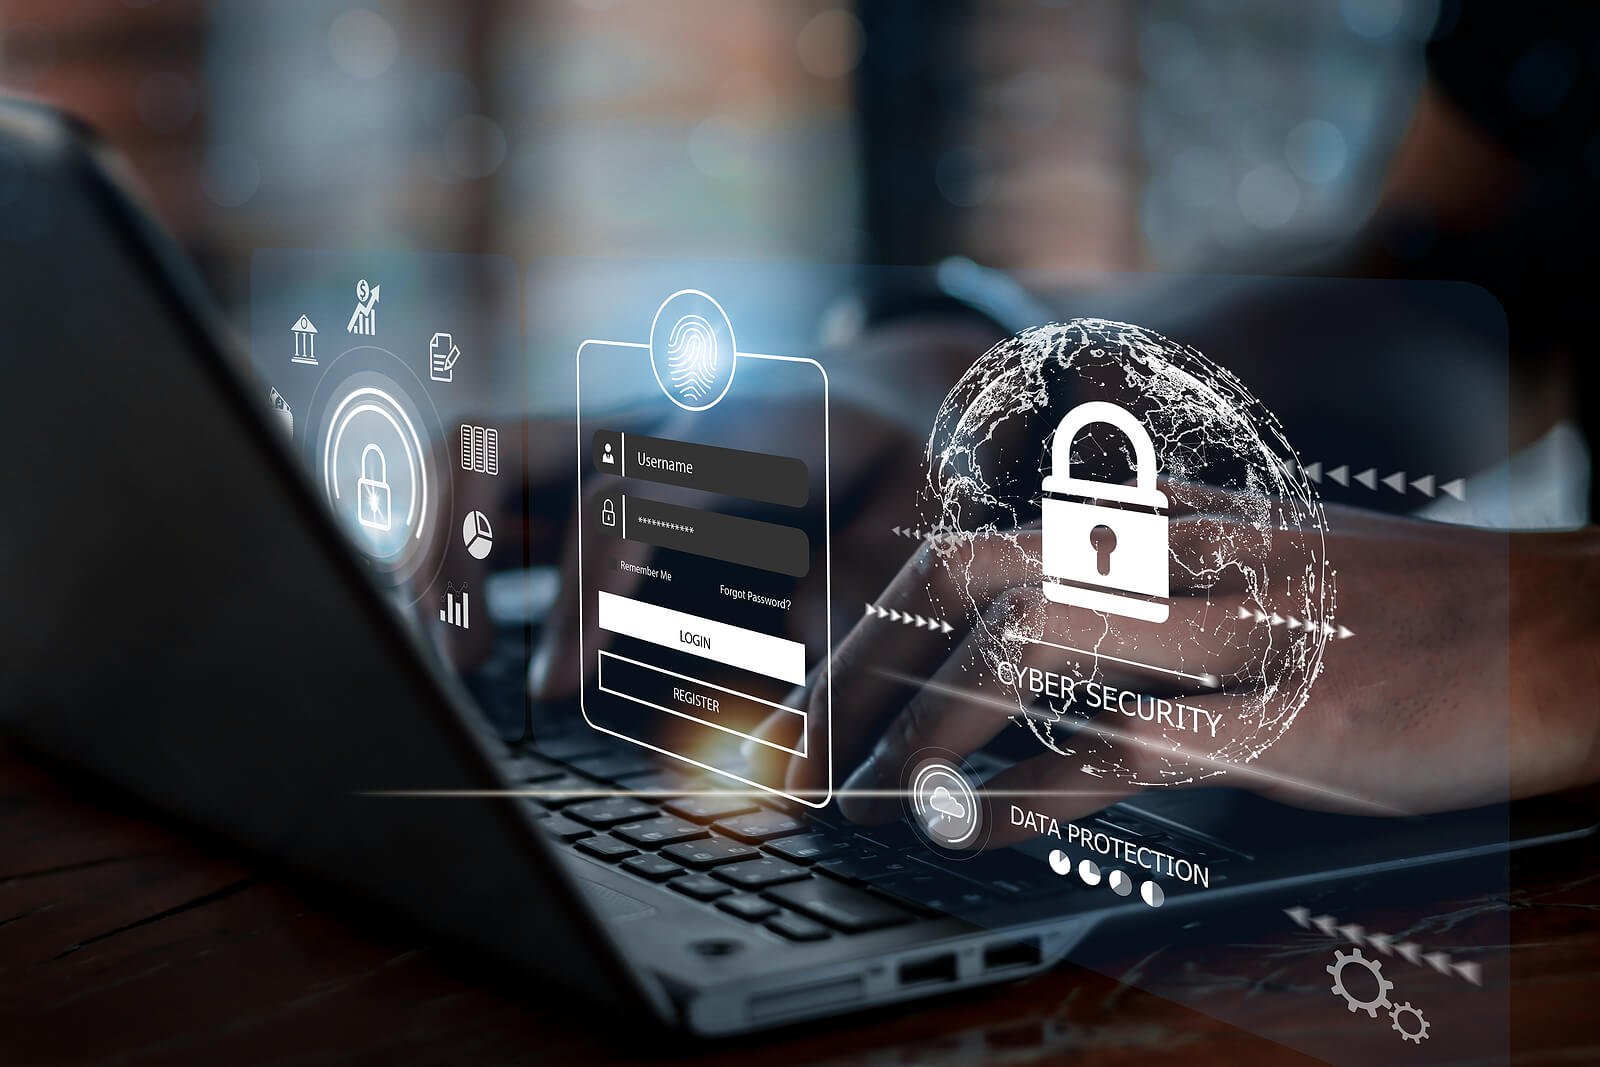
Windows Security, Privacy & Safety – Complete Protection Guide
Security is not just for experts. This module teaches normal Windows users how to protect their PC, personal data, online accounts, and privacy from real-world threats.
6.1 Windows Security Explained for Normal Users
Windows comes with built-in security tools that protect your system from viruses, malware, ransomware, and online threats.
🛡️ Windows Security Protects You From:
- 🦠 Viruses & malware
- 🔐 Ransomware attacks
- 🌐 Unsafe websites & downloads
- 📧 Phishing emails
6.2 Do You Really Need Antivirus Software?
Many users think paid antivirus is mandatory. In reality, Windows Security (Defender) is enough for most users.
| User Type | Windows Security | Paid Antivirus |
|---|---|---|
| Normal Home User | ✅ Enough | ❌ Not required |
| Office / Students | ✅ Enough | Optional |
| Risky Downloads / Piracy | ❌ Not enough | ⚠️ Still risky |
6.3 Avoiding Online Scams, Fake Calls & Fake Emails
Online scams target normal users more than hackers.
🚨 Common Scams
- “Your PC is infected” popup
- Fake Microsoft support calls
- Fake bank or courier emails
- WhatsApp prize & job scams
6.4 Privacy Settings You Must Change After Installing Windows
Windows collects some data by default. You can control what information is shared.
🔒 Recommended Privacy Changes
- Disable unnecessary location access
- Turn off ad personalization
- Limit camera & microphone access
- Disable background app permissions
6.5 Safe Downloads & Software Installation Rules
Most infections come from unsafe downloads.
✅ Safe Download Rules
- ✔ Download only from official websites
- ✔ Avoid “cracked”, “mod”, “patched” software
- ✔ Check file extensions (.exe, .msi)
- ✔ Scan files before installing
6.6 Secure Boot – What It Is & Should You Disable or Enable It?
Secure Boot is a built-in security feature found in modern PCs that protects your system during startup. It decides what is allowed to load when your computer turns on.
What Is Secure Boot? (Simple Explanation)
When you press the power button, your PC does not start Windows immediately. First, the system firmware (UEFI) checks whether the operating system is trusted and not modified.
- If everything is trusted → Windows loads normally
- If something is untrusted → boot is blocked
Secure Boot protects your PC from boot-time viruses and rootkits.
Why Secure Boot Exists
- Stops malware before Windows starts
- Prevents boot-level hacking
- Protects system files from tampering
- Required for Windows 11 installation
When You SHOULD Keep Secure Boot Enabled
- You are a normal home or office user
- You only use Windows (10 / 11)
- You want maximum security
- Your system works without issues
For 90% of users, Secure Boot should remain ENABLED.
When You MAY Need to Disable Secure Boot
- Installing Linux or dual-boot systems
- Using old operating systems
- Booting recovery or diagnostic tools
- Fixing certain boot or driver compatibility issues
Disabling Secure Boot reduces protection. Do it only when you clearly know why you need it.
How to Check Secure Boot Status in Windows
- Press Win + R
- Type
msinfo32and press Enter - Look for Secure Boot State
- Status will show On or Off
How to Enable or Disable Secure Boot (Step-by-Step)
- Restart your PC
- Press F2 / F10 / DEL / ESC (varies by brand)
- Enter BIOS / UEFI Settings
- Go to Boot or Security tab
- Find Secure Boot
- Set it to Enable or Disable
- Save changes and exit
Never change other BIOS settings unless instructed. Wrong changes can prevent Windows from booting.
Secure Boot: Enable vs Disable (Quick Comparison)
| Feature | Enabled | Disabled |
|---|---|---|
| Security Level | High | Lower |
| Windows 11 Support | Required | Not Supported |
| Linux / Custom OS | May Block | Works |
| Recommended for Beginners | Yes | No |
Final Advice for Normal Users
- If your PC works → do nothing
- If Windows 11 → keep enabled
- If experimenting → disable temporarily, re-enable later
Always re-enable Secure Boot after completing your task.
Software, Apps & Daily Productivity – Smart Windows Usage Guide
The right software can make Windows faster, safer, and easier to use. This module helps normal users choose useful, free, and safe apps and avoid unnecessary or harmful software.
7.1 Must-Have Free Software for Windows (Safe & Legal)
Windows works out of the box, but these free tools improve daily productivity without slowing down your PC.
| Category | Software Type | Why It’s Useful |
|---|---|---|
| Browser | Chrome / Edge / Firefox | Fast, secure web browsing |
| PDF Reader | Built-in Edge / Free PDF apps | Open & read PDFs easily |
| Media Player | VLC Media Player | Plays almost all audio/video formats |
| Compression | 7-Zip / WinRAR | Extract ZIP, RAR files |
| Cloud Storage | OneDrive / Google Drive | Backup & access files anywhere |
7.2 PDF Editing Without Paid Software
Many users think PDF editing always requires paid software. In reality, most basic tasks are free.
🧾 What You Can Do for Free
- Read PDFs (Edge, Chrome)
- Highlight & draw (Snipping Tool, Edge)
- Convert images to PDF
- Split or merge PDFs (online tools)
7.3 ZIP, RAR & File Extraction Explained
Compressed files save space and make sharing easier.
📦 Common Formats
- .zip – Most common
- .rar – Often password protected
- .7z – High compression
📂 How to Extract
- Right-click the file
- Select Extract Here or Extract to Folder
7.4 Managing Downloads Like a Pro
Poor download habits lead to clutter and security risks.
📥 Best Practices
- Rename files immediately after download
- Delete unused installers
- Scan downloads before opening
- Create folders by category
7.5 Windows Tips for Students
- Use OneDrive for notes backup
- Split screen for classes & notes
- Use screenshots instead of copying text
- Organize subjects into folders
7.6 Windows Tips for Office Users
- Pin Office apps to taskbar
- Use PDF instead of DOC for sharing
- Use screenshots for quick reporting
- Keep desktop clean
7.7 Avoiding Bloatware & Unnecessary Apps
Many PCs come with pre-installed apps you don’t need.
- Uninstall unused apps
- Avoid “PC boosters”
- Disable auto-start apps
- Read installation options carefully
7.8 Multitasking & Productivity Shortcuts
| Shortcut | Function |
|---|---|
| Win + D | Show Desktop |
| Win + Arrow | Snap Windows |
| Alt + Tab | Switch Apps |
| Ctrl + C / V | Copy / Paste |
7.9 Cloud Apps vs Installed Apps
Many tools now work directly in browsers.
- Cloud apps save storage
- No installation required
- Accessible from any device
7.10 Final Software & Productivity Checklist
- ✅ Only essential apps installed
- ✅ Downloads folder clean
- ✅ No unknown software
- ✅ Regular file organization
- ✅ Cloud backup enabled
Windows Troubleshooting & Real-Life Problems – Step-by-Step Fix Guide
Every Windows user faces problems like Wi-Fi not working, sound issues, blue screen errors, or failed updates. This module explains simple, safe, and practical fixes that normal users can apply without technical knowledge.
8.1 Fixing Wi-Fi & Internet Issues (Most Common Problem)
Internet issues are the #1 Windows complaint. Most problems are caused by settings, drivers, or routers.
🔧 Basic Checks (Always Do First)
- Turn Wi-Fi OFF → ON
- Restart router & modem
- Restart your PC
- Check airplane mode
🛠️ Advanced Fixes
- Forget & reconnect Wi-Fi network
- Run Windows Network Troubleshooter
- Update Wi-Fi driver
- Reset network settings
8.2 Sound Not Working – Step-by-Step Fix
Audio problems are usually caused by wrong output device or driver issues.
🔊 Quick Fix Checklist
- Check volume & mute button
- Select correct output device
- Reconnect headphones/speakers
🎧 Advanced Fixes
- Restart Windows Audio service
- Update or reinstall audio driver
- Run Sound Troubleshooter
8.3 Blue Screen Errors Explained Simply (BSOD)
Blue Screen of Death looks scary but usually has simple causes.
❌ Common Causes
- Faulty drivers
- Windows update issues
- Hardware problems (RAM, SSD)
- Overheating
✅ Safe Fix Steps
- Restart PC
- Remove recently installed software
- Update drivers
- Run Windows Update
8.4 Windows Update Problems & Solutions
Updates improve security but sometimes fail or get stuck.
🔄 Common Issues
- Update stuck at certain percentage
- Update failed error
- PC restarting repeatedly
🛠️ Fixes
- Restart PC and try again
- Pause updates temporarily
- Run Windows Update Troubleshooter
- Ensure enough free disk space
8.5 When to Reset vs Reinstall Windows
| Situation | Best Option |
|---|---|
| PC slow but usable | Optimize & clean |
| Frequent crashes | Reset Windows |
| System severely broken | Reinstall Windows |
8.6 DiskPart Explained – Clean & Create Pendrive Properly
DiskPart is a powerful Windows command-line tool used to fix corrupted, write-protected, or unusable pendrives. It is especially helpful when normal formatting fails.
Important Warning (Read Before Proceeding)
- This process will permanently delete all data on the selected disk
- Selecting the wrong disk can erase your hard drive
- Use DiskPart only when normal formatting does not work
When Should You Use DiskPart?
- Pendrive not showing correct size
- Write-protected USB drive
- Multiple or corrupted partitions
- Bootable USB creation fails
Complete DiskPart Commands (Step-by-Step)
diskpart
list disk
select disk 1
clean
create partition primary
format fs=fat32 quick
assign
exit
What Each Command Does
- diskpart – Opens the DiskPart utility
- list disk – Shows all connected disks
- select disk 1 – Selects the pendrive (number may vary)
- clean – Removes all partitions and data
- create partition primary – Creates a new main partition
- format fs=fat32 quick – Formats the pendrive quickly
- assign – Assigns a drive letter
- exit – Closes DiskPart
Always verify disk size in list disk before using
select disk.
Never guess the disk number.
FAT32 is recommended for bootable pendrives. For large files (over 4GB), NTFS may be required.
8.7 Windows Password Recovery Using Hiren's Boot CD
📋 PHASE 1: Preparation & Download
✅ Step 1: Download Hiren's Boot CD PE
- On a working computer, visit: 🔗 Hiren's Boot CD Official Download Page
- Download the latest version (Hiren's BootCD PE x64)
- File size: ~2GB
- Save to an easy location (Desktop recommended)
🛠️ Step 2: What You'll Need
- USB Drive: 8GB or larger (will be formatted)
- Rufus: USB creation tool
- Target Computer: The locked Windows PC
- Backup: Important data if possible
📝 Alternative Tools (If Hiren's Doesn't Work)
Small, fast, text-based
Bypasses password without removing
Commercial but very effective
💿 PHASE 2: Create Bootable USB Drive
🔄 Step 1: Download & Run Rufus
- Download Rufus from: 🔗 rufus.ie (Official Website)
- Run Rufus (no installation needed)
- Insert your USB drive
- Rufus will automatically detect it
⚙️ Step 2: Configure Rufus Settings
| Setting | Value to Select | Important Note |
|---|---|---|
| Device | Your USB drive | Double-check correct drive! |
| Boot selection | SELECT → Choose Hiren's ISO file | Browse to downloaded .iso file |
| Partition scheme | GPT (for UEFI) or MBR (for BIOS) | See table below to choose |
| Target system | UEFI (non-CSM) or BIOS | Match partition scheme |
| File system | NTFS | Default is fine |
🔧 How to Choose: GPT/UEFI vs MBR/BIOS
| Computer Age | Windows Version | Recommended Setting | How to Check |
|---|---|---|---|
| Before 2012 | Windows 7 or older | MBR + BIOS | Older computers usually BIOS |
| 2012-2016 | Windows 8/8.1 | Try GPT+UEFI first | Most support both |
| 2017-Present | Windows 10/11 | GPT + UEFI | Modern computers are UEFI |
🚀 Step 3: Create USB & Final Checks
- Click START in Rufus
- Warning about data loss → Click OK
- Select "Write in ISO Image mode" → Click OK
- Wait for completion (5-15 minutes)
- When done, click CLOSE
- Safely eject USB drive
⚡ PHASE 3: Boot Computer from USB
🔑 Step 1: Access Boot Menu
| Brand | Boot Menu Key | BIOS Key | Notes |
|---|---|---|---|
| HP | F9 or ESC | F10 | Press repeatedly at startup |
| Dell | F12 | F2 | Most common: F12 |
| Lenovo | F12 or F1 | F2 | Some have Novo button |
| Acer | F12 | F2 | Or Del key |
| Asus | F8 | F2 or Del | Try both if F8 fails |
| MSI | F11 | Del | Common for gaming laptops |
| Toshiba | F12 | F2 | Older: ESC then F1 |
🎯 Step 2: Boot Process (Universal Method)
- Turn off the locked computer completely
- Insert Hiren's Boot USB
- Turn on computer and immediately start pressing the Boot Menu Key (see table above)
- You'll see a menu with boot options
- Select your USB drive (may appear as):
- "USB HDD: [Your USB Brand]"
- "UEFI: [Your USB]" (for UEFI)
- "Removable Device"
- Press Enter to boot from USB
🚨 Troubleshooting: If USB Doesn't Boot
Common Issues & Solutions
- Fast Boot enabled: Enter BIOS → Disable Fast Boot
- Secure Boot enabled: Enter BIOS → Disable Secure Boot
- Wrong USB port: Try USB 2.0 port (usually black)
- Old computer: Recreate USB with MBR+BIOS in Rufus
BIOS Settings to Change
- Boot Order: Make USB first
- Legacy Support: Enable if available
- CSM: Enable for older systems
- Temporarily disable TPM 2.0 (Win 11)
🔓 PHASE 4: Reset Windows Password
🖥️ Step 1: Navigate Hiren's Boot Menu
- After booting from USB, you'll see main menu
- Select: Boot from Hiren's BootCD (Normal Mode)
- Wait for Windows PE to load (takes 2-5 minutes)
- You'll see a desktop similar to Windows
📁 Step 2: Locate & Run Password Tool
- On the desktop, open Start Menu (bottom-left)
- Go to: Programs → Password Tools → NTPWEdit
- OR navigate manually:
X:\Programs\Password\NTPWEdit\ntpwedit64.exe - Run the program (64-bit version for modern Windows)
👤 Step 3: Select User & Reset Password
- NTPWEdit will show Windows installation(s)
- Select the correct Windows drive (usually C:)
- Click Open or Select Windows folder
- Navigate to:
Windows\System32\config - Select the SAM file
- User accounts will appear in the list
- Select Administrator account if available
- Don't modify SYSTEM or default accounts
- Backup original SAM file if possible
🔧 Step 4: Reset Options (Choose One)
| Method | Steps | Best For | Effect |
|---|---|---|---|
| Blank Password |
|
Quickest access | No password needed |
| Set New Password |
|
Security conscious | New password set |
| Enable Admin |
|
Disabled admin accounts | Admin account activated |
💾 Step 5: Save Changes & Exit
- After making changes, click Save
- Confirm if prompted
- Close NTPWEdit program
- Close any other open programs
- Click Start → Shutdown → Restart
- IMPORTANT: Remove USB when computer restarts
✅ PHASE 5: Post-Recovery Steps
🛡️ Step 1: First Login
- Computer should boot normally
- At login screen:
- If blank password → Just press Enter
- If new password → Enter it
- You should now access Windows
- Check if all files/data are intact
⚙️ Step 2: Account Management
- Go to Settings → Accounts
- Set up proper user account
- Create password hint
- Set up PIN for easier login
- Consider setting recovery options
⚠️ Important Security Notes
What Gets Reset
- Windows login password
- Local account passwords
- Some app passwords may remain
- Microsoft account link may break
What Doesn't Get Reset
- Files and documents (safe)
- Installed programs (safe)
- Browser passwords (may need re-login)
- Wi-Fi passwords (remain)
- Use "I forgot my password" on Microsoft website
- Or create new local admin account
- Transfer files to new account
🚨 PHASE 6: Troubleshooting Common Problems
| Problem | Possible Cause | Solution | Difficulty |
|---|---|---|---|
| USB won't boot | Secure Boot enabled, Wrong Rufus settings | Disable Secure Boot in BIOS, Try MBR+BIOS | ⭐ Easy |
| Blue screen when booting USB | Driver issues, Hardware incompatibility | Try "Safe Mode" in Hiren's menu | ⭐⭐ Medium |
| NTPWEdit shows no users | Wrong SAM file, BitLocker encryption | Select correct Windows folder, Disable BitLocker first | ⭐⭐⭐ Hard |
| Password reset but still can't login | Microsoft account, Corrupted profile | Create new local admin account | ⭐⭐ Medium |
| BitLocker recovery key required | Drive encryption enabled | Need recovery key from Microsoft account | ⭐⭐⭐⭐ Very Hard |
| TPM 2.0 error (Windows 11) | TPM security prevents boot | Temporarily disable TPM in BIOS | ⭐⭐⭐ Hard |
🆘 Emergency Alternatives
For Simple Cases
- Use Windows installation USB
- Shift+F10 at install screen
- Rename utilman.exe to cmd.exe
- Works on some Windows versions
For Advanced Users
- Offline NT Password & Registry Editor
- Smaller, faster than Hiren's
- Command-line only
- Higher success rate on old systems
Last Resort
- Windows Reset (keep files)
- Fresh Windows install
- Professional data recovery service
- Replace hard drive
⚖️ LEGAL & ETHICAL GUIDELINES
This guide is for legitimate password recovery purposes only.
✅ Legal Uses
- Your own personal computer
- Family member's computer (with permission)
- Company computer (with written authorization)
- Customer's computer (with service agreement)
- Educational purposes (in lab environment)
❌ Illegal Uses
- Accessing someone else's computer without permission
- Bypassing workplace restrictions
- Academic dishonesty (bypassing exam software)
- Stealing data or information
- Any malicious intent
📄 Documentation & Proof of Ownership
Always maintain proper documentation when performing password recovery for others:
- Written authorization from owner
- Service agreement with terms
- Photographs of computer serial number
- Receipt if recently purchased
- Witness if possible
⏱️ 30-Minute Quick Recovery Checklist
| Time | Step | Tools | Status |
|---|---|---|---|
| 5 min | Download Hiren's & Rufus | Working computer, Internet | ✅ |
| 10 min | Create bootable USB | 8GB USB, Rufus | ✅ |
| 2 min | Boot from USB | Boot menu key | ✅ |
| 5 min | Run NTPWEdit | Hiren's Boot CD | ✅ |
| 3 min | Reset password | NTPWEdit tool | ✅ |
| 5 min | Reboot & Login | Remove USB, Restart | ✅ |
Windows Command Line & Power Tools – CMD, PowerShell & Automation
The command line is one of Windows' most powerful tools, yet most users avoid it unnecessarily. This module teaches practical, safe, and time-saving commands that normal users can master in minutes – no programming experience required.
XX.1 CMD vs PowerShell vs Terminal – Which Should You Use?
Many users get confused by Windows having multiple command-line tools. Here's the simple, practical difference and when to use each.
| Tool | What It Is | Best For | When to Use |
|---|---|---|---|
| CMD (Command Prompt) | Original Windows command line (1987) | Simple tasks, batch files, older tools | Quick file operations, ping, ipconfig |
| PowerShell | Modern, object-based command shell | System management, automation | Windows settings, Office 365, Azure |
| Windows Terminal | Modern host for CMD, PowerShell, WSL | Tabs, customization, multiple shells | Daily use, developers, IT pros |
Use CMD for basic commands (dir, ping, ipconfig).
Use PowerShell for advanced Windows management.
Use Windows Terminal if you want a modern, tabbed interface.
How to Open Each Tool
📟 Command Prompt
- Win + R → type
cmd→ Enter - Search "cmd" in Start Menu
- Right-click Start → Command Prompt
⚙️ PowerShell
- Win + R → type
powershell→ Enter - Search "PowerShell" in Start
- Right-click Start → Windows Terminal
🪟 Windows Terminal
- Search "Terminal" in Start
- Win + R →
wt→ Enter - Install from Microsoft Store
XX.2 Basic CMD Commands Everyone Should Know
You don't need to memorize hundreds of commands. These 10 commands will solve 90% of your daily needs.
| Command | What It Does | Example | When You Need It |
|---|---|---|---|
dir |
Lists files/folders in current directory | dir /p (pause after each page) |
See what's in a folder without File Explorer |
cd |
Change directory (move between folders) | cd Desktop → cd .. (go back) |
Navigate folders quickly |
mkdir |
Create new folder | mkdir Projects |
Create multiple folders quickly |
del |
Delete file(s) | del *.tmp (delete all .tmp files) |
Bulk delete specific file types |
copy |
Copy files | copy file.txt D:\backup\ |
Copy files without drag-drop |
move |
Move files | move *.pdf D:\Documents\ |
Organize files by type |
ren |
Rename files/folders | ren oldname.txt newname.txt |
Batch rename files |
cls |
Clear screen | cls |
Clean up cluttered command window |
exit |
Close command prompt | exit |
Quickly close window |
help |
Show all commands | help copy (specific command help) |
Learn what commands do |
🐧 Linux Command Reference for Windows Users
If you ever use Linux or WSL (Windows Subsystem for Linux), these commands will be useful. Think of this as a cross-platform command line dictionary.
| Command | Purpose | Example | Windows Equivalent |
|---|---|---|---|
dmidecode |
Retrieves hardware information from BIOS/DMI table | sudo dmidecode -t systemShows manufacturer, product name, serial number |
wmic csproduct get name, vendor, identifyingnumber |
netstat |
Displays network connections, routing tables, interface statistics | netstat -tulnpShows listening ports with process IDs |
netstat -an or netstat -ano |
dmesg |
Displays kernel messages for hardware/driver troubleshooting | dmesg | lessView kernel logs page by page |
Get-WinEvent -LogName System | Select-Object -First 20 (PowerShell) |
umask |
Sets default file creation permissions | umask 022Files → 755, Directories → 755 |
No direct equivalent. Windows uses ACLs via icacls |
tr |
Translate or delete characters from input | echo "hello" | tr 'a-z' 'A-Z'Converts lowercase to uppercase |
No direct equivalent. PowerShell: "hello".ToUpper() |
wsl --install in PowerShell (Admin).
🔄 Quick Comparison: Same Task, Different OS
Windows (CMD/PowerShell)
systeminfo- System detailsipconfig- Network configtasklist- Running processesgetmac- MAC addresspowercfg /batteryreport- Battery health
Linux (Ubuntu/Debian)
lshwordmidecode- System detailsifconfigorip addr- Network configps aux- Running processesip link show- MAC addressupower -i /org/freedesktop/UPower/devices/battery_BAT0
🖥️ dmidecode - Hardware Information
Purpose: Retrieve detailed hardware information from BIOS/DMI table in human-readable format.
Linux Command: sudo dmidecode
Example: sudo dmidecode -t system
Displays: Manufacturer, product name, serial number, UUID, SKU number
Windows Equivalent: wmic csproduct get name, vendor, identifyingnumber
🌐 netstat - Network Statistics
Purpose: Display network connections, routing tables, interface statistics, masquerade connections, multicast memberships.
Linux Command: netstat
Common Usage: netstat -tulnp - Shows listening ports with process IDs
Windows Equivalent: netstat -ano - Shows ports with PID
📟 dmesg - Kernel Messages
Purpose: Display kernel-related messages and troubleshoot hardware/driver issues.
Linux Command: dmesg
Example: dmesg | less - View kernel logs page by page
Windows Equivalent: Get-WinEvent -LogName System | Where-Object {$_.LevelDisplayName -eq "Error"} | Select-Object -First 10
🔒 umask - Permission Defaults
Purpose: Sets default file creation permissions for new files and directories.
Linux Command: umask
Example: umask 022 - Sets default permissions: Files 755, Directories 755
Windows Equivalent: No direct equivalent. Windows uses ACLs via icacls or Set-Acl in PowerShell.
🔄 tr - Character Translation
Purpose: Translate or delete characters from standard input and write to standard output.
Linux Command: tr
Example: echo "hello world" | tr 'a-z' 'A-Z' - Converts lowercase to uppercase (HELLO WORLD)
Windows Equivalent: No direct CMD equivalent. PowerShell: "hello world".ToUpper()
📋 Quick Reference: Linux Commands for Windows Users
| Linux Command | Windows CMD | Windows PowerShell |
|---|---|---|
ls |
dir |
Get-ChildItem or dir |
pwd |
cd |
Get-Location or pwd |
ps aux |
tasklist |
Get-Process or ps |
grep |
findstr |
Select-String |
ifconfig |
ipconfig |
Get-NetIPAddress |
kill |
taskkill |
Stop-Process |
wsl --install
XX.3 File & Folder Operations Using Command Line
Command line is often faster than File Explorer for bulk operations and hidden files.
📁 Advanced File Operations
Copy Entire Folder Structure
xcopy D:\source E:\backup /e /h /iShow Hidden Files
dir /ahDelete All Files of Certain Type
del *.tmp /s /f /qExport File List to Text
dir /b > filelist.txtCompare Two Folders
robocopy folder1 folder2 /L /NJH /NJS /NP /NSCreate Empty File
type nul > filename.txtdel or rmdir.
XX.4 Network Troubleshooting Commands
These commands help diagnose internet and network problems faster than any software.
🌐 Essential Network Commands
| Command | What It Shows | How to Use | What to Look For |
|---|---|---|---|
ipconfig |
Your IP address, subnet mask, gateway | Type ipconfig |
169.254.x.x = no IP assigned (problem) |
ipconfig /all |
Detailed network info (DNS, MAC address) | Type ipconfig /all |
Check DHCP server, DNS servers |
ping google.com |
Tests internet connectivity | ping 8.8.8.8 or ping google.com |
Reply = internet works, Timeout = no connection |
tracert google.com |
Shows route packets take to destination | tracert google.com |
Where the connection stops = problem location |
nslookup google.com |
DNS lookup - converts domain to IP | nslookup google.com |
If fails, DNS is broken |
netstat -an |
Shows all active connections | netstat -an |
See which apps are connecting to internet |
ipconfig /release & /renew |
Get new IP address from router | ipconfig /release then ipconfig /renew |
Fixes "No internet access" issues |
ipconfig /flushdns |
Clear DNS cache | ipconfig /flushdns |
Fixes "Website not loading" issues |
🔧 Step-by-Step Network Diagnostic
- Check IP address:
ipconfig→ If IPv4 is 169.254.x.x, router not assigning IP - Test local network:
ping 192.168.1.1(or your gateway IP) → If fails, problem is between PC and router - Test internet:
ping 8.8.8.8→ If works, DNS problem - Test DNS:
nslookup google.com→ If fails,ipconfig /flushdns - Renew IP:
ipconfig /releasethenipconfig /renew
XX.5 System Information & Monitoring Commands
Get detailed system information without third-party tools.
💻 System Information
-
systeminfoComplete system details -
systeminfo | findstr /B /C:"OS Name" /C:"OS Version"Quick OS info -
wmic cpu get nameCPU model -
wmic memorychip get capacity, speedRAM details -
wmic diskdrive get model,sizeHard drive model
📊 System Monitoring
-
tasklistAll running processes -
tasklist | findstr "chrome"Find specific process -
wmic process list briefProcess with memory usage -
driverqueryList all drivers -
powercfg /batteryreportLaptop battery health
powercfg /batteryreport → Generates HTML report with battery capacity, cycles, and health history. Save to desktop and open in browser.
XX.6 Useful Batch File Basics for Automation
Batch files (.bat) let you automate repetitive tasks. Write commands once, run them anytime.
📝 How to Create a Batch File
- Open Notepad
- Type your commands (one per line)
- Save as filename.bat (not .txt)
- Double-click to run
🔄 Useful Batch Files for Daily Use
1. Quick System Cleaner
@echo off
echo Cleaning temporary files...
del /q /f /s %temp%\*
echo Cleaning prefetch...
del /q /f /s C:\Windows\Prefetch\*
echo Cleaning recycle bin...
rd /s /q C:\$Recycle.bin
echo Done!
pause2. Network Troubleshooter
@echo off
echo Resetting network...
ipconfig /release
ipconfig /renew
ipconfig /flushdns
netsh winsock reset
netsh int ip reset
echo Restart your computer
pause3. Backup Files
@echo off
set source=C:\Users\%username%\Documents
set destination=D:\Backup\Documents
xcopy "%source%" "%destination%" /e /i /y
echo Backup complete!
pause4. System Info Reporter
@echo off
echo System Information > systeminfo.txt
echo ==================== >> systeminfo.txt
date /t >> systeminfo.txt
time /t >> systeminfo.txt
echo. >> systeminfo.txt
systeminfo | findstr /B /C:"OS Name" /C:"OS Version" >> systeminfo.txt
wmic cpu get name >> systeminfo.txt
wmic memorychip get capacity >> systeminfo.txt
echo Report saved as systeminfo.txt
pause@echo off at the top to hide commands and show only results.
XX.7 PowerShell Basics for Windows Management
PowerShell is more powerful than CMD but still easy for beginners. These commands work on Windows 10/11.
⚡ PowerShell vs CMD - Same Task, Different Command
| Task | CMD Command | PowerShell Command |
|---|---|---|
| List files | dir |
Get-ChildItem or ls or dir |
| Copy file | copy |
Copy-Item or copy |
| Show processes | tasklist |
Get-Process or ps |
| Kill process | taskkill /pid 1234 |
Stop-Process -Id 1234 |
| Get help | help |
Get-Help |
🛠️ Useful PowerShell One-Liners
Get Installed Programs
Get-WmiObject -Class Win32_Product | Select-Object Name, VersionFind Large Files
Get-ChildItem -Path C:\ -Recurse -File | Where-Object {$_.Length -gt 1GB}Check Disk Space
Get-PSDrive -PSProvider FileSystemExport Installed Drivers
Get-WindowsDriver -Online -All | Export-Csv drivers.csv| (pipe) to chain commands,
and Get-Member to see what properties an object has. This makes PowerShell incredibly flexible.
XX.8 Running CMD/PowerShell as Administrator Safely
Some commands need administrator privileges. Here's how to do it safely and recognize when it's necessary.
⚠️ Commands That Require Admin Rights
ipconfig /release & /renewnetsh winsock resetsfc /scannowchkdsk(with repair options)powercfg(battery report is fine without admin)dismcommands- Installing/uninstalling software
- Modifying system files
✅ Safe Ways to Run as Administrator
Method 1: Right-Click
- Search for CMD/PowerShell/Terminal
- Right-click on the app
- Select "Run as administrator"
- Click Yes on UAC prompt
Method 2: Keyboard Shortcut
- Press Win + X
- Press A (for Terminal Admin)
- Or press I then A (older Windows)
🛡️ How to Identify Admin Mode
Command Prompt:
Title bar shows "Administrator: Command Prompt"
Path starts with C:\Windows\system32>
PowerShell/Terminal:
Title bar shows "Administrator: Windows PowerShell"
Tab has shield icon
- A command explicitly says "Run as administrator"
- You're fixing system-level problems
- You understand exactly what the command does
📋 Quick Reference: Command Line Cheat Sheet
File Operations
dir- List filescd- Change foldermkdir- New foldercopy- Copy filemove- Move filedel- Delete fileren- Rename
Network
ipconfig- IP infoping- Test connectiontracert- Route tracenslookup- DNS lookupnetstat- Connections
System
systeminfo- PC specstasklist- Running appsdriverquery- Driverssfc /scannow- Repairchkdsk- Disk check
PowerShell
Get-Process- ProcessesGet-Service- ServicesGet-Help- DocumentationExport-CSV- Save to fileWhere-Object- Filter
Advanced Windows Tips – Hidden Features & Power Tricks
This module is for users who want to go beyond basics. These tips are optional, but once you learn them, Windows becomes faster, cleaner, and easier to control.
9.1 Using Task Manager Like an Expert
Task Manager is not just for closing frozen apps — it’s a powerful monitoring tool.
📊 Key Tabs Explained
- Processes: See which apps use CPU, RAM, Disk
- Startup: Control boot-time apps
- Performance: Real-time system health
- App history: Resource usage of apps
9.2 Multiple Desktops & Virtual Workspace
Virtual Desktops help you separate work, study, and personal tasks.
🖥️ Useful Shortcuts
- Win + Tab → View desktops
- Win + Ctrl + D → New desktop
- Win + Ctrl + ← / → → Switch desktops
- Win + Ctrl + F4 → Close desktop
9.3 Hidden Windows Features Most Users Don’t Know
- 📋 Clipboard history (Win + V)
- 📌 Pin files to Quick Access
- 🔍 Advanced search filters in File Explorer
- 🖱️ Right-click taskbar options
9.4 File Explorer Power Tips
📁 Smart File Management
- Use tabs (Windows 11)
- Group files by date/type
- Use search operators (date:, size:)
- Pin frequently used folders
9.5 Power User Keyboard Shortcuts
| Shortcut | Action |
|---|---|
| Win + X | Quick system menu |
| Win + L | Lock PC instantly |
| Alt + Enter | File properties |
| Ctrl + Shift + Esc | Task Manager |
9.6 Windows Search & Indexing Optimization
Windows Search can be faster with proper indexing.
- Exclude unnecessary folders
- Rebuild search index if broken
- Use precise keywords
9.7 Backup Important Data the Right Way
Advanced users always plan for data loss.
💾 Best Backup Strategy
- Local backup (external drive)
- Cloud backup (OneDrive / Drive)
- Regular schedule
9.8 Startup & Boot Optimization (Advanced)
- Disable unused startup services
- Delay heavy apps
- Keep SSD healthy
9.9 Advanced Privacy & Control Tips
- Review app permissions regularly
- Disable unnecessary background apps
- Control notification overload
9.10 Smart Habits That Separate Power Users
- 🧠 Use keyboard more than mouse
- 📁 Organize files weekly
- 🔄 Update Windows regularly
- 🛡️ Think before installing apps
9.11 Common Advanced Mistakes to Avoid
- Editing registry without knowledge
- Using random “tweaker” tools
- Disabling important services blindly
9.12 Final Advanced Tips Checklist
- ✅ Task Manager understood
- ✅ Virtual desktops in use
- ✅ Files well organized
- ✅ Backups configured
- ✅ Clean & controlled system
Windows Maintenance & Long-Term Care – Keep Your PC Healthy for Years
Just like a vehicle needs servicing, Windows needs regular care. This module explains what to do, how often to do it, and what NOT to do so your PC stays fast, stable, and secure for the long term.
10.1 How Often Should You Clean & Maintain Windows?
Many users either never maintain Windows or over-clean it. Both are harmful.
| Task | Recommended Frequency |
|---|---|
| Restart PC | Weekly |
| Disk Cleanup / Storage Sense | Monthly |
| Windows Updates | As released |
| Check Startup Apps | Every 2–3 months |
| Full Antivirus Scan | Monthly |
10.2 Disk Cleanup vs Storage Sense (Which to Use?)
Windows provides two safe cleaning tools — both are useful.
🧹 Disk Cleanup
- Manual control
- Best for beginners
- Safe system cleanup
🤖 Storage Sense
- Automatic background cleanup
- Deletes temp files & Recycle Bin items
- Ideal for forgetful users
10.3 Checking Disk Errors Safely (CHKDSK Explained)
Disk errors can silently slow Windows or cause crashes.
🔍 When to Check Disk
- PC freezes frequently
- Files become corrupted
- Unexpected shutdowns
🛠️ Safe Method (No Commands)
- Open This PC
- Right-click system drive (C:)
- Properties → Tools → Check
10.4 Defragmentation vs SSD Optimization
Many users still defrag SSDs — this is a mistake.
| Storage Type | Action | Frequency |
|---|---|---|
| HDD | Defragment | Monthly |
| SSD | Optimize (TRIM) | Automatic |
10.5 Signs Your Windows Needs Reset or Reinstall
Maintenance has limits. Sometimes a fresh start is better.
⚠️ Warning Signs
- System extremely slow despite optimization
- Frequent blue screen errors
- Corrupted system files
- Malware infection history
10.6 Keeping Drivers Healthy
Drivers act as translators between hardware and Windows.
- Update drivers only when needed
- Use Windows Update or manufacturer website
- Avoid “driver booster” tools
10.7 Battery & Hardware Care (Laptops)
- Avoid constant 100% charging
- Do not block ventilation
- Clean dust every 6–12 months
- Use original charger
10.8 Backup & Restore Points
Maintenance includes preparing for failure.
- Create restore points before major changes
- Keep external backups
- Use cloud backup for documents
10.9 Common Maintenance Myths (Debunked)
- ❌ “Clean registry weekly”
- ❌ “More cleaners = faster PC”
- ❌ “Disable updates permanently”
- ❌ “Task killer apps improve speed”
10.10 Long-Term Windows Care Checklist
- ✅ Regular updates
- ✅ Monthly cleanup
- ✅ Disk health monitoring
- ✅ Backup strategy
- ✅ Minimal software installation
Windows Updates, Drivers & Hardware – What to Update, When & Why
Windows updates and drivers keep your PC secure, stable, and compatible with new software. This module clears common myths and teaches safe update habits for normal users.
11.1 Windows Updates – Myths vs Reality
Many users fear Windows updates, but most problems come from skipping updates, not installing them.
| Myth | Reality |
|---|---|
| Updates slow your PC | Updates usually improve performance & security |
| Updates always break Windows | Major failures are rare |
| Disabling updates is safer | Unpatched systems are more vulnerable |
11.2 Types of Windows Updates Explained
- Security Updates: Fix vulnerabilities (most important)
- Quality Updates: Bug fixes & stability improvements
- Feature Updates: Major Windows version upgrades
- Driver Updates: Hardware compatibility fixes
11.3 Should You Pause or Disable Windows Updates?
Windows allows pausing updates — disabling them permanently is risky.
⏸️ When Pausing Updates Is OK
- Low internet data
- Important presentation or exam
- Known buggy update (temporary pause)
11.4 Drivers Explained (Graphics, Audio, Network)
Drivers allow Windows to communicate with hardware. Outdated or faulty drivers cause crashes and device issues.
| Driver Type | What It Controls | Problem Symptoms |
|---|---|---|
| Graphics | Display, games, videos | Screen flicker, low resolution |
| Audio | Speakers, mic | No sound |
| Network | Wi-Fi, Ethernet | No internet |
11.5 How to Update Drivers Safely
✅ Safe Methods (Recommended Order)
- Windows Update
- Device Manager → Update driver
- Manufacturer website (Dell, HP, Lenovo, etc.)
11.6 Device Manager Explained for Beginners
Device Manager shows all hardware connected to your PC.
🛠️ What Symbols Mean
- ⚠️ Yellow triangle → Driver issue
- ❌ Red X → Device disabled
- ✔️ No symbol → Working properly
11.7 Hardware Compatibility & Upgrade Awareness
Not all hardware upgrades are compatible with every PC.
- Check motherboard RAM limits
- SSD compatibility (SATA vs NVMe)
- Power supply capacity
- Windows version support
11.8 BIOS / Firmware Updates – Should You Care?
BIOS updates improve compatibility but carry risk.
✅ Update BIOS Only If:
- Manufacturer recommends it
- You face hardware compatibility issues
- Security vulnerability exists
11.9 Hardware Failure vs Software Issue – How to Tell
- Problem fixed after restart → Software
- Problem persists in Safe Mode → Hardware
- Multiple crashes → Possible RAM/SSD issue
11.10 Best Practices for Updates & Hardware Health
- ✅️✅ Keep Windows updated
- ✅ Update drivers only when needed
- ✅ Use genuine hardware
- ✅ Backup before major updates
- ✅ Avoid risky tools
Data Backup, Recovery & Storage – Protect Your Files Before It’s Too Late
Data loss happens suddenly — accidental delete, system crash, virus, theft, or hardware failure. This module teaches how to back up data correctly, recover files safely, and choose the right storage for long-term peace of mind.
12.1 Importance of Backup (Real-Life Data Loss Examples)
Most people think: “It won’t happen to me.” But data loss is extremely common.
📉 Common Data Loss Scenarios
- Accidental delete (Shift + Delete)
- Windows update failure
- Virus or ransomware attack
- Hard disk / SSD failure
- Laptop theft or damage
12.2 What Exactly Should You Back Up?
Many users back up the wrong things and miss critical data.
✅ Must-Backup Data
- Documents (PDF, Word, Excel)
- Photos & videos
- Desktop & Downloads folder
- Browser bookmarks & passwords
- Email data (if not cloud-based)
❌ Usually Not Required
- Installed software
- System files
- Temporary folders
12.3 Backup Using External Hard Drive (Best Practice)
External drives are the most reliable offline backup option.
🔌 How to Do It Correctly
- Connect external hard drive
- Create folders (Documents, Photos, Videos)
- Copy data manually OR use File History
- Disconnect drive after backup
12.4 Cloud Backup vs Local Backup (Which Is Safer?)
| Feature | Local Backup | Cloud Backup |
|---|---|---|
| Internet Needed | No | Yes |
| Protection from Theft | ❌ | ✅ |
| Ransomware Safe | ✅ (offline) | ⚠️ Depends |
| Cost | One-time | Monthly |
12.5 Windows File History Explained Simply
File History automatically backs up important folders.
🛠️ How to Enable File History
- Settings → Update & Security
- Backup → Add a drive
- Select external drive
12.6 Recover Deleted Files (What Works & What Doesn’t)
✅ Recovery Possible If:
- Recycle Bin not emptied
- Backup exists
- Drive not overwritten
❌ Recovery Hard If:
- SSD TRIM enabled
- Drive formatted
- Data overwritten
12.7 Storage Types Explained (HDD vs SSD vs USB)
| Storage | Best For | Lifespan |
|---|---|---|
| HDD | Large backups | Medium |
| SSD | Speed & OS | High |
| USB Flash | Transfer only | Low |
12.8 Formatting Drives Without Losing Data (Precautions)
⚠️ Before Formatting
- Double-check drive letter
- Backup data
- Disconnect other drives
12.9 Backup Frequency – How Often Is Enough?
- Daily users → Weekly backup
- Office users → Monthly
- Critical data → Daily + cloud
12.10 Golden Backup Rules (Must Remember)
- ✅ 3-2-1 Backup Rule
- ✅ Test backups occasionally
- ✅ Keep offline copy
- ✅ Encrypt sensitive backups
- ✅ Never rely on a single device
Windows Networking & Sharing – Home, Office & Daily Use Made Simple
Networking allows your Windows PC to connect to the internet, share files, printers, and communicate with other devices. This module explains network basics, sharing setup, common problems, and real-life fixes in simple language.
13.1 Home Wi-Fi Basics for Windows Users
Most Windows users connect through home Wi-Fi routers. Understanding basic terms avoids confusion.
📡 Common Networking Terms
- Router: Connects your home to the internet
- Modem: Brings internet from ISP
- SSID: Wi-Fi network name
- Password: Network security key
13.2 Network Types Explained (Public vs Private)
Windows treats networks differently for security reasons.
| Network Type | Use Case | Sharing |
|---|---|---|
| Public | Café, airport, hotel | Disabled |
| Private | Home, office | Enabled |
13.3 Sharing Files Between PCs (LAN & Wi-Fi)
File sharing allows PCs on the same network to access folders.
🛠️ Step-by-Step Setup
- Set network to Private
- Control Panel → Network & Sharing Center
- Turn on Network Discovery
- Turn on File & Printer Sharing
- Right-click folder → Properties → Sharing
13.4 Sharing Files Without Password (Advanced but Useful)
Windows allows password-protected sharing by default.
🔓 Disable Password-Protected Sharing
- Control Panel → Network & Sharing Center
- Advanced sharing settings
- Turn off password-protected sharing
13.5 Printer Setup & Sharing Explained
Printers can be shared across multiple PCs.
🖨️ Printer Sharing Steps
- Install printer on main PC
- Control Panel → Devices & Printers
- Printer Properties → Sharing
- Enable “Share this printer”
13.6 Using Mobile Hotspot on Windows
Windows can share internet from Ethernet or Wi-Fi.
📱 How to Enable
- Settings → Network & Internet
- Mobile hotspot
- Select connection source
- Turn ON
13.7 Fixing “Network Not Showing Other Devices”
🔧 Common Fixes
- Enable Network Discovery
- Check Private network setting
- Restart router
- Disable third-party firewall temporarily
13.8 Internet Speed Issues – PC or Network?
Not all slow internet is Windows-related.
🧪 Simple Tests
- Test speed on phone vs PC
- Move closer to router
- Restart router
- Check background downloads
13.9 Network Security Tips for Normal Users
- 🔒 Use strong Wi-Fi password
- 🔒 Change router default password
- 🔒 Avoid public Wi-Fi for banking
- 🔒 Keep router firmware updated
13.10 Common Networking Mistakes to Avoid
- Disabling firewall permanently
- Using cracked VPN software
- Ignoring router placement
- Connecting unknown USB network devices
👨👩👧👦 Module 14 : Accounts, Passwords & Family Safety – Complete Windows Security Guide
14.1 Local Account vs Microsoft Account – Complete Comparison Guide
💻 Local Account – Traditional Windows Account
A local account exists only on your specific computer. It's not connected to the internet and doesn't sync with Microsoft's servers.
✅ Advantages:
- Privacy: No data sent to Microsoft servers
- No Internet Required: Log in even without internet connection
- Simplicity: No email needed, just a username and password
- No Advertising: No targeted ads based on your account
- Better for Shared Computers: Each user's data stays completely separate
- No Microsoft Account Needed: Good for users without email or who avoid Microsoft services
❌ Disadvantages:
- No Password Recovery: If you forget your password, recovery is difficult (covered in sections 14.6-14.9)
- No Sync: Settings, themes, and passwords don't sync across devices
- No Microsoft Store Downloads: Many Store apps require Microsoft account
- No OneDrive Integration: Can't easily access cloud storage
- No Device Tracking: Can't locate lost device via "Find My Device"
- Older Windows Features Limited: Some features require Microsoft account
How to Create a Local Account:
- When prompted for Microsoft account, click "Offline account" or "Domain join instead"
- Click "Limited experience" if prompted
- Enter your desired username and password
- Go to Settings → Accounts → Your info
- Click "Sign in with a local account instead"
- Follow the wizard to create local account
☁️ Microsoft Account – Connected Modern Experience
A Microsoft account is an email address and password used to sign in to Microsoft services (Outlook.com, Xbox Live, Office 365, etc.).
✅ Advantages:
- Easy Password Recovery: Reset online (covered in 14.5)
- Settings Sync: Themes, passwords, browser favorites sync across devices
- Microsoft Store Access: Download and sync apps across devices
- OneDrive Integration: Built-in cloud storage (5GB free)
- Find My Device: Locate lost computers
- Windows Hello Setup: Easier biometric configuration
- Family Features: Parental controls, activity reporting
- Single Sign-On: Automatically signed into Microsoft services
❌ Disadvantages:
- Privacy Concerns: Microsoft collects usage data
- Internet Dependent: First login requires internet
- Ads in Windows: May see targeted ads in Start menu
- Email Required: Must have or create email account
- Account Compromise Risk: If email is hacked, all devices at risk
How to Create/Switch to Microsoft Account:
- Go to Settings → Accounts → Your info
- Click "Sign in with a Microsoft account instead"
- Enter your email and password
- Verify with current password if switching
Create new Microsoft account: Visit account.microsoft.com or create during Windows setup
📊 Side-by-Side Comparison: Local vs Microsoft Account
| Feature | Local Account | Microsoft Account |
|---|---|---|
| Password Recovery | ❌ Difficult (disk required) | ✅ Easy (online reset) |
| Settings Sync | ❌ No | ✅ Yes (across devices) |
| Microsoft Store | Limited | Full access |
| OneDrive | Manual setup | Integrated |
| Find My Device | ❌ No | ✅ Yes |
| Parental Controls | Basic local only | Full family features |
| Privacy | ✅ High (offline) | ⚠️ Moderate (data collected) |
| Internet Required | ❌ No (offline) | ✅ Yes for setup |
| Windows Hello | ✅ Works | ✅ Works (easier setup) |
| Multiple Devices | Separate accounts | Unified experience |
| BitLocker Recovery | Manual key backup | Auto backup to account |
- Personal laptop: Microsoft account (convenience, recovery)
- Shared family computer: Mix – Microsoft for parents, local for young kids
- Business/work computer: Local or Azure AD (business equivalent)
- Privacy-focused users: Local account
🔄 Switching Between Account Types Without Losing Data
Switching from Local to Microsoft Account:
- Settings → Accounts → Your info
- Click "Sign in with a Microsoft account instead"
- Enter Microsoft account credentials
- Enter current local password to verify
- Choose whether to sync settings
Result: All your files remain, but now settings sync and online recovery enabled.
Switching from Microsoft to Local Account:
- Settings → Accounts → Your info
- Click "Sign in with a local account instead"
- Verify current Microsoft account password
- Create local username and password
- Sign out and sign in with new local account
📈 Business & Marketing Relevance: Account Security for Professionals
For digital marketers, business owners, and Facebook ad managers, your Windows account choice has implications:
- Client Data Protection: If you handle client Facebook ad accounts, local accounts on shared computers prevent accidental cross-contamination
- Password Managers: Microsoft account can sync browser passwords (convenient but consider security)
- Multi-User Workstations: Agencies with multiple employees using one computer should use separate local accounts
- Remote Work: Microsoft account helps sync settings between office and home computers
- Recovery Scenarios: If you forget your password and have Facebook ad campaigns running, Microsoft account recovery is much faster
14.2 Password vs PIN vs Biometrics – Which Authentication Method Is Best?
🔑 Traditional Password – The Universal Standard
A password is a string of characters you type to prove your identity. It's the most universal but also most problematic method.
✅ Advantages:
- Universally accepted: Works everywhere, including safe mode and recovery environments
- No special hardware needed: Works on any computer
- Can be very secure: Long complex passwords are extremely strong
- Standard for Microsoft account: Required for online recovery
- Works remotely: Can sign in over Remote Desktop
❌ Disadvantages:
- Vulnerable to keyloggers: Malware can record keystrokes
- Shoulder surfing risk: Someone can watch you type
- Hard to remember: Complex passwords are forgettable
- Slow to type: Especially long complex ones
- Reused passwords risk: People reuse across sites
Creating a Strong Password:
- Length matters most: 12+ characters
- Mix it up: Uppercase, lowercase, numbers, symbols
- Avoid dictionary words: Use passphrases like "correct-horse-battery-staple"
- Don't reuse: Different password for Microsoft account
- Example strong password: "My-D0g-Rex-barks-@-3am!"
🔢 Windows Hello PIN – Device-Specific Convenience
A PIN is a numeric (or alphanumeric) code tied to your specific device. It's not transmitted to Microsoft servers.
How PINs Are Different from Passwords:
- Device-specific: PIN only works on this computer
- Local storage: Stored in TPM (Trusted Platform Module) hardware
- No network transmission: Never sent over internet
- Can include letters: "PIN" can actually be alphanumeric
✅ Advantages:
- Faster to type: Short numbers (or letters) on keyboard
- More secure than password locally: TPM protects against brute force
- Survives password changes: If you change Microsoft account password, PIN still works
- No internet required: Works offline
- Two-factor like: Combines something you know with something you have (this device)
- Auto-lock works: Can require PIN after sleep
❌ Disadvantages:
- Only works on this device: Can't use PIN on another computer
- Not universal: Won't work in safe mode or recovery environments
- Short PINs are weak: 4-digit is easily guessable
- Same PIN risk: People reuse simple PINs
Setting Up PIN:
- Settings → Accounts → Sign-in options
- Click PIN (Windows Hello) → Add
- Verify your password
- Enter desired PIN (check "Include letters and symbols" for stronger)
PIN Complexity Options:
# Group Policy (Windows Pro) to require complex PINComputer Configuration → Administrative Templates → System → PIN Complexity
👆 Windows Hello Biometrics – Fingerprint & Facial Recognition
Biometric authentication uses physical characteristics to verify identity. Windows Hello supports fingerprint readers and facial recognition cameras.
How It Works:
- Fingerprint: Capacitive sensor reads unique ridge patterns
- Face: Infrared camera creates 3D map of your face (not just a photo)
- Data stored locally: In TPM, never uploaded
- Anti-spoofing: Requires live person, not photo
✅ Advantages:
- Fastest sign-in: Touch or look, instantly logged in
- No typing required: Great for tablets or keyboards
- Very convenient: Encourages using security
- Hard to steal: Your fingerprint/face is always with you
- Cannot be observed: No shoulder surfing risk
- Supports apps: Many apps use Windows Hello
❌ Disadvantages:
- Requires special hardware: Not all PCs have it
- Cannot change biometrics: If compromised, can't change your face
- False reject/accept rates: Not 100% perfect
- Wet/dirty fingers: Fingerprint readers may fail
- Lighting affects face: Very dark rooms may have issues
- Privacy concerns: Some users uncomfortable with biometrics
Setting Up Biometrics:
- Settings → Accounts → Sign-in options
- Click Fingerprint recognition or Face recognition
- Click Set up
- Follow wizard (multiple scans of finger or face)
- Create PIN as backup
🔐 Security Keys – Physical Two-Factor Authentication
Security keys (like YubiKey) are physical USB/NFC devices that provide strong two-factor authentication.
How It Works:
- Insert USB key or tap NFC
- Press button on key to authenticate
- Uses FIDO2/WebAuthn standards
- Requires PIN or biometric as second factor
✅ Advantages:
- Extremely secure: Phishing-resistant
- Portable: Use on any computer
- No batteries: Always works
- Great for high-security users
❌ Disadvantages:
- Cost: $20-50 for key
- Can lose it: Need backup keys
- USB port required: Some devices lack ports
📊 Authentication Methods Comparison
| Feature | Password | PIN | Fingerprint | Face | Security Key |
|---|---|---|---|---|---|
| Speed | ⭐ Slow | ⭐⭐ Fast | ⭐⭐⭐⭐ Very Fast | ⭐⭐⭐⭐⭐ Instant | ⭐⭐⭐ Fast |
| Security Level | High (if strong) | High (with TPM) | High | High | ⭐⭐⭐⭐⭐ Highest |
| Hardware Required | None | None | Fingerprint reader | IR camera | USB/NFC key |
| Works Offline | ✅ Yes | ✅ Yes | ✅ Yes | ✅ Yes | ✅ Yes |
| Works in Safe Mode | ✅ Yes | ❌ No | ❌ No | ❌ No | ❌ No |
| Phishing Resistant | ❌ No | ✅ Yes (local only) | ✅ Yes | ✅ Yes | ✅ Yes |
| Multi-Device | ✅ Yes | ❌ No | ❌ No | ❌ No | ✅ Yes |
🎯 Best Practices: Layered Authentication
The most secure approach combines multiple methods:
Recommended Setup:
- Primary: Windows Hello (Face or Fingerprint) for daily convenience
- Backup: Strong alphanumeric PIN in case biometrics fail
- Recovery: Strong Microsoft account password (for online reset)
- Extra security: Security key for Microsoft account (2FA)
Security Tips:
- Never use 1234 or 0000: Most common PINs are easily guessed
- Enable Dynamic Lock: Windows can lock when you walk away with your phone
- Set sign-in requirements after sleep: Never auto-login on laptops
- Use picture password on tablets: Touch-friendly alternative
# Enable Dynamic Lock (requires Bluetooth phone)Settings → Accounts → Sign-in options → Dynamic lock
💼 Professional Relevance: Authentication for Business Users
For digital marketers and business professionals handling client data:
- Facebook Ads Manager: Use strong Microsoft account password + 2FA to protect ad spend
- Client Confidentiality: Biometrics ensure only you access client campaign data
- Shared Computers: Never save passwords; use separate accounts or Windows Hello for Business
- Remote Work: PIN works offline when traveling without internet
- Quick Access: Biometrics let you quickly check campaign performance throughout day
14.3 Creating Guest & Child Accounts – Complete Setup Guide
👥 Windows Account Types Explained
| Account Type | Permissions | Best For | Can Install Software? |
|---|---|---|---|
| Administrator | Full system control | Primary user, IT admin | ✅ Yes (any) |
| Standard User | Can run software, change own settings | Daily use, teens | ⚠️ Some (admin password needed) |
| Child (via Family Safety) | Standard user with parental controls | Children under 13-18 | ⛔ Restricted |
| Guest (built-in) | Very limited, temporary | One-time visitors | ❌ No |
| Kiosk/Assigned Access | Single app only | Public computers, demos | ❌ No |
➕ Creating a Standard Local User Account
Perfect for guests, roommates, or secondary users who don't need admin access.
Method 1: Settings App (Windows 10/11)
- Open Settings → Accounts → Family & other users
- Under "Other users," click Add account
- Click "I don't have this person's sign-in information"
- Click "Add a user without a Microsoft account"
- Enter username, password, password hint
- Click Next
Method 2: Control Panel (Classic)
- Open Control Panel → User Accounts → User Accounts
- Click Manage another account → Add a new user in PC settings
- (Redirects to Settings method above)
Method 3: Command Line (Fastest)
# Open Command Prompt as Administratornet user username password /add# Example: net user guestuser P@ssw0rd123 /add# Set as standard user (not admin)net localgroup users username /addnet localgroup administrators username /delete
🚪 Enabling the Built-in Guest Account
The built-in Guest account provides temporary access with minimal privileges. It's disabled by default for security.
Enable Guest Account:
# Method 1: Command Prompt (Admin)net user guest /active:yes# Method 2: Local Users and Groups (Windows Pro)1. Run lusrmgr.msc2. Click Users → Guest3. Uncheck "Account is disabled"
Set Guest Account Restrictions:
- Guest cannot install software
- Guest cannot access other users' files
- Guest cannot change system settings
- Guest folder is deleted on logout (by default)
Disable When Done:
net user guest /active:no
👶 Creating a Microsoft Child Account (For Family Safety)
Microsoft child accounts are linked to a parent's account and enable comprehensive parental controls.
Prerequisites:
- Parent must have Microsoft account
- Child needs email address (can create during setup)
- Internet connection required
Step-by-Step Setup:
- Go to Settings → Accounts → Family & other users
- Click Add a family member
- Select Add a child
- Enter child's email address or click "The person I want to add doesn't have an email address" to create one
- If creating new email:
- Enter desired email (@outlook.com or @hotmail.com)
- Create password
- Enter birthdate (affects safety defaults)
- Click Next and confirm
- Child will receive email invitation (accept on their device)
What Happens Next:
- Child account appears in your Family Safety dashboard
- Default safety settings apply based on age
- You receive email when child requests screen time or purchases
🏪 Kiosk Mode (Assigned Access) – Single App Accounts
Assigned Access locks a user account to a single app. Perfect for public displays, library computers, or child-safe tablets.
Setup Kiosk Mode (Windows 10/11):
- Create a standard user account for kiosk
- Go to Settings → Accounts → Family & other users
- Click the kiosk account → Set up assigned access
- Select the app to run in kiosk mode
- Restart and sign in with kiosk account
Use Cases for Marketing:
- Trade Show Demos: Show only your product website or demo app
- Digital Signage: Display ads or presentations
- Client Portals: Allow clients to view reports only
- Employee Time Clocks: Single app for clocking in/out
Remove Kiosk Mode:
Settings → Accounts → Family & other users → Select account → Remove assigned access
🛡️ Account Security Best Practices
- Principle of Least Privilege: Give users only the permissions they need
- Only one admin account: Use standard for daily use, admin only for changes
- Regular audits: Check "Other users" periodically for unknown accounts
- Remove unused accounts: Delete accounts of former employees or guests
- Strong passwords for all: Even guest accounts should have passwords if enabled
- Enable auditing: Track who logs in and when (Pro editions)
Check Current Users via Command Line:
net user # List all usersquery user # Who's currently logged in
14.4 Parental Controls Explained Simply – Complete Family Safety Guide
🎮 What Parental Controls Can Do – Complete Feature Overview
Screen Time Limits
- Set daily time limits per device
- Create bedtime schedules (e.g., no access after 9 PM)
- Different limits for weekdays vs weekends
- See time usage reports
- Allow extra time when requested
Content Filters
- Block inappropriate websites (Edge browser only)
- Choose age-appropriate app and game ratings
- Block specific apps or games
- Filter search results (Bing safe search enforced)
Purchase Controls
- Require parent approval for all purchases
- Add money to child's Microsoft account
- See spending history
- Block free downloads if desired
Activity Reporting
- Weekly email reports
- See which apps and games they use
- View websites visited (Edge only)
- See search terms used
- Monitor screen time across devices
Location Sharing (with child's phone)
- See child's location on map (with child's consent)
- Location history
- Battery level of child's device
- Arrival/departure notifications
⚙️ Step-by-Step: Setting Up Parental Controls
On Your Computer (Parent):
- Ensure you're signed in with Microsoft account
- Go to Settings → Accounts → Family & other users
- Click Add a family member
- Select Add a child and follow wizard
- Child receives email invitation (accept on their device)
On Child's Computer:
- Sign in with the new child Microsoft account
- Follow setup prompts
- Ensure child uses Edge browser for web filtering
Configure Settings (Online Dashboard):
- Visit account.microsoft.com/family
- Sign in with your parent Microsoft account
- Select child's account
- Configure:
- Screen time: Set schedules and limits
- Content filters: Set age ratings, block sites
- Spending: Require approval, add money
- Activity: View reports
🔧 Advanced Parental Control Configuration
Screen Time Settings:
Per-device limits: You can set different limits for PC, Xbox, and phone
Schedule example:
- Weekdays: 3 PM – 8 PM (5 hours total)
- Weekends: 9 AM – 9 PM (12 hours total, with breaks)
- Bedtime: 9 PM – 7 AM (no access)
Content Filtering Options:
Web and search:
- Allow list only: Child can only visit approved sites
- Block inappropriate sites: Automatic filtering (recommended)
- No filtering: Monitor only
Apps and games: Set maximum allowed age rating:
- Everyone (ages 3+)
- Everyone 10+
- Teen (ages 13+)
- Mature (ages 17+) – usually not for children
Purchase Approval:
When child tries to buy something:
- You receive email notification
- You can approve/deny via email or family dashboard
- If approved, transaction completes
- If denied, child gets notification
📊 Understanding Activity Reports
Weekly email reports show:
Screen Time Summary:
- Total time per device
- Most used apps and games
- Time spent per app
- Comparison to previous week
Web Activity:
- Top websites visited
- Search terms used
- Attempts to visit blocked sites
Real-time Dashboard (online):
- Current activity (if child is online)
- Location (if enabled)
- Pending requests for extra time or purchases
🔍 Common Parental Control Issues & Fixes
| Problem | Likely Cause | Solution |
|---|---|---|
| Settings not applying | Child not signed in with Microsoft account | Verify child's sign-in; restart computer |
| Web filtering not working | Child using Chrome/Firefox | Web filtering only works in Edge; install Family Safety browser extension for Chrome |
| Screen time not enforcing | Time zone mismatch | Ensure all devices have correct time zone |
| Child bypassing limits | Creating local account | Disable ability to create local accounts via Group Policy |
| Location not showing | Location services disabled | Enable location on child's phone/tablet |
💼 Why Marketers Should Understand Parental Controls
Digital marketers and business owners should understand parental controls because:
- Target Audience: If you market to parents, you need to understand their concerns and how they protect children online
- Compliance: COPPA (Children's Online Privacy Protection Act) affects how you market to minors
- Family-Oriented Products: Understanding Family Safety helps design kid-friendly apps
- Work-from-Home Parents: Many employees need to balance work and childcare; family features help
- Ad Targeting: Microsoft's advertising policies restrict targeting children
If you're creating content or ads for parents, mentioning compatibility with Microsoft Family Safety can be a selling point.
14.5 Reset Microsoft Account Password (Online Method) – Complete Recovery Guide
📋 Before You Start: What You'll Need
- Access to recovery email/phone: The alternate contact methods you set up
- Another device: Phone, tablet, or friend's computer to access reset page
- Internet connection: Obviously
- Patience: Process may take a few minutes
🔄 Step-by-Step: Reset Microsoft Account Password
Method 1: Using Another Device (Recommended)
- Go to https://account.live.com/password/reset
- Select "I forgot my password" and click Next
- Enter your Microsoft account email and the captcha
- Choose how to receive verification code:
- Email (to alternate email)
- Text (to registered phone number)
- Authentication app (if set up)
- Enter the verification code you receive
- Create a new strong password
- Sign in to Windows with new password
Method 2: From Locked Windows PC (If Internet Connected)
- On login screen, click "I forgot my password" below password field
- Follow same online prompts as above
- Once reset, sign in immediately
🆘 What If You Don't Have Access to Recovery Email/Phone?
Microsoft provides an account recovery form for this situation. Be prepared to provide:
Information You May Need:
- Full name on account
- Previous passwords you remember
- Date you created the account (approximate)
- Email addresses you've sent to recently
- Subject lines of recent emails
- Contacts in your address book
- Purchase history (if any Xbox or Microsoft Store purchases)
- Device information (serial numbers of devices using this account)
Recovery Form Process:
- Go to https://account.live.com/acsr
- Fill out as much information as possible (more is better)
- Microsoft reviews within 24 hours
- If approved, you'll get password reset link
🔐 Recovering with Two-Factor Authentication Enabled
If you have 2FA enabled, recovery is similar but requires:
Recovery Codes:
When you set up 2FA, Microsoft provided recovery codes. Use one of these if you don't have your phone.
Authentication App Recovery:
If you changed phones and lost access to authenticator app:
- Use recovery codes (above)
- Or use account recovery form with identity verification
Prevention: Always Save Recovery Codes!
Store recovery codes in:• Password manager• Printed paper in safe place• Encrypted USB drive
✅ After Successful Recovery
- Update all devices: Sign in with new password on all your devices
- Update password manager: Change stored password
- Verify recovery options: Ensure alternate email/phone are current
- Consider setting up PIN: For easier daily sign-in
- Enable 2FA: If not already enabled
Update Windows Sign-in:
- After resetting online, Windows may still show old password
- Click "OK" on failed login, then use new password
- Windows will update credentials automatically
📈 Business Continuity: Why This Matters for Professionals
For digital marketers and business owners:
- Facebook Ads Manager: Your Microsoft account may be linked to business email; losing access could delay campaigns
- Client Data: If locked out, you can't access client files or contracts
- Multiple Devices: Many professionals use multiple devices; account recovery must work across all
- Team Collaboration: Shared Microsoft 365 accounts need reliable recovery processes
14.6 Reset Local Windows Password Using Password Reset Disk
💾 Creating a Password Reset Disk (Do This Now!)
You must create this while you still know your password!
Requirements:
- USB flash drive (any size, will be formatted)
- Access to your logged-in Windows account
- Windows 10/11 (works on all versions)
Step-by-Step Creation:
- Insert USB drive
- Open Control Panel → User Accounts → User Accounts
- In left panel, click "Create a password reset disk"
- Forgotten Password Wizard opens – click Next
- Select your USB drive from list → Next
- Enter your current password → Next
- Wait for progress bar to complete → Next → Finish
userkey.psw. This is your password reset disk.
Alternative: Command Line Method
# Run as Administratorrundll32.exe keymgr.dll,PRShowSaveWizardExW
🔄 Using the Password Reset Disk (When Locked Out)
When you've forgotten your password and have the reset disk ready:
- Insert the password reset USB
- On login screen, enter any password (it will fail)
- Click OK on error message
- Below the password field, you'll see "Reset password..." link
- Click it to start Password Reset Wizard
- Click Next (should detect your USB automatically)
- Select your USB drive if prompted
- Enter a new password and password hint
- Click Next → Finish
- Sign in with your new password
What If Reset Link Doesn't Appear?
- Ensure USB is properly inserted
- Try different USB port
- Check if you're using correct account type (Microsoft vs local)
- Reset disk only works for local accounts, not Microsoft accounts
🔒 Security Best Practices for Password Reset Disks
- Store securely: Keep in locked drawer or safe
- Don't label as "Password Reset": Use innocuous label
- Create multiple copies: One for home, one for office
- Recreate if you change password: Reset disk still works after password change, but recreate annually
- Destroy old disks: If you lose a reset disk, format it immediately
Testing Your Reset Disk:
You can test without forgetting your password:
- Insert reset disk
- Press Ctrl + Alt + Delete → Change a password
- Click Reset password to verify disk works
- Cancel without changing password
⚠️ Limitations of Password Reset Disks
- Must be created in advance: No help if you didn't create one
- User-specific: Only works for one account
- Computer-specific: Works only on the PC where created
- Doesn't work for Microsoft accounts: Use online recovery instead
- Physical access required: Need the USB with you
- Can be lost/stolen: Security risk if misplaced
14.7 Reset Windows Password Using Safe Mode
📋 Requirements for Safe Mode Password Reset
- Another administrator account on the same computer (with known password)
- Physical access to the computer
- Windows installation (any version)
🔄 Step-by-Step: Reset Password via Safe Mode
Part 1: Boot into Safe Mode
- Restart computer
- As Windows begins loading, press F8 repeatedly (may need to try multiple times)
- If F8 doesn't work (Windows 10/11 often doesn't), use this method:
- On login screen, click power icon
- Hold Shift while clicking Restart
- Computer restarts to recovery environment
- Choose Troubleshoot → Advanced options → Startup Settings → Restart
- Press 4 or F4 for Safe Mode
Part 2: Reset Password
- Windows boots to Safe Mode login
- Sign in with the administrator account you know
- Open Control Panel → User Accounts → User Accounts
- Click Manage another account
- Select the account with forgotten password
- Click Change the password
- Enter new password twice (leave blank to remove password)
- Click Change password
Part 3: Alternative Using Computer Management
- Right-click This PC → Manage
- Expand System Tools → Local Users and Groups → Users
- Right-click target user → Set Password
- Read warning, click Proceed
- Enter new password, confirm, click OK
⌨️ Command Line Method in Safe Mode
For faster password reset using Command Prompt:
- Boot to Safe Mode with Command Prompt (option 6 in Startup Settings)
- Login with known administrator account
- Command Prompt opens automatically (or open it manually)
- Run these commands:
# List all usersnet user# Reset password for specific usernet username newpassword# Example: net john P@ssw0rd123# To remove password (blank)net username ""
🔍 Troubleshooting Safe Mode Access
If F8 Doesn't Work:
- Use Shift+Restart method described above
- Create a Windows installation USB and boot from it, then choose "Repair your computer"
If Built-in Administrator is Disabled:
Windows disables the built-in Administrator account by default. Enable it:
net user administrator /active:yes
If You Have No Other Admin Account:
This method won't work. Proceed to section 14.8 or 14.9.
14.8 Reset Windows Password Using Bootable Recovery Tools – Three Complete Methods
💿 METHOD 1: Hiren's Boot CD – Complete Password Reset Guide
📀 What is Hiren's Boot CD?
Hiren's Boot CD is a collection of diagnostic and recovery tools that boots from USB. It includes password reset utilities that work on Windows 10/11, 8, 7, and even older versions.
Requirements:
- Another computer to create bootable USB
- USB drive (8GB or larger recommended)
- Hiren's Boot CD PE ISO (free download from official site)
- Physical access to locked computer
- Ability to boot from USB (may need to change BIOS settings)
🔧 Creating Hiren's Boot CD USB Drive
- Download Hiren's Boot CD PE from the official website (the Windows 10 PE version is recommended)
- Download Rufus from rufus.ie (or use BalenaEtcher)
- Insert USB drive (all data will be erased – backup first!)
- Open Rufus – it will automatically detect your USB drive
- Configure Rufus:
- Device: Select your USB drive (double-check you have the right one!)
- Boot selection: Click SELECT and choose the Hiren's ISO file
- Partition scheme:
- For UEFI systems (most Windows 10/11 PCs): Choose GPT
- For Legacy BIOS systems: Choose MBR
- Leave other settings as default
- Click START
- Wait for completion (typically 5-10 minutes depending on USB speed)
- Click CLOSE when finished – your Hiren's USB is ready!
Alternative: Using BalenaEtcher
If you prefer a simpler tool:
- Download and install BalenaEtcher
- Click "Flash from file" and select Hiren's ISO
- Click "Select target" and choose your USB
- Click "Flash!" and wait for completion
🔓 Hiren's Boot CD: Step-by-Step Password Reset
Follow these steps carefully once you have your Hiren's USB ready:
Phase 1: Booting from Hiren's USB
- Insert the Hiren's USB into the locked computer (use a USB 2.0 port if available – better compatibility)
- Restart the computer
- Enter Boot Menu – Immediately press the appropriate key repeatedly:
- Dell: F12
- HP: F9 or Esc
- Lenovo: F12 or Novo button
- Acer/Asus: F8 or Esc
- Generic: F8, F10, F11, F12, or Esc
If unsure, watch for "Press F12 for Boot Menu" message during startup.
- Select your USB drive from the boot menu using arrow keys and press Enter
- Hiren's Boot CD PE loads – this may take 1-3 minutes. You'll see a Windows-like desktop environment
Phase 2: Using NT Password Edit Tool
- Locate the Password Tool – Click on the Start button (bottom-left corner of Hiren's desktop)
- Navigate to Password Tools – Go to Start → Password Tools → NT Password Edit
- Alternative path: Start → All Programs → Security → Password Tools → NT Password Edit
- If you can't find it, use the search bar and type "NT Password"
- NT Password Edit window opens – This tool will scan for Windows installations
- Select Windows Installation – It should automatically detect your Windows drive (usually C:\Windows). If not:
- Click the Folder icon (Browse)
- Navigate to the drive containing Windows (look for the "Windows" folder)
- Select the Windows folder and click OK
- Click the Open button – This loads the SAM (Security Account Manager) file containing all user accounts and passwords
- View User Accounts – After a few seconds, you'll see a list of all user accounts on the system:
- Administrator (built-in)
- Your personal account(s)
- Any other user accounts
- Select the target user account – Click on the account whose password you want to reset (e.g., "Trick Blower" or "John" or "Administrator")
- Click the Change password button – A dialog box will appear
- Enter new password – Type your new password in the field
- You can leave it blank for no password (not recommended for security)
- Make it something memorable but secure
- Confirm password – Type it again to verify
- Click OK to confirm – You'll return to the main window
- Verify the change – The account should now show "Password changed" or similar status
- Click the Save changes button – This writes the new password to the SAM file
- Confirm save – Click "Yes" or "OK" when prompted to confirm writing changes
- Close NT Password Edit – Click the X in the top-right corner
Phase 3: Restart and Test
- Close all open windows in Hiren's environment
- Click Start → Power → Restart (or use the restart button on the taskbar)
- Remove the USB drive when prompted or when you see the computer restarting
- Let Windows boot normally – This may take a moment as Windows starts up
- At the login screen, enter your new password
- You're in! Your password has been successfully reset
🔓 METHOD 2: Windows Login Unlocker – Complete Password Reset Guide
🔐 What is Windows Login Unlocker?
Windows Login Unlocker is a specialized password recovery tool designed specifically for resetting Windows passwords. It's often included in Hiren's Boot CD but also available as a standalone tool. It works on Windows 11, 10, 8, 7, Vista, and XP.
Key Features:
- Simple, guided interface
- Works with all Windows versions
- Can reset, remove, or change passwords
- Also works on domain accounts
- Faster than general-purpose tools
Requirements:
- Bootable USB with Windows Login Unlocker (or Hiren's which includes it)
- Physical access to locked computer
- Ability to boot from USB
💿 Creating Windows Login Unlocker Bootable USB
Option A: Using Hiren's Boot CD (Easiest)
Windows Login Unlocker is included in Hiren's Boot CD PE. Simply create a Hiren's USB using the steps in Method 1, and you'll have access to both tools.
Option B: Standalone Windows Login Unlocker
- Download Windows Login Unlocker from the official website (search for "Windows Login Unlocker official")
- Extract the ISO file if it's compressed
- Create bootable USB using Rufus:
- Open Rufus
- Select your USB drive
- Click SELECT and choose the Windows Login Unlocker ISO
- Keep default settings
- Click START
- Wait for completion – your USB is now ready
🔓 Windows Login Unlocker: Step-by-Step Password Reset
Phase 1: Boot from Windows Login Unlocker USB
- Insert the Windows Login Unlocker USB into the locked computer
- Restart the computer
- Enter Boot Menu – Press the appropriate key during startup:
- Dell: F12
- HP: F9
- Lenovo: F12
- Acer/Asus: F8 or Esc
- Select your USB drive from the boot menu
- Windows Login Unlocker loads – You'll see a boot menu with options:
- Run Windows Login Unlocker (GUI mode)
- Run Windows Login Unlocker (Safe mode)
- Boot from hard disk
- Select "Run Windows Login Unlocker" (GUI mode) using arrow keys and press Enter
- Wait for the tool to load – This may take 30-60 seconds. You'll see a Windows-like interface
Phase 2: Using Windows Login Unlocker GUI
- Windows Login Unlocker main window opens – It will automatically scan for Windows installations
- Select Windows installation – The tool should detect your Windows drive automatically. If multiple are found, select the correct one (usually C:)
- Click "Next" to proceed
- The tool scans for user accounts – After a moment, you'll see a list of all user accounts on the system:
- Administrator (built-in)
- All user accounts you've created
- Guest account (if enabled)
- Select the user account whose password you want to reset
- Choose an action:
- Reset Password: Set a new password for the account
- Remove Password: Make the account password blank (not recommended)
- Unlock Account: If the account is locked out
- Promote to Administrator: Make a standard user an admin
- For password reset: Select "Reset Password" and click "Next"
- Enter new password in the provided field:
- Type your new password
- Confirm by typing it again
- Password can include letters, numbers, and symbols
- Optional: Add a password hint (helps you remember later)
- Click "Apply" or "OK" to save the changes
- Confirmation message appears – "Password reset successfully"
- Click "Finish" to complete the process
Phase 3: Using Windows Login Unlocker (Advanced Mode – Command Line)
If GUI mode doesn't work, use the command-line version:
- At the initial boot menu, select "Run Windows Login Unlocker (Safe mode)"
- You'll see a text-based menu
- Select your Windows installation number (usually 1)
- Select user account number from the list
- Choose option to reset password
- Enter new password when prompted
- Type "Y" to confirm changes
- Press any key to reboot
Phase 4: Restart and Test
- Remove the USB drive
- Click "Restart" or press Ctrl+Alt+Delete to reboot
- Let Windows boot normally
- At the login screen, enter your new password
- You're in! Your password has been successfully reset
🔄 METHOD 3: Lazesoft Password Recovery – Complete User-Friendly Guide
🔐 What is Lazesoft Password Recovery?
Lazesoft Password Recovery is a popular, user-friendly tool designed specifically for resetting lost Windows passwords. It offers both free and paid versions, with the free version being sufficient for most home users. It works on Windows 11, 10, 8, 7, Vista, XP, and even Server editions.
Key Features:
- Extremely user-friendly interface – great for beginners
- Guided wizard-style process
- Can reset, remove, or change passwords
- Also includes data recovery tools
- Supports all Windows versions
- Free version available (limited features but password reset works)
Requirements:
- Another computer to create bootable USB
- USB drive (1GB+ is sufficient)
- Lazesoft software (free download)
- Physical access to locked computer
💿 Creating Lazesoft Bootable USB Drive
Lazesoft makes it incredibly easy to create a bootable USB – the tool has a built-in wizard!
Step-by-Step Creation (on a working computer):
- Download and install Lazesoft Recovery Suite from the official website
- Open Lazesoft Recovery Suite – You'll see the main menu
- Click on "Password Recovery" in the left sidebar
- Click "Burn Bootable CD/USB Disk Now" button at the bottom
- Select "USB Flash Drive" as the media type
- Choose your USB drive from the dropdown (double-check it's the correct one!)
- Select the Windows version you want to recover (usually auto-detected)
- Click "Start" to begin creating the bootable USB
- Wait for the process to complete – Lazesoft will download necessary files and create the bootable USB
- Click "OK" when finished – your Lazesoft USB is ready!
Alternative: Using ISO Mode
If you prefer to create the USB manually:
- In Lazesoft, choose "Create ISO File" instead of burning directly
- Save the ISO to your computer
- Use Rufus or BalenaEtcher to write the ISO to USB
🔓 Lazesoft Password Recovery: Step-by-Step Password Reset
Phase 1: Boot from Lazesoft USB
- Insert the Lazesoft USB into the locked computer
- Restart the computer
- Enter Boot Menu – Press the appropriate key during startup:
- Dell: F12
- HP: F9
- Lenovo: F12 or Novo button
- Acer/Asus: F8 or Esc
- Generic: F8, F10, F11, F12, Esc
- Select your USB drive from the boot menu
- Lazesoft loads – You'll see a boot menu with options:
- Run Lazesoft Live CD (Default)
- Run Lazesoft Live CD (VGA mode)
- Boot from hard disk
- Select "Run Lazesoft Live CD (Default)" using arrow keys and press Enter
- Wait for Lazesoft to load – This may take 1-2 minutes. You'll see a simple blue/white interface
Phase 2: Using Lazesoft Password Recovery Wizard
- Lazesoft main menu appears – You'll see several options:
- Password Recovery
- Data Recovery
- Disk Clone
- Mbr Boot Fix
- Click on "Password Recovery" (usually the first option)
- The Password Recovery Wizard starts – Click Next to continue
- Select Windows installation – Lazesoft will scan for all Windows installations on your computer:
- It will show a list of found Windows installations
- Select the one you want to recover (usually C:\Windows)
- Click Next
- Select user account – Lazesoft displays all user accounts on the system:
- Administrator (built-in)
- All created user accounts
- Guest account
- Choose the account you want to reset (click on it to highlight)
- Select an action:
- Reset Password: Sets a new password for the account
- Remove Password: Makes the account password blank
- Unlock Account: If the account is locked out
- For password reset: Choose "Reset Password" and click Next
- Enter new password in the provided field:
- Type your new password
- Confirm by typing it again in the second field
- Password can include letters, numbers, and symbols
- Click "Next" to apply the changes
- Confirmation screen appears – "Password has been reset successfully"
- Click "Finish" to complete the wizard
Phase 3: Lazesoft Command Line Mode (Alternative)
If the GUI doesn't work, Lazesoft also includes a command-line version:
- From the main Lazesoft menu, press Ctrl + Alt + F2 to switch to command mode
- Type lazesoft and press Enter to start the command-line tool
- Follow the text prompts to select Windows installation and user
- Enter new password when prompted
- Type "exit" to return to menu
Phase 4: Restart and Test
- Return to the main Lazesoft menu
- Click "Reboot" or press Ctrl+Alt+Delete to restart
- Remove the USB drive when prompted
- Let Windows boot normally
- At the login screen, enter your new password
- You're in! Your password has been successfully reset
✨ Lazesoft Additional Features (Free vs Paid)
| Feature | Free Version | Paid Version |
|---|---|---|
| Password Reset | ✅ Yes | ✅ Yes |
| Remove Password | ✅ Yes | ✅ Yes |
| Unlock Account | ✅ Yes | ✅ Yes |
| Data Recovery | ❌ No | ✅ Yes |
| Disk Clone | ❌ No | ✅ Yes |
| MBR Boot Fix | ✅ Yes | ✅ Yes |
| Technical Support | ❌ No | ✅ Yes |
📊 Comparison: All Three Methods Side-by-Side
| Feature | Hiren's Boot CD | Windows Login Unlocker | Lazesoft Password Recovery |
|---|---|---|---|
| File Size | ~1.5-2GB | ~200-500MB | ~100-200MB |
| Additional Tools | Hundreds of diagnostic tools | Focused only on passwords | Password + Data Recovery + Disk Tools |
| Ease of Use | Moderate (many tools) | Easy | Very Easy (wizard-based) |
| Windows Versions | All versions | All versions including 11 | All versions including 11 |
| GUI Available | Yes (NT Password Edit) | Yes | Yes (very intuitive) |
| Free Version | ✅ Completely Free | ⚠️ Paid (trial available) | ✅ Free version available |
| Command Line Option | Yes (Offline NT) | Yes (Safe mode) | Yes (Ctrl+Alt+F2) |
| Domain Account Support | Yes | Yes | Yes |
| BitLocker Support | No (needs key) | No (needs key) | No (needs key) |
| Beginner Friendly | ⭐⭐ Moderate | ⭐⭐⭐ Good | ⭐⭐⭐⭐⭐ Excellent |
- For beginners: Lazesoft Password Recovery – easiest wizard-based interface
- For a dedicated password tool: Windows Login Unlocker – focused and efficient
- For a comprehensive toolkit: Hiren's Boot CD – includes everything plus many other recovery tools
- For free solution: Hiren's or Lazesoft free version
🔍 Common Issues & Solutions (All Methods)
| Problem | Likely Cause | Solution |
|---|---|---|
| USB doesn't boot | Secure Boot enabled, Fast Boot, or wrong boot mode |
|
| Can't find Windows installation | Wrong drive letter or hidden partitions |
|
| "Access Denied" or "Cannot open SAM" | File permissions or encryption |
|
| Password change doesn't save | Didn't click "Save changes" or disk write-protected |
|
| BitLocker detected | Drive is encrypted |
|
| Tool crashes or freezes | Incompatible version or corrupted USB |
|
🔒 Security Implications – Protecting Yourself
All three methods demonstrate a fundamental truth: physical access = full access. Anyone with physical access to your computer and a bootable USB can reset passwords.
How to Protect Yourself:
Essential Protections:
- Enable BitLocker: Full disk encryption makes these tools useless without the recovery key
- Set BIOS/UEFI password: Prevents booting from USB without password
- Enable Secure Boot: Helps prevent unauthorized boot media
Additional Measures:
- Disable USB boot: Remove USB from boot order in BIOS
- Physical security: Lock your laptop in a drawer or safe
- Use Microsoft account: Online recovery is often easier
Enabling BitLocker (Windows Pro only):
Control Panel → BitLocker Drive Encryption → Turn on BitLocker
Save your recovery key to:
- Microsoft account (recommended)
- USB drive (store safely)
- Printed copy (keep in safe)
🏢 Business & Marketing Implications
For business owners, digital marketers, and professionals handling client data:
- Data Protection: If you store client Facebook ad account information or campaign data, encrypted drives are essential
- Employee Devices: Implement BitLocker on all company laptops to prevent data theft
- Recovery Planning: Have documented procedures for IT staff to recover access when employees leave
- Client Confidentiality: Many contracts require encrypted storage for client data
- Compliance: GDPR, HIPAA, and other regulations may mandate encryption
- Tool Selection: For business IT departments, having Hiren's Boot CD on hand is essential for quick recoveries
📋 Quick Reference – All Three Methods
Hiren's Boot CD
1. Boot from Hiren's USB
2. Start → Password Tools → NT Password Edit
3. Open SAM file
4. Select user → Change password
5. Enter new password → OK
6. Save changes → Restart
Windows Login Unlocker
1. Boot from Unlocker USB
2. Select GUI mode
3. Select Windows installation
4. Choose user → Reset Password
5. Enter new password
6. Apply changes → Restart
Lazesoft Recovery
1. Boot from Lazesoft USB
2. Click "Password Recovery"
3. Follow wizard
4. Select user
5. Enter new password
6. Finish → Restart
14.9 Reset Windows Password Using Command Prompt Trick (Utilman/Sethc) – Complete Visual Guide
control userpasswords2 GUI approach as shown in the screenshots.
🎯 How the Utilman/Sethc Trick Works
Windows has accessibility tools that can be activated at the login screen:
- Utilman.exe – Ease of Access Center (icon in bottom-left or bottom-right corner)
- Sethc.exe – Sticky Keys (activated by pressing Shift 5 times)
By replacing these executables with cmd.exe, you can launch Command Prompt with SYSTEM privileges before logging in, then reset any user's password using either command line or GUI tools.
Requirements:
- Access to the login screen (to use Shift+Restart method)
- Physical access to computer
- No BitLocker encryption (or have recovery key)
🔄 Method 1: Shift+Restart Method (No USB Required) – Exact Steps from Screenshots
This method matches exactly what's shown in your screenshots. No installation USB needed!
Step-by-Step Instructions:
- Access Advanced Startup Options (Shift+Restart)
- On the login screen, click the Power icon (bottom-right corner)
- Hold down the Shift key on your keyboard
- While holding Shift, click Restart
- Continue holding Shift until the computer restarts and shows the blue recovery menu
- Navigate to Command Prompt
- From the blue menu, click Troubleshoot
- Click Advanced options
- Click Command Prompt
- The computer will restart again and open Command Prompt
- Navigate to Windows System32 folder (EXACT COMMANDS FROM SCREENSHOT)
C:\Windows\System32>c:C:\>cd windowsC:\Windows>cd system32C:\Windows\System32>These are the exact commands shown in the first screenshot:
c:– Switch to C: drivecd windows– Change to Windows directorycd system32– Change to System32 directory
- Rename Utilman.exe to Utilman1.exe
C:\Windows\System32>ren utilman.exe utilman1.exeThis renames the original Ease of Access tool to utilman1.exe as a backup.
⚠️ Note: If you see "A duplicate file name exists, or the file cannot be found" – this means either:- The file was already renamed previously, or
- You're not in the correct directory
dir utilman*to see what files exist. - Rename cmd.exe to utilman.exe
C:\Windows\System32>ren cmd.exe utilman.exeThis replaces the accessibility tool with Command Prompt.
- Close Command Prompt and Continue
- Type
exitto close Command Prompt - Click Continue (exit and continue to Windows)
- The computer will restart normally
- Type
- At Login Screen – Access Command Prompt
- Click the Ease of Access icon (human-like figure / person icon in bottom-right corner)
- Instead of accessibility tools, Command Prompt will open with SYSTEM privileges
- Open User Accounts GUI – control userpasswords2 (EXACT COMMAND FROM SCREENSHOT)
C:\Windows\System32>control userpasswords2This opens the User Accounts dialog box – exactly as shown in "WhatsApp Image 2026-03-13 at 11.33.54 AM (1).jpeg" and "WhatsApp Image 2026-03-13 at 11.33.54 AM.jpeg"
📸 Screenshot Reference: The second and third screenshots show exactly this step – the User Accounts window with "Trick Blower" as Administrator. - Select User and Click Reset Password
- In the User Accounts window, select the user account you want to reset (e.g., "Trick Blower" as shown in screenshot)
- Click the Reset Password... button
As shown in screenshot: "Password for Trick Blower – To change the password for Trick Blower, click Reset Password."
- Enter New Password (EXACT SCREEN FROM SCREENSHOT)
- In the Reset Password dialog, enter the New password
- Confirm new password by typing it again
- Click OK
As shown in last screenshot:
Reset Password
New password: **********
Confirm new password: ********** - Close All Windows and Sign In
- Click OK to close User Accounts
- Type
exitin Command Prompt to close it - Sign in with your new password
control userpasswords2 GUI, exactly as shown in your screenshots.
📋 Complete Command Reference – Exactly as Shown in Screenshots
Here's the exact command sequence from your screenshots:
Phase 1: In Recovery Command Prompt (from Shift+Restart)
# Navigate to Windows System32 (Screenshot 1)C:\Windows\System32>c:C:\>cd windowsC:\Windows>cd system32C:\Windows\System32># Rename utilman.exe to utilman1.exe (backup)ren utilman.exe utilman1.exe# Rename cmd.exe to utilman.exe (replace)ren cmd.exe utilman.exe# Exit and Continueexit# Click "Continue" on the recovery menu screen
Phase 2: At Login Screen (After clicking Ease of Access icon)
# Open User Accounts GUI (Screenshot 2)C:\Windows\System32>control userpasswords2# This opens the User Accounts window (Screenshot 3)# Select user → Click "Reset Password" (Screenshot 4)# Enter new password → Confirm → OK
Phase 3: Restore Original Files (Cleanup – Do This After!)
# Repeat Shift+Restart to get back to recovery Command PromptC:\Windows\System32>del utilman.exeC:\Windows\System32>ren utilman1.exe utilman.exeC:\Windows\System32>exit# Click Continue
control userpasswords2 method which is more reliable.
📸 Understanding Your Screenshots – Visual Guide
Screenshot 1: Command Sequence
c:– Switch to C: drivecd windows– Enter Windows foldercd system32– Enter System32 folderren utilman.exe utilman1.exe– Backup originalren cmd.exe utilman.exe– Replace with cmd
dir utilman*.
Screenshot 2: control userpasswords2
- Command executed successfully
- Opens User Accounts GUI
- Note: "Not enough memory" error can be ignored if GUI opens
Screenshot 3: User Accounts Window
- User shown: "Trick Blower"
- Group: Administrators
- Button: "Reset Password..."
Screenshot 4: Reset Password Dialog
- New password: **********
- Confirm new password: **********
- Click OK to apply
🔍 Troubleshooting – Based on Errors in Screenshots
| Error Message | Meaning | Solution |
|---|---|---|
| "A duplicate file name exists, or the file cannot be found" | utilman1.exe already exists from a previous attempt, or you're in wrong directory |
|
| "Not enough memory resources are available" | Temporary system resource issue |
|
| Ease of Access icon doesn't open Command Prompt | Files not replaced correctly |
|
🔄 Restoring Original Files – Essential Cleanup
After successfully resetting your password, you must restore the original utilman.exe file. Leaving cmd.exe in its place is a major security risk.
Restoration Steps:
- Repeat the Shift+Restart process to get back to recovery Command Prompt
- Navigate to System32:
c:
cd windows\system32 - Restore original files:
del utilman.exe(remove the fake one)
ren utilman1.exe utilman.exe(restore original) - Verify:
dir utilman.exe(should show original file) - Type
exitand click Continue
⌨️ Alternative: Using net user Command (If GUI Doesn't Work)
If control userpasswords2 doesn't work or shows errors, use the command line method:
# List all usersC:\Windows\System32>net user# Reset password for specific userC:\Windows\System32>net username newpassword# Example: net "Trick Blower" P@ssw0rd123# Note: Use quotes if username has spaces# To remove password (blank)C:\Windows\System32>net username ""
This method is more reliable if you're getting memory errors with the GUI.
🔒 Security Implications – What This Means for Your Computer
This trick demonstrates a fundamental truth: physical access = full access. Anyone with physical access to your computer can bypass passwords using this method.
How to Protect Yourself:
- Enable BitLocker: Full disk encryption renders this method useless without the recovery key
- Set BIOS/UEFI password: Prevents booting from other devices or accessing recovery options
- Enable Secure Boot: Helps prevent unauthorized system modifications
- Physical security: Lock your computer when unattended
📋 Quick Reference Card – All Commands in One Place
Recovery Phase (Shift+Restart → CMD):
c:
cd windows
cd system32
ren utilman.exe utilman1.exe
ren cmd.exe utilman.exe
exit
(Click Continue)
Login Phase (Click Ease of Access):
control userpasswords2
# Select user → Reset Password
# OR use net user:
net user
net "username" newpassword
exit
Restoration Phase (Cleanup):
c:
cd windows\system32
del utilman.exe
ren utilman1.exe utilman.exe
exit
💿 Method 2: Complete Step-by-Step: Utilman Trick
- Boot from Windows installation USB
- Insert USB, restart, boot from USB
- Select language, click Next
- Click Repair your computer (bottom-left)
- Choose Troubleshoot → Advanced options → Command Prompt
- Identify Windows drive letter
diskpart
list volume
exitLook for your Windows installation (usually C: but in recovery it might be D: or E:)
- Replace Utilman.exe with cmd.exe
cd /d D:\Windows\System32(use correct drive letter)
ren utilman.exe utilman.exe.bak
copy cmd.exe utilman.exe - Reboot normally
wpeutil reboot - At login screen
- Click Ease of Access icon (bottom-right)
- Command Prompt opens with SYSTEM privileges
- Reset password
net user(list users)
net username newpassword
# Example: net john P@ssw0rd123 - Close Command Prompt and sign in
Alternative: Using Sticky Keys (sethc.exe)
Same process, but replace sethc.exe instead of utilman.exe. Then press Shift 5 times at login to trigger Command Prompt.
🔄 Restoring Original Files (Cleanup)
After resetting password, restore the original accessibility tools:
- Repeat steps to boot from USB and open Command Prompt
- Navigate to System32:
cd /d D:\Windows\System32 - Restore original:
del utilman.exe
ren utilman.exe.bak utilman.exe - Reboot
⚠️ Why This May Not Work on Modern Windows
Windows 10 and 11 have protections against this trick:
- Secure Boot: Prevents booting unauthorized media
- BitLocker: Encrypts drive, requires recovery key to access files
- Windows Defender System Guard: Protects system files
- PatchGuard: Prevents modification of kernel components
- Windows 11 strict requirements: Many of these tricks are blocked
Modern Alternative:
If this method doesn't work, use the Hiren's Boot CD method from section 14.8 instead.
💼 Why Digital Marketers Should Know This
Understanding these recovery methods is valuable for:
- Freelancers with client devices: Occasionally need to recover access to business computers
- Legacy systems: Some older office computers may still be vulnerable to these tricks
- Security awareness: Understanding attack vectors helps you secure client data
- Emergency access: If an employee leaves and you need access to business files
However, always use these methods ethically and legally.
14.10 When Password Cannot Be Recovered – Reset or Reinstall Options
🆘 Scenarios Where Recovery Is Impossible
BitLocker Encryption Without Recovery Key
If BitLocker is enabled and you:
- Don't have the recovery key
- Lost the USB with recovery key
- Microsoft account recovery fails
- TPM chip malfunctioned
Corrupted SAM File
The Security Account Manager (SAM) file stores passwords. If it's corrupted:
- Password reset tools can't read it
- Windows may not boot
- All accounts may be inaccessible
Domain-Joined Computers
If computer is joined to corporate domain:
- Local recovery methods often disabled by Group Policy
- Must contact IT department
- Offline password reset tools may not work
Physical Damage or Hardware Failure
- Hard drive failure
- Corrupted system files
- Failed Windows updates
🔄 Option 1: Windows Reset – Keep Personal Files
Windows 10/11 includes a reset feature that reinstalls Windows while optionally keeping your personal files.
How to Access Reset:
- Boot from Windows installation USB
- Select language → Next
- Click Repair your computer (bottom-left)
- Choose Troubleshoot → Reset this PC
- Select Keep my files
- Choose your account (if any are accessible)
- Follow prompts to reset Windows
What "Keep my files" Does:
- Preserves: Files in C:\Users\[YourUsername]\ (Documents, Pictures, Desktop, etc.)
- Removes: All installed applications, settings, and drivers
- Resets: Windows system files to default
- Removes: All user accounts and passwords
🗑️ Option 2: Windows Reset – Remove Everything (Clean Install)
Choose this when you don't need to recover data or when the system is badly corrupted.
When to Choose This:
- You have backups of all important data
- Computer is being passed to someone else
- System has multiple issues beyond just password
- You want the fastest, most reliable solution
Steps:
- Boot from Windows installation USB
- Select language → Next
- Click Install now
- When prompted for license, click "I don't have a product key" (will auto-activate later)
- Select Windows edition (same as currently installed)
- Choose Custom: Install Windows only (advanced)
- Select each partition and click Delete until only "Unallocated Space" remains
- Select unallocated space and click Next
- Windows will install fresh
💾 Option 3: Recover Data Before Resetting
If you need files but can't access Windows, recover them before resetting:
Method 1: Boot from Linux Live USB
- Create Ubuntu Live USB (see Module 2)
- Boot from USB (may need to disable Secure Boot)
- Choose "Try Ubuntu"
- Open Files application
- Navigate to Windows drive → Users → [YourUsername]
- Copy files to external drive
Method 2: Use Hiren's Boot CD File Manager
- Boot Hiren's Boot CD (from section 14.8)
- Open File Explorer
- Navigate to Windows drive
- Copy files to external USB
Method 3: Remove Drive and Use External Enclosure
- Physically remove hard drive from locked computer
- Place in external USB enclosure
- Connect to working computer
- Copy files (may need to take ownership)
⏱️ Option 4: System Restore (If Available)
If you previously created restore points, you might roll back to a time before the password issue.
Access System Restore from Recovery:
- Boot from Windows installation USB
- Click Repair your computer
- Troubleshoot → Advanced options → System Restore
- Choose a restore point from before password issue
- Follow prompts to restore
🛡️ Prevention: Protect Yourself Before Lockout
Follow these steps today to avoid future lockouts:
For Microsoft Accounts:
- ✅ Verify recovery email and phone are current
- ✅ Save 2FA recovery codes in safe place
- ✅ Use password manager to store passwords
- ✅ Set up Windows Hello PIN as backup
For Local Accounts:
- ✅ Create password reset disk NOW (section 14.6)
- ✅ Create another admin account as backup
- ✅ Enable BitLocker and save recovery key
- ✅ Regular backups of important files
General Best Practices:
- ✅ Keep Windows installation USB handy
- ✅ Document passwords in secure password manager
- ✅ Regular system image backups
- ✅ Test recovery methods annually
For Businesses:
- ✅ Use Microsoft 365 Business with admin recovery
- ✅ Implement mobile device management
- ✅ Document IT recovery procedures
- ✅ Train employees on account security
🌳 Decision Tree: Which Recovery Method to Use
Start Here
    │
    ├─► Is it a Microsoft account?
    │       ├─► Yes → Go to 14.5 (Online Reset)
    │       └─► No  → Continue
    │
    ├─► Do you have a password reset disk?
    │       ├─► Yes → Go to 14.6 (Reset Disk)
    │       └─► No  → Continue
    │
    ├─► Do you have another admin account?
    │       ├─► Yes → Go to 14.7 (Safe Mode)
    │       └─► No  → Continue
    │
    ├─► Is the drive BitLocker encrypted?
    │       ├─► Yes → Do you have recovery key?
    │       │       ├─► Yes → Unlock then try methods
    │       │       └─► No  → Data lost, reinstall (14.10)
    │       └─► No  → Continue
    │
    ├─► Can you boot from USB?
    │       ├─► Yes → Try 14.8 (Hiren's) or 14.9 (Utilman)
    │       └─► No  → Continue
    │
    └─► Final options: 14.10 Reset or Reinstall
📋 Quick Reference: Password Recovery Methods Summary
| Method | Account Type | Requires | Difficulty | Success Rate |
|---|---|---|---|---|
| 14.5 Online Reset | Microsoft | Internet, recovery contact | ⭐ Easy | High |
| 14.6 Password Reset Disk | Local | Pre-created USB | ⭐ Easy | 100% |
| 14.7 Safe Mode | Local | Another admin account | ⭐⭐ Moderate | High |
| 14.8 Hiren's Boot CD | Local | USB creation, boot access | ⭐⭐⭐ Moderate | High |
| 14.9 Utilman Trick | Local | Windows USB, no BitLocker | ⭐⭐⭐ Moderate | Medium (modern Windows) |
| 14.10 Reset (Keep Files) | Both | Windows USB | ⭐⭐ Moderate | 100% (new start) |
| 14.10 Clean Reinstall | Both | Windows USB | ⭐⭐ Moderate | 100% (fresh start) |
🏢 Final Word: Business Continuity & Password Management
For digital marketers, business owners, and professionals:
- Password Managers: Use business-grade password managers (1Password, Bitwarden, LastPass) to never lose passwords
- Recovery Documentation: Document all recovery procedures for your business
- Employee Offboarding: Have processes to access business computers when employees leave
- Client Data: Ensure client data is never locked away behind unrecoverable passwords
- Facebook Ads Continuity: Losing access to business manager accounts can cost thousands in ad spend – have backup admins!
Windows Customization & Personalization – Make Windows Truly Yours
Windows customization is not just about looks — it improves comfort, productivity, accessibility, battery life, and focus. This module teaches safe, built-in ways to personalize Windows without breaking anything.
15.1 Themes, Wallpapers & Accent Colors
Themes control your wallpaper, colors, sounds, and visual style.
🖼️ Change Theme
- Right-click Desktop → Personalize
- Go to Themes
- Select built-in or downloaded theme
🎨 Accent Colors
- Affects Start Menu, taskbar & windows
- Choose solid or auto color from wallpaper
15.2 Customizing Taskbar & Start Menu
A clean taskbar improves speed and focus.
📌 Taskbar Customization
- Pin frequently used apps
- Unpin unnecessary icons
- Hide search box if not needed
- Auto-hide taskbar for more screen space
🧭 Start Menu Tips
- Remove rarely used tiles/apps
- Keep only essentials
- Use search instead of browsing menus
15.3 Dark Mode vs Light Mode (Eye Comfort & Battery Impact)
Windows offers system-wide dark and light modes.
| Mode | Best For | Battery Impact |
|---|---|---|
| Dark Mode | Night use, long hours | Saves battery (OLED) |
| Light Mode | Bright environments | Normal |
15.4 Fonts, Text Size & Display Scaling
Display customization improves readability and reduces eye fatigue.
🔍 Adjust Text Size
- Settings → Accessibility
- Text size
- Move slider → Apply
🖥️ Display Scaling
- 100%–125% recommended for most users
- Avoid extreme scaling
15.5 Accessibility Features (Useful for Everyone)
Accessibility features are not just for disabilities.
- Magnifier (Zoom areas)
- High contrast themes
- Mouse pointer size & color
- Live captions
15.6 Sounds, Notifications & Focus Mode
Notifications can improve productivity or destroy focus.
🔔 Notification Control
- Disable non-essential app notifications
- Enable priority notifications only
- Use Focus Assist during work/study
15.7 Customizing File Explorer
File Explorer can be optimized for speed.
- Set “This PC” as default view
- Disable unnecessary preview panes
- Enable file extensions
- Use Quick Access wisely
15.8 Making Windows Look Clean & Minimal
Minimal Windows improves clarity and speed.
- Remove desktop clutter
- Disable startup clutter
- Use simple wallpaper
- Avoid heavy visual effects
15.9 Customization Myths (Don’t Fall for These)
- ❌ Skins make PC faster
- ❌ Custom themes are always safe
- ❌ Registry tweaks improve appearance safely
15.10 Smart Personalization Checklist
- ✅ Clean wallpaper & theme
- ✅ Minimal taskbar
- ✅ Correct display scaling
- ✅ Focus mode enabled
- ✅ Accessibility tweaks used
Real-Life Windows Use Cases – How Normal People Actually Use Windows
Windows is not just for IT experts. This module shows practical, real-world usage scenarios for students, office workers, freelancers, creators, and low-end PC users — with tips that actually work.
16.1 Windows Tips for Students (Online Classes, Exams & Study)
Students use Windows for learning, not troubleshooting. Small optimizations make a BIG difference.
🎓 Essential Student Setup
- Create a separate Student user account
- Enable Focus Assist during classes
- Use OneDrive / Google Drive for notes backup
- Keep desktop clutter-free
📝 Online Exams Safety Tips
- Restart PC before exam
- Close background apps
- Disable notifications temporarily
- Keep charger connected
16.2 Windows Tips for Office Work (Excel, Email, PDFs)
Office users value speed, reliability, and data safety.
🏢 Office Productivity Setup
- Pin Excel, Word, Browser to taskbar
- Enable auto-save in Office apps
- Use File Explorer Quick Access
- Enable clipboard history (Win + V)
📄 PDF & Email Tips
- Use browser PDF viewers for quick edits
- Avoid unknown email attachments
- Backup important work weekly
16.3 Windows Tips for Freelancers & Creators
Freelancers depend on Windows for income. Stability matters more than looks.
💼 Freelancer Best Practices
- Use SSD for OS & software
- Keep separate work folders
- Enable automatic backups
- Use cloud sync for client files
🎨 Creators (Video, Design, Audio)
- Keep GPU drivers updated
- Close unnecessary background apps
- Use external storage for projects
16.4 Using Windows on Low-End PCs (2GB–4GB RAM)
Not everyone has a powerful PC — and that’s OK.
⚙️ Low-End PC Optimization
- Disable unnecessary startup apps
- Use lightweight browsers
- Limit background services
- Use SSD if possible
🚫 What to Avoid
- Heavy antivirus suites
- Third-party boosters
- Live wallpapers
16.5 Windows for Parents & Family PCs
Family PCs need safety + simplicity.
- Create separate accounts for kids
- Enable Family Safety controls
- Restrict downloads
- Schedule screen time
16.6 Windows for Seniors (Simple & Safe Setup)
Seniors need clarity, not complexity.
👴 Senior-Friendly Tweaks
- Increase text size
- Use large mouse pointer
- Pin essential apps only
- Disable unnecessary notifications
16.7 Work-From-Home (WFH) Windows Setup
- Stable internet connection
- Auto-update paused during meetings
- Noise-free environment setup
- Daily backup of work files
16.8 Common Mistakes Normal Users Make
- Using admin account daily
- Never backing up data
- Installing random tools
- Ignoring updates for months
16.9 Smart Windows Habits (Long-Term)
- ✅ Restart weekly
- ✅ Backup regularly
- ✅ Install only needed apps
- ✅ Keep system updated
- ✅ Use built-in tools first
16.10 Final Thought – Windows Is a Tool, Not a Burden
Windows should support your life, work, and learning — not slow you down. When used correctly, even basic systems can be reliable, fast, and stress-free.
Windows Myths, Facts & Smart Habits – Use Windows the RIGHT Way
Most Windows problems are not caused by Windows itself — they are caused by myths, wrong advice, and bad habits. This final module clears confusion and gives you a simple, safe, long-term mindset for using Windows confidently.
17.1 Common Windows Myths (Debunked Clearly)
| Myth | Reality |
|---|---|
| Windows gets slow automatically | Bad habits slow Windows, not age |
| Registry cleaners speed up PC | They often damage Windows |
| More antivirus = more security | One good solution is enough |
| Updates always break Windows | Skipping updates is riskier |
| RAM cleaners boost performance | They waste system resources |
17.2 Do Cleaners, Boosters & Optimizers Really Work?
Many tools promise “1-click speed boost”.
❌ Why They Are Dangerous
- Delete important system files
- Break updates & drivers
- Install ads or malware
- Create false fear messages
17.3 Smart Windows Habits That Keep PC Fast for Years
- 🔄 Restart PC weekly
- 📦 Install only needed software
- 🧹 Clean junk monthly (built-in tools)
- 💾 Backup important data
- 🔐 Keep system updated
17.4 Things You Should NEVER Do on Windows
- ❌ Disable Windows Security permanently
- ❌ Download cracked software
- ❌ Follow random YouTube “registry hacks”
- ❌ Use admin account for daily work
- ❌ Ignore backup warnings
17.5 Windows vs User – Who Is Really Responsible?
Windows is only a tool.
- Windows provides security & stability
- User decisions decide safety
- Most issues are avoidable
17.6 Smart Software Installation Rule (Golden Rule)
- Download only from official websites
- Read install screens carefully
- Uncheck bundled software
- Avoid “free premium unlocks”
17.7 Long-Term Windows Maintenance Mindset
Windows is not a phone app that needs daily cleaning.
- Less interference = more stability
- Trust built-in tools
- Fix only when problem exists
17.8 Final Windows Master Checklist
- ✅ Microsoft account recovery enabled
- ✅ Regular backups configured
- ✅ Updates enabled
- ✅ Startup apps optimized
- ✅ Only trusted software installed
- ✅ Smart user habits followed
17.9 Final Message to Every Windows User
Windows does not need hacks, tricks, or fear-based tools. It needs understanding, patience, and smart habits.